Keycloak
This page explains how to use Keycloak as the identity provider (IdP) to manage access to API Portals.
Introduction
You can use Keycloak as the IdP or as an identity broker for Traefik Hub.
Keycloak is an open-source identity and access management (IAM) solution that provides authentication and authorization.
Once Keycloak is enabled and successful configured in the dashboard, Traefik Hub will synchronize user and groups from Keycloak into Traefik Hub.
After the first initial sync, Traefik Hub will sync once an hour with Keycloak.
When authenticating to the API Portal, the user is matched against the latest known synchronization point in the Traefik Hub database.
Traefik Hub will not list automatically all users after synchronization. Users will be only listed after a first successful login into Traefik Hub.
Shared Data Between Traefik Hub and Keycloak
The following data is shared between Traefik Hub and Keycloak:
- URL: The URL of your Keycloak instance.
- Realm: Name of the Keycloak realm you want to use.
- Username: Username of the realm management account.
- Password: Password of the Keycloak realm management account (encrypted).
- Users and Groups: Configured in the realm settings.
Before You Begin
If you replace your Traefik Hub internal IdP with an external IdP, all users, user groups, and tokens created by the internal IdP will be deleted.
This action is irreversible!
Permissions
Before you begin, please ensure the realm management account has all the required permissions.
Please do not use the Master realm of your Keycloak instance! It is recommended to always create and use a new realm with reduced permissions.
A realm manages a set of users, credentials, roles, and groups. A user belongs to and logs into a realm. Realms are isolated from one another and can only manage and authenticate the users they control.
Traefik Hub needs to be able to view and query users and groups and manage clients. No further permissions are required.

Configuration
First, select Auth settings in the left navigation menu to get to the IdP overview, then select the toggle on the external IdP.
In the next step, configure the Keycloak integration:
| Field | Description | Required |
|---|---|---|
URL | The URL of your Keycloak instance. | Yes |
Realm | Name of the Keycloak realm you want to use. | Yes |
Login | Realm management account. The account must have the rights to manage OIDC clients, users, and groups in the realm. | Yes |
Password | Password of the Keycloak realm management account. | Yes |
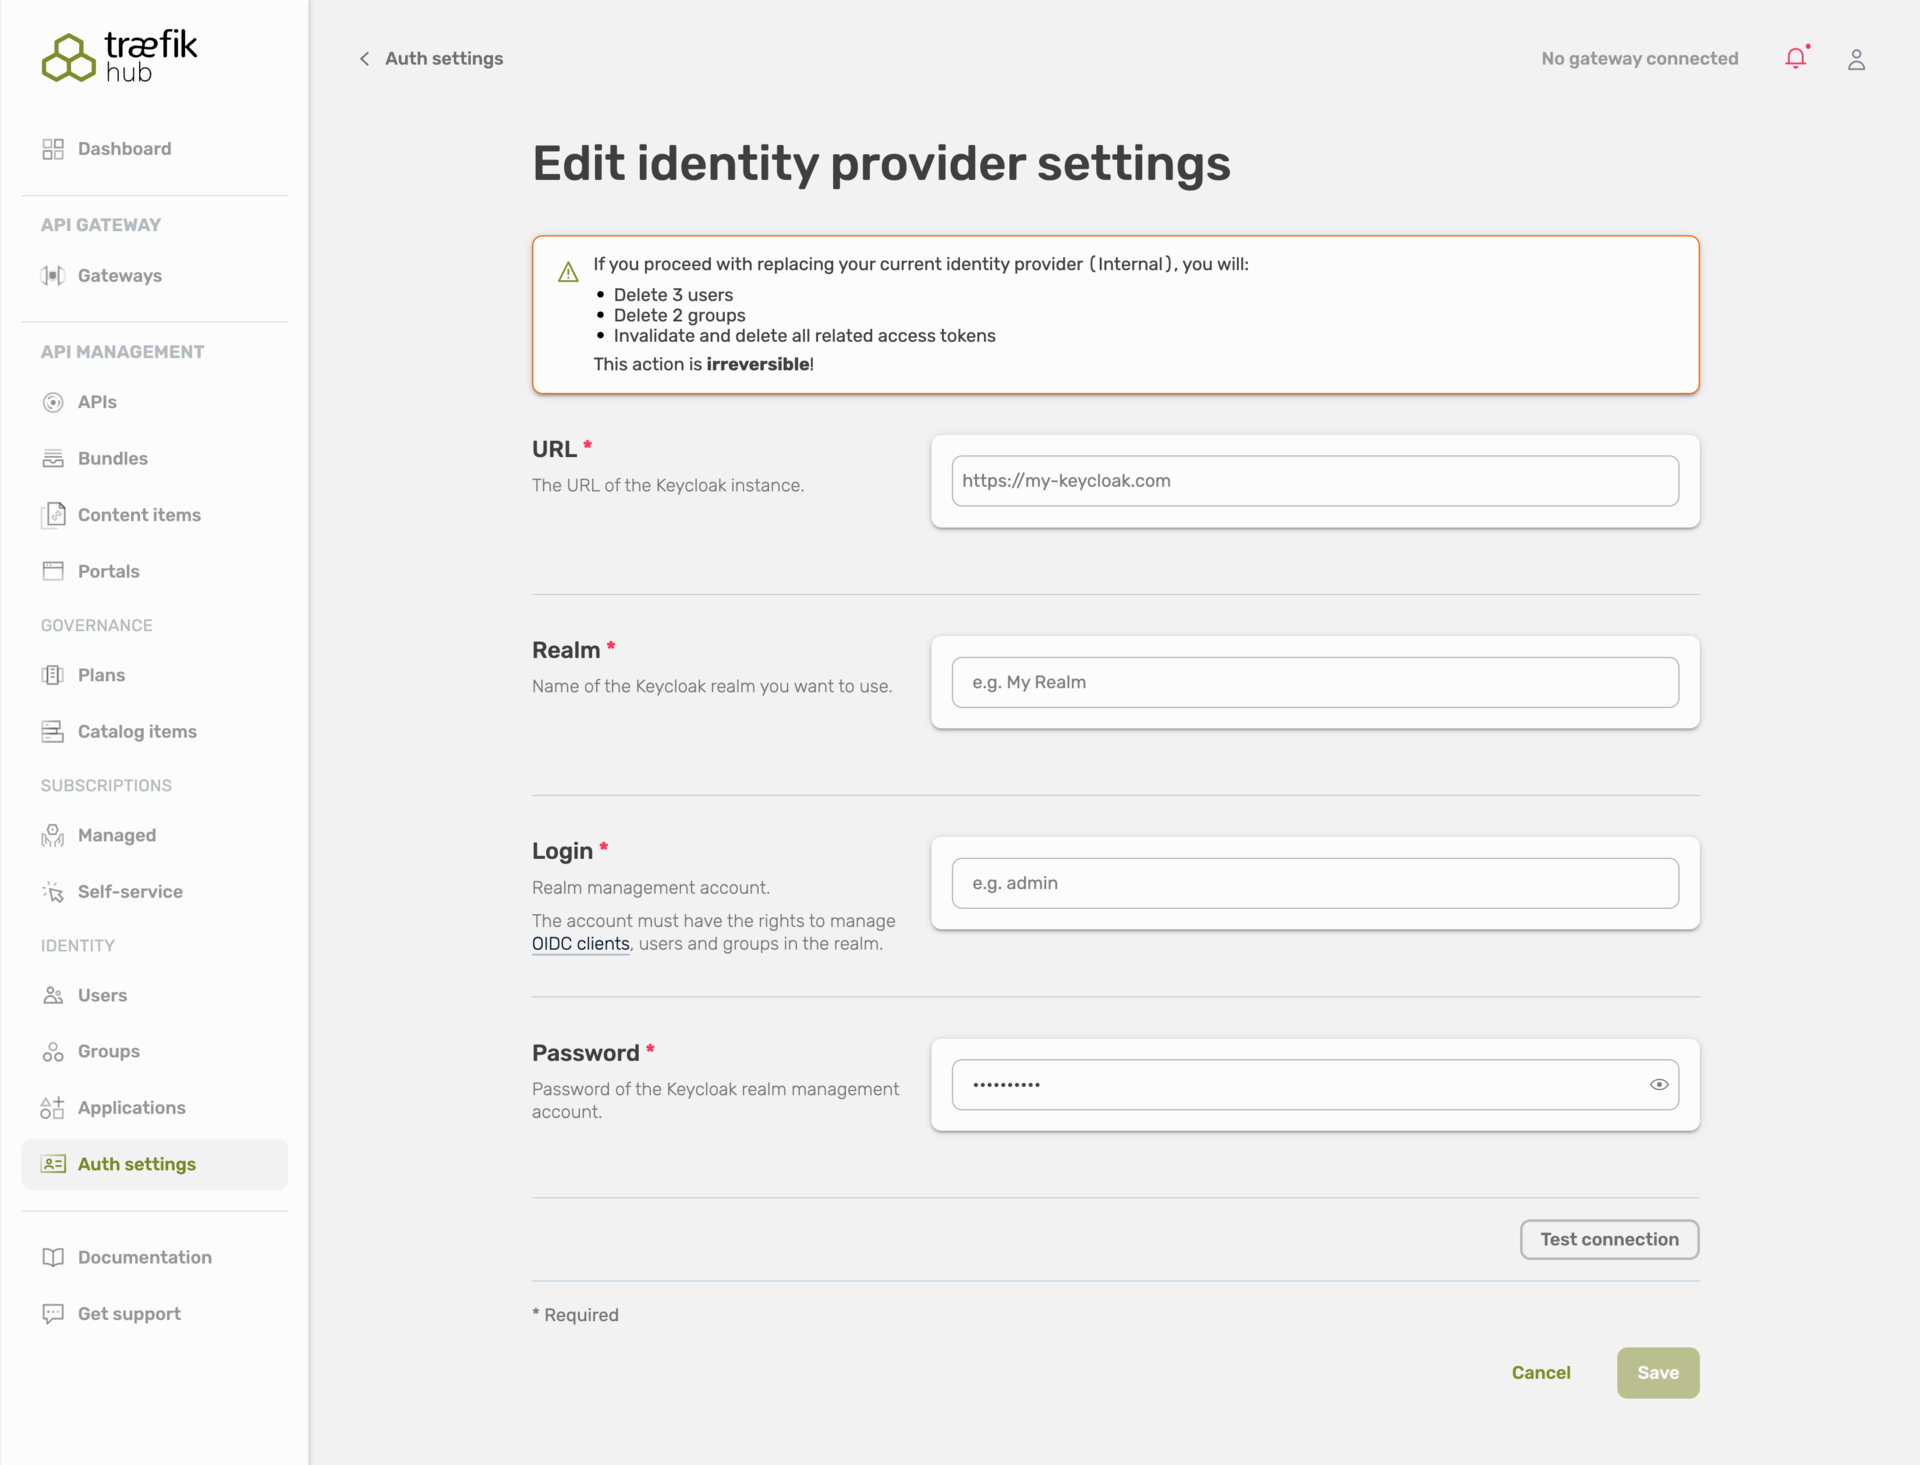
Once you're done, you can test your configuration by selecting Test connection.
If the connection is working, save your configuration by selecting Save.
In the last step, you have to confirm the configuration changes.
Please make sure to read the displayed message and follow the needed steps for confirmation!
If you already have users and groups configured, these accounts and all related user data, including tokens, will be deleted from Traefik Hub.
Traefik Hub will sync with your Keycloak realm immediately after confirming your configuration.
Please do not try to change your configuration during the synchronization process!
From that point on, Traefik Hub is configured to use Keycloak as its IdP.
The user overview page in the Online Dashboard will not automatically show all users. Users will only be listed after a successful login into an API Portal.
Synchronization
Traefik Hub will automatically sync every 60 minutes with your Keycloak realm. After a first successful synchronization, you can initiate a sync at any time by selecting the Synchronize button.

Related Content
- Learn how to use JWT for API requests in the API Portal.
