Getting Started
Pre-requisites
- A Traefik Hub account and license.
- Kubernetes version
1.23or greater. - Helm version 3 or greater.
For this tutorial, we will deploy Traefik Hub API Gateway on a Kubernetes cluster. It's possible to use alternatives such as kind, k3d, k3s, cloud providers, and others.
Step 1: Install Traefik Hub
First, log in to the Traefik Hub Online Dashboard and open the page to create a new gateway.
Copy the token from the gateway creation page. We'll use our own configuration steps instead of the ones shown on that page.
Then, open a terminal and run these commands to create the required secret:
export TRAEFIK_HUB_TOKEN=<paste-token-here>
kubectl create namespace traefik
kubectl create secret generic traefik-hub-license --namespace traefik --from-literal=token=$TRAEFIK_HUB_TOKEN
Now, install Traefik Hub with Helm:
# Add the Helm repository
helm repo add --force-update traefik https://traefik.github.io/charts
# Install the Helm chart

helm install traefik traefik/traefik -n traefik --wait \
  --set hub.token=traefik-hub-license \
  --set hub.apimanagement.enabled=true \
  --set ingressClass.enabled=false \
  --set ingressRoute.dashboard.enabled=true \
  --set ingressRoute.dashboard.matchRule='Host(`dashboard.localhost`)' \
  --set ingressRoute.dashboard.entryPoints={web}
If Traefik Hub is already installed, we can upgrade the Traefik Hub instance instead:
# Upgrade CRDs
kubectl apply --server-side --force-conflicts -k https://github.com/traefik/traefik-helm-chart/traefik/crds/
# Update the Helm repository
helm repo add --force-update traefik https://traefik.github.io/charts
# Upgrade the Helm chart
helm upgrade traefik traefik/traefik -n traefik --wait \
  --reset-then-reuse-values \
  --set hub.token=traefik-hub-license \
  --set hub.apimanagement.enabled=true \
  --set ingressClass.enabled=false \
  --set ingressRoute.dashboard.enabled=true \
  --set ingressRoute.dashboard.matchRule='Host(`dashboard.localhost`)' \
  --set ingressRoute.dashboard.entryPoints={web}
Now, we can access the local dashboard at http://dashboard.localhost/.
Step 2: Deploy an API as an Ingress
This tutorial uses a simple JSON server as an API; source code.
First, let's deploy a weather app that exposes an API:
kubectl apply -f https://raw.githubusercontent.com/traefik/hub/main/src/manifests/weather-app.yaml
It creates the weather app:
namespace/apps created
configmap/weather-data created
middleware.traefik.io/stripprefix-weather created
deployment.apps/weather-app created
service/weather-app created
configmap/weather-app-openapispec created
Then, expose the weather app using an IngressRoute:
cat <<'EOF' | kubectl apply -f -
---
apiVersion: traefik.io/v1alpha1
kind: IngressRoute
metadata:
  name: getting-started-apimanagement
  namespace: apps
spec:
  entryPoints:
    - web
  routes:
  - match: Host(`getting-started.apimanagement.localhost`)
    kind: Rule
    services:
    - name: weather-app
      port: 3000
EOF
ingressroute.traefik.io/getting-started-apimanagement created
At this point, the API is exposed. It is possible to reach it using the curl command:
curl -s http://getting-started.apimanagement.localhost/weather | jq
[
  {"city":"City of Gophers","id":"1","weather":"Sunny"},
  {"city":"GopherRocks","id":"2","weather":"Cloudy"},
  {"city":"GopherCity","id":"0","weather":"Moderate rain"}
]
Step 3: Manage the API Using Traefik Hub API Management
Let's manage the weather API with Traefik Hub using the API resource:
cat <<'EOF' | kubectl apply -f -
apiVersion: hub.traefik.io/v1alpha1
kind: API
metadata:
  name: getting-started-apimanagement-weather-api
  namespace: apps
spec:
  openApiSpec:
    path: /openapi.yaml
    override:
      servers:
        - url: http://api.getting-started.apimanagement.localhost
EOF
Next, reference the API resource in the IngressRoute using the dedicated annotation:
cat <<'EOF' | kubectl apply -f -
apiVersion: traefik.io/v1alpha1
kind: IngressRoute
metadata:
  name: getting-started-apimanagement-weather-api
  namespace: apps
  annotations:
    hub.traefik.io/api: getting-started-apimanagement-weather-api # <=== Link to the API using its name
spec:
  entryPoints:
  - web
  routes:
  - match: Host(`api.getting-started.apimanagement.localhost`) && PathPrefix(`/weather`)
    kind: Rule
    services:
    - name: weather-app
      port: 3000
EOF
After applying the resources, it creates API and links IngressRoute to the weather API:
api.hub.traefik.io/getting-started-apimanagement-weather-api created
ingressroute.traefik.io/getting-started-apimanagement-weather-api created
Next, we need to configure visibility and authorization for our API. Traefik Hub separates API visibility from authorization:
| Resource | Purpose |
|---|---|
APICatalogItem | Makes an API visible in the Portal to one or more user groups. |
APIPlan | Defines the available plans that users can subscribe to when accessing an API. |
ManagedSubscription | Grants an application access to that API with an APIPlan. |
For the APIPlan feature to work, we need to deploy and configure Redis in the cluster and the Traefik Hub deployment. We can do this by following these steps:
These commands install Redis for demo purposes. For production deployments, refer to the Redis production installation guide: https://doc.traefik.io/traefik-hub/api-gateway/expose/middleware/distributed-rate-limit
Install Redis via the Helm chart:
helm install redis oci://registry-1.docker.io/cloudpirates/redis -n traefik --wait
Export the Redis instance password:
export REDIS_PASSWORD=$(kubectl get secret redis -n traefik -o jsonpath="{.data.redis-password}" | base64 -d)
Finally, upgrade the Traefik Hub deployment to include Redis:
helm upgrade traefik traefik/traefik -n traefik --wait \
  --reset-then-reuse-values \
  --set hub.redis.endpoints=redis.traefik.svc.cluster.local:6379 \
  --set hub.redis.password=${REDIS_PASSWORD}
We'll make the weather API visible to the admin group in the portal using an APICatalogItem and grant the weather-app application access to consume it through a specific API plan.
cat <<'EOF' | kubectl apply -f -
---
apiVersion: hub.traefik.io/v1alpha1
kind: APIPlan
metadata:
  name: weather-api-basic-plan
  namespace: apps
spec:
  title: Basic
  description: "Basic API Plan"
  rateLimit:
    limit: 5
    period: 1s
  quota:
    limit: 500
    period: 24h
---
apiVersion: hub.traefik.io/v1alpha1
kind: APICatalogItem
metadata:
  name: getting-started-weather-catalog
  namespace: apps
spec:
  groups:
    - admin                # Users in this group can **see** the API
  apis:
    - name: getting-started-apimanagement-weather-api
  apiPlan:
    name: weather-api-basic-plan
---
apiVersion: hub.traefik.io/v1alpha1
kind: ManagedSubscription
metadata:
    name: weather-api-subscription
    namespace: apps
spec:
  applications:
    - appId: weather-app        # Will be created in the Portal (Step 5)
  apis:
    - name: getting-started-apimanagement-weather-api
  apiPlan:
    name: weather-api-basic-plan
EOF
After applying the resources, it creates APICatalogItem, APIPlan, and ManagedSubscription resources:
apicatalogitem.hub.traefik.io/getting-started-weather-catalog created
apiplan.hub.traefik.io/weather-api-plan created
managedsubscription.hub.traefik.io/weather-api-subscription created
We'll use weather-app as the application ID for the ManagedSubscription resource for now but we'll update it with an actual application ID in the next steps.
Now, the API is secured. When we try to access the API without an API key, it returns the expected 401 Unauthorized HTTP code:
curl -i http://api.getting-started.apimanagement.localhost/weather
HTTP/1.1 401 Unauthorized
Date: Mon, 06 May 2024 12:09:56 GMT
Content-Length: 0
Step 4: Create a User For the API
Next, create an Admin user in the Traefik Hub Online Dashboard:
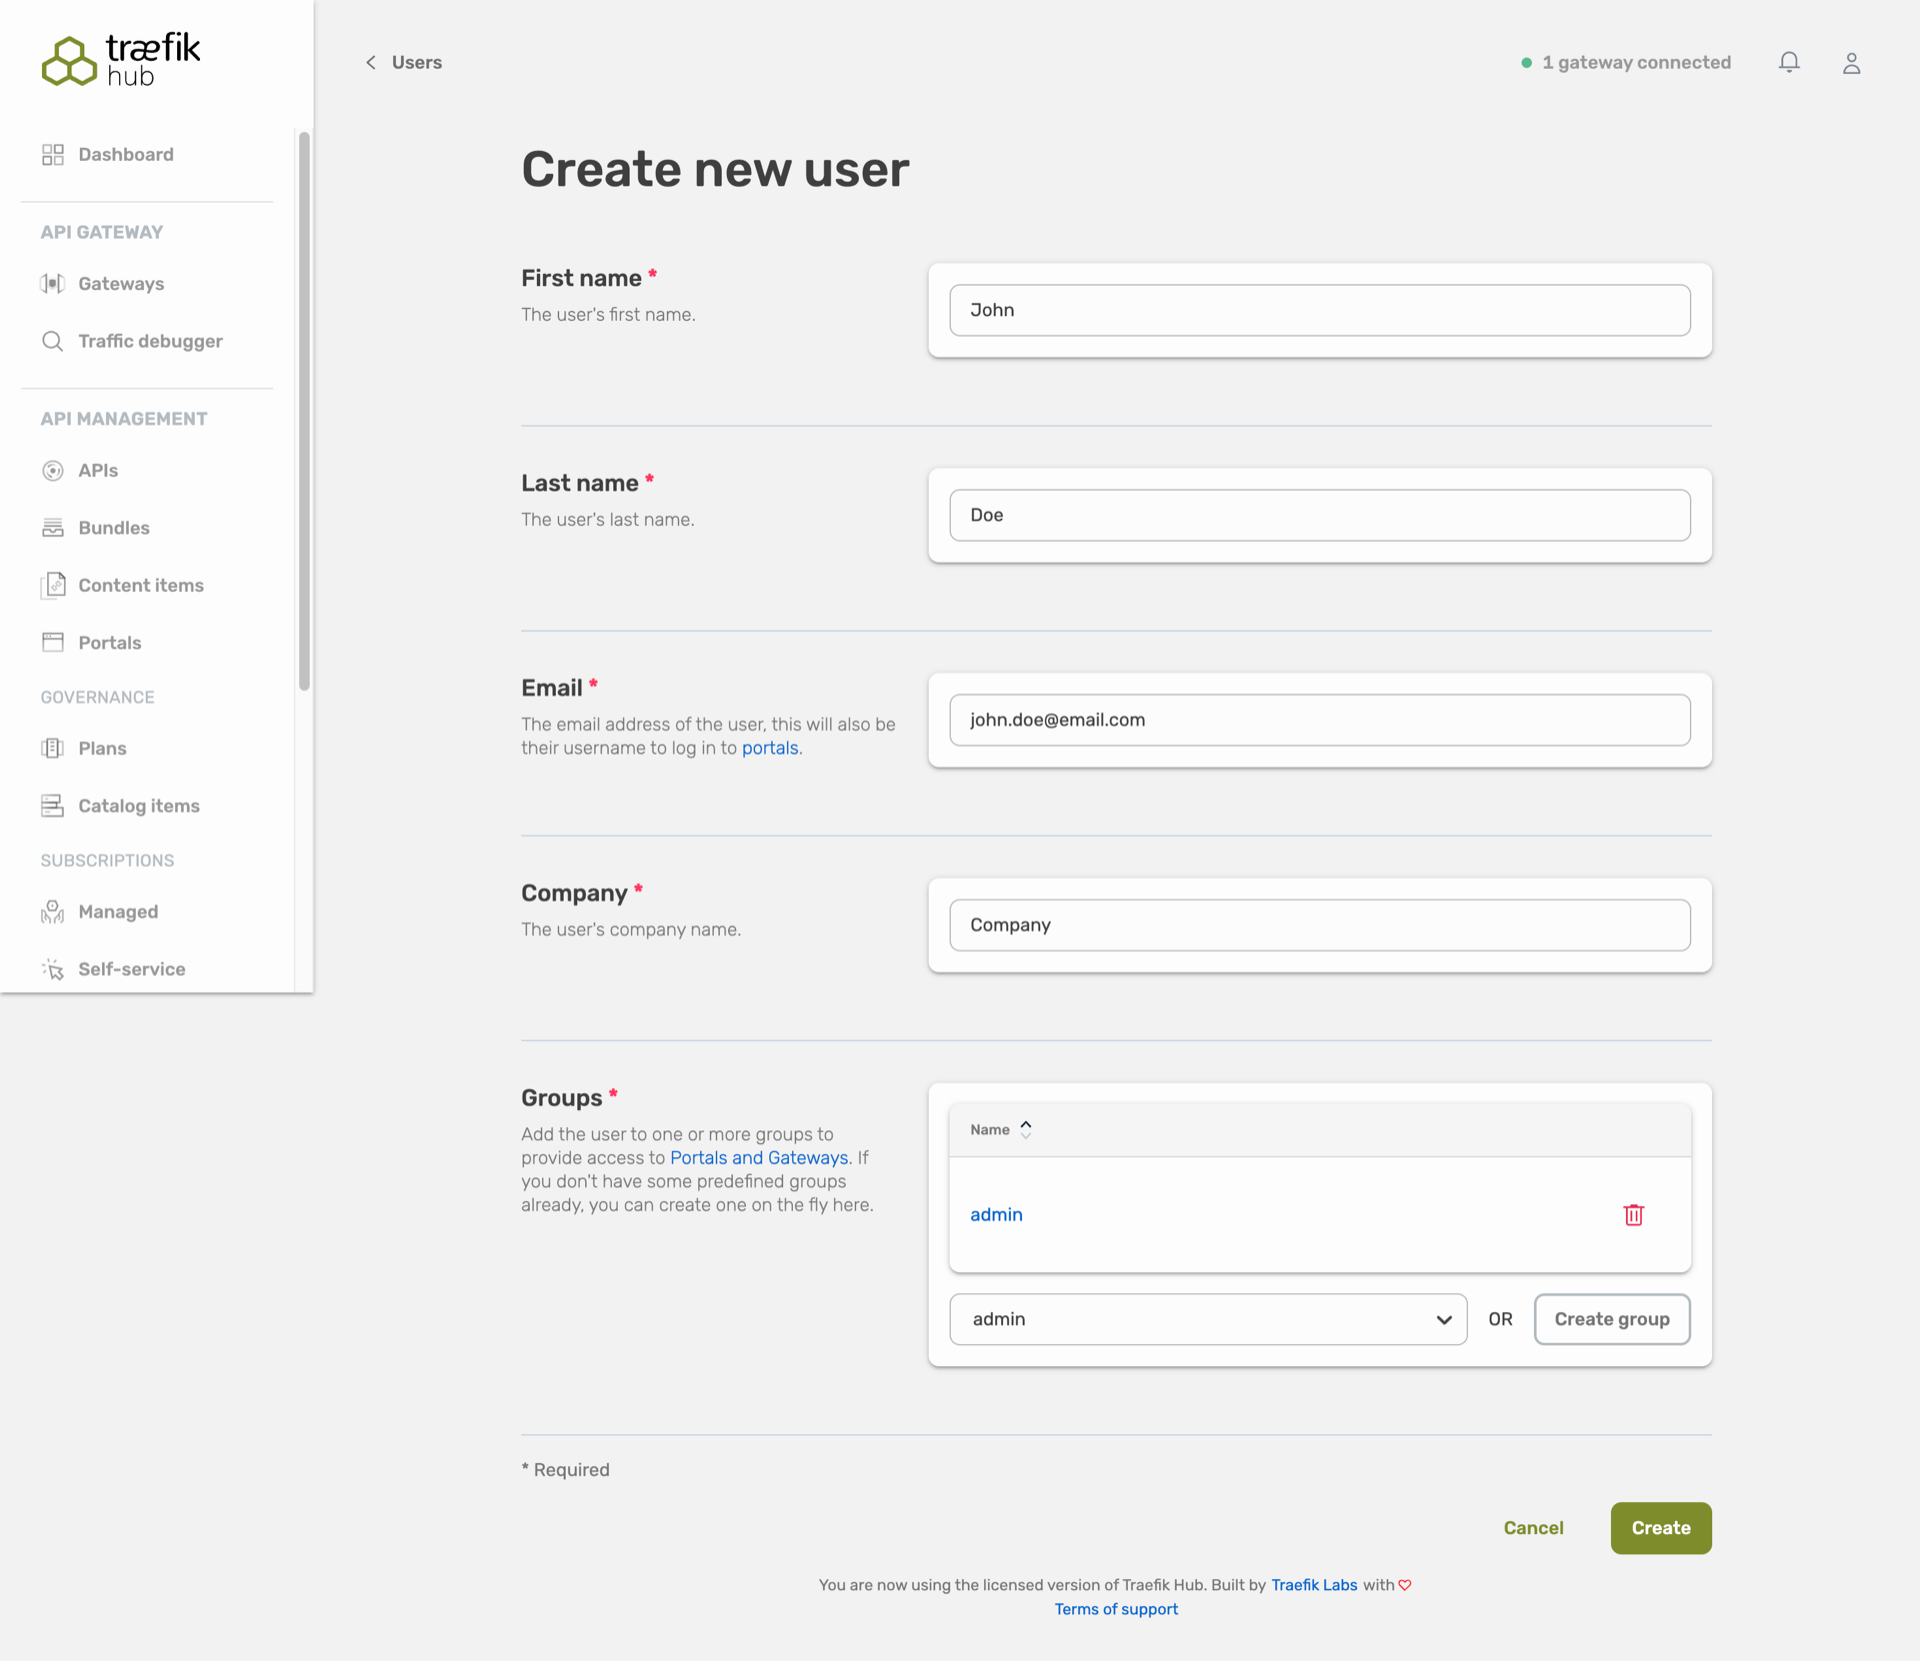
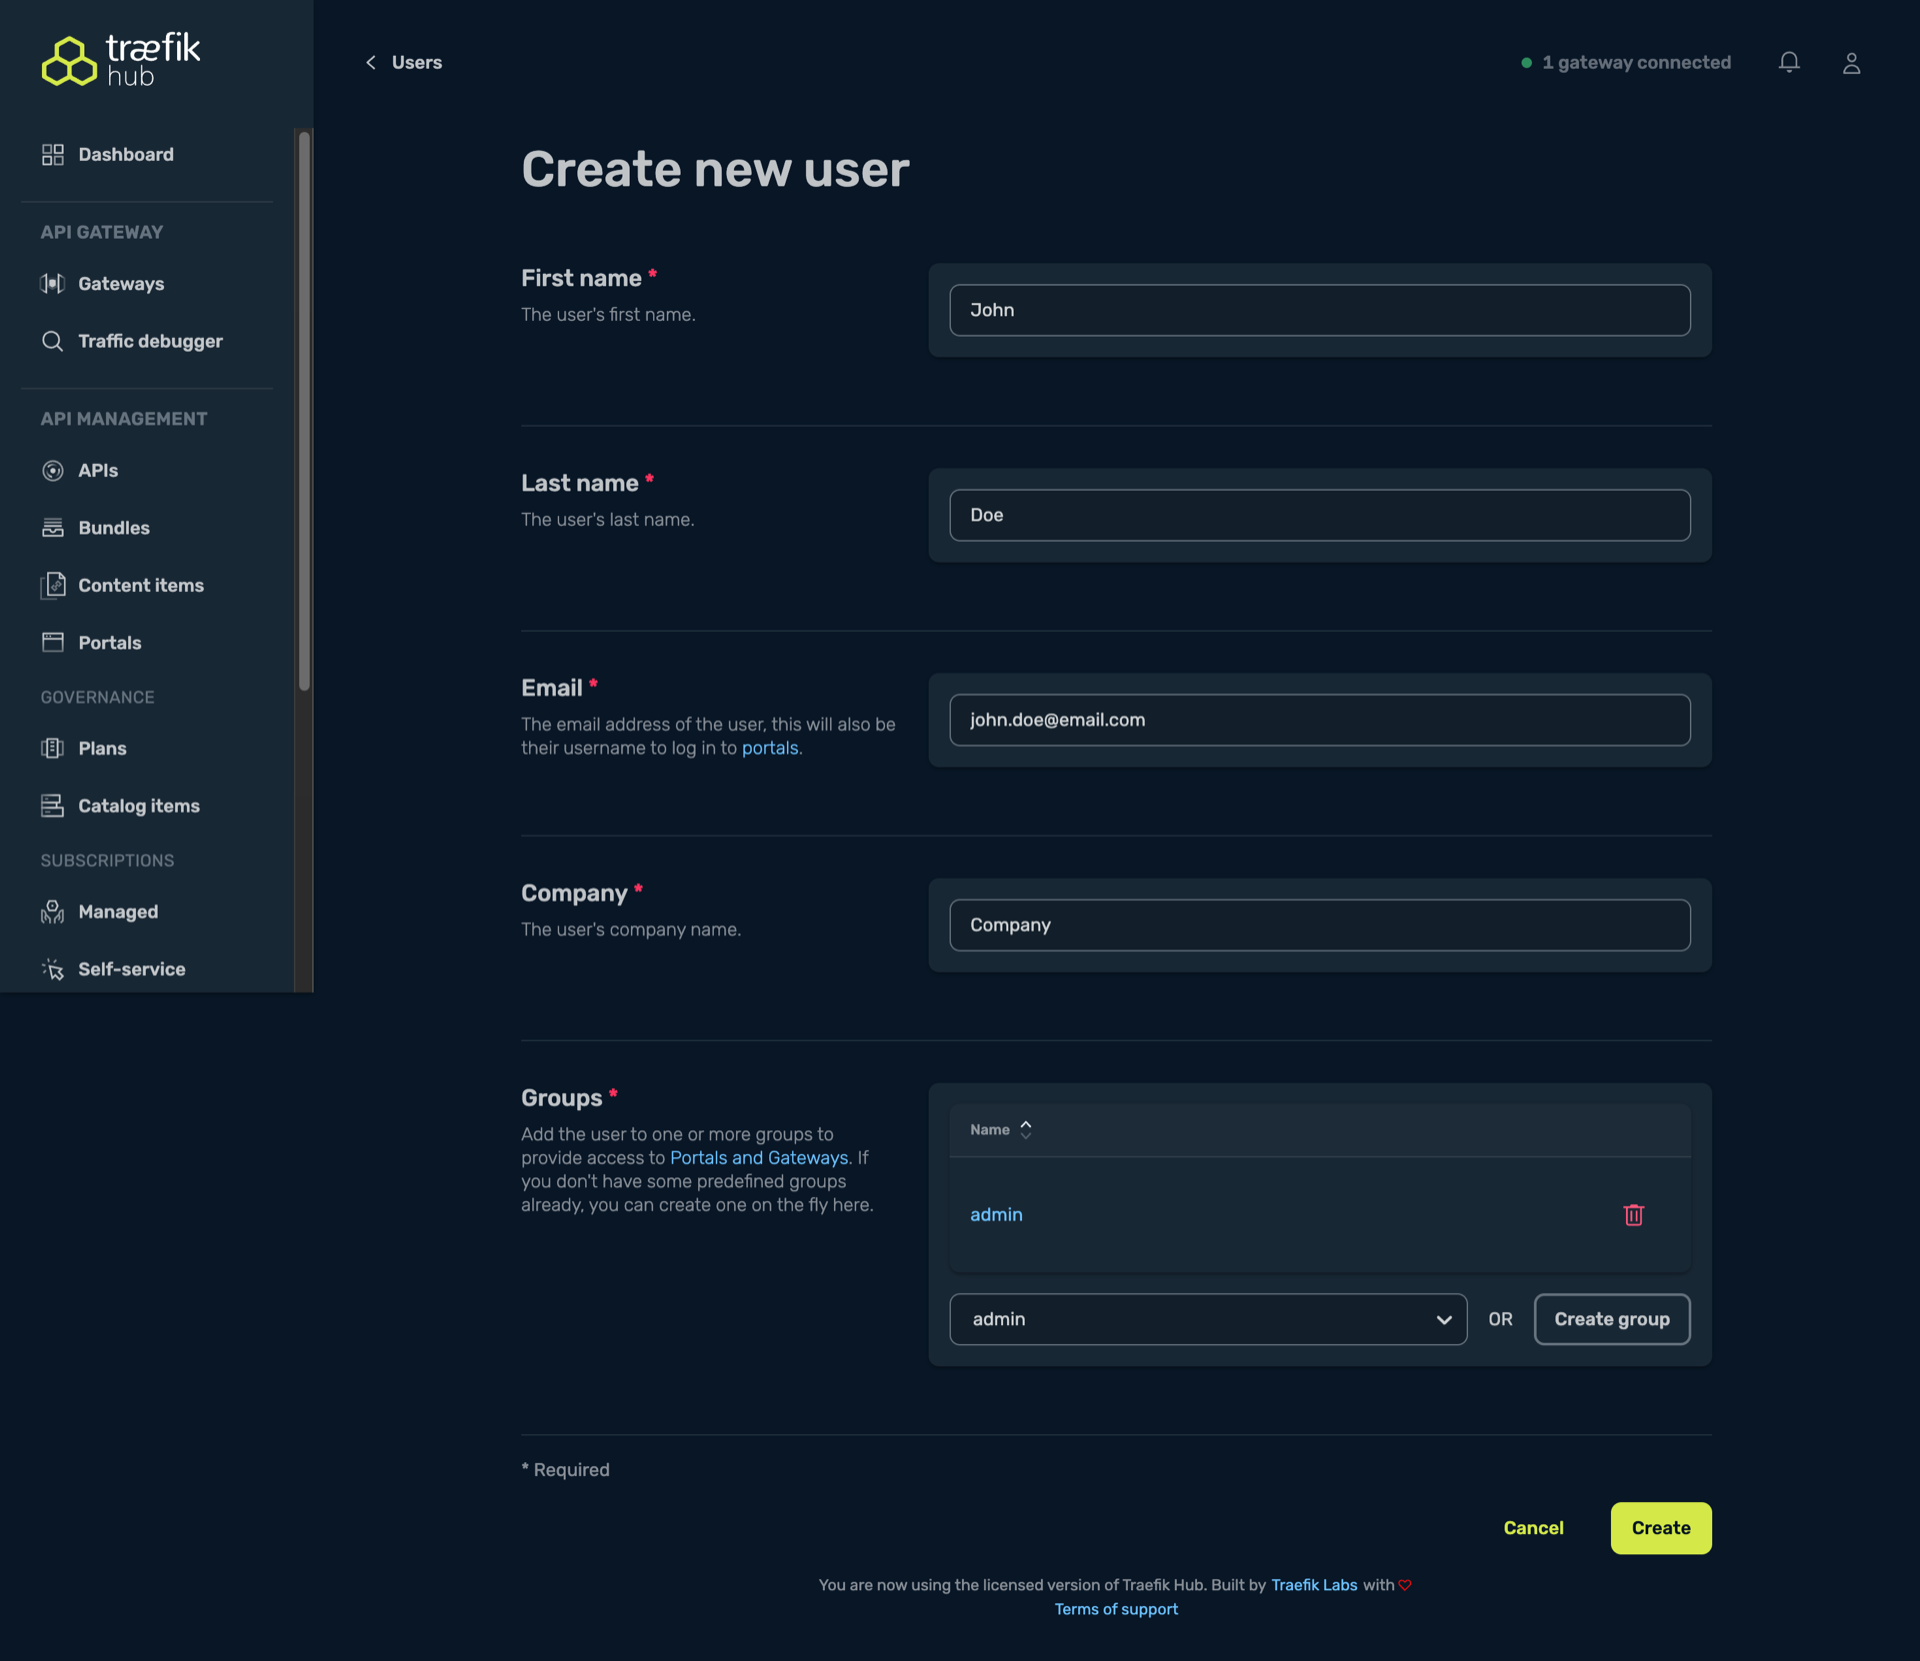
Ensure that the admin group is created in the Traefik Hub Online Dashboard and the admin user is added to the admin group.
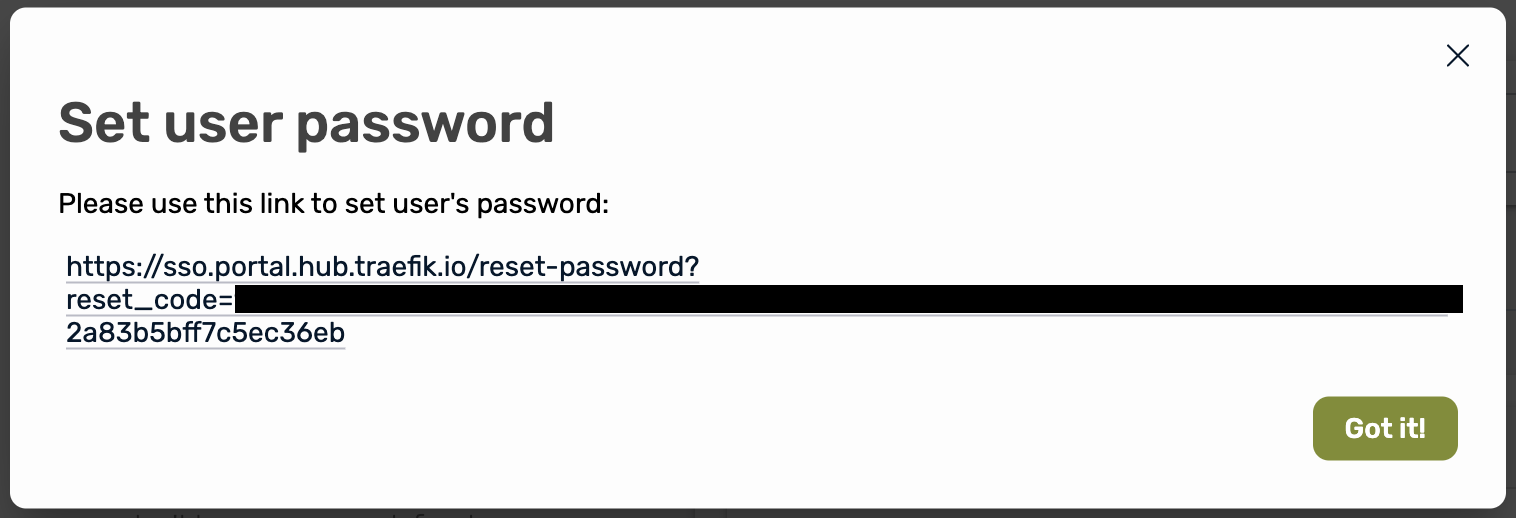
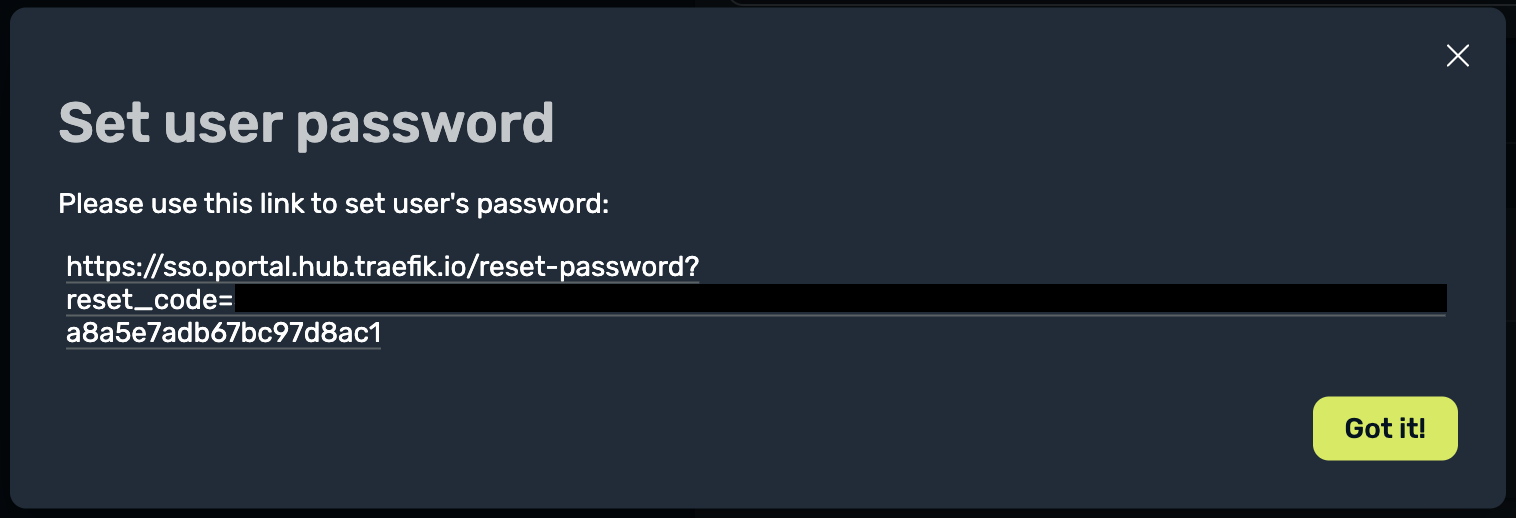
After creating a new user, you'll be prompted to set a password. Select the link displayed and paste it in your browser to set a new password. Remember these credentials as they will be used to access the API Portal.
Now, we can provide an API Portal to the admin user.
Step 5: Deploy the API Portal
An API Portal uses the same logic as an API for routing, employing an Ingress resource and a dedicated annotation.
The portal enforces namespace boundaries and considers only resources within the same namespace as the APIPortal.
cat <<'EOF' | kubectl apply -f -
---
apiVersion: hub.traefik.io/v1alpha1
kind: APIPortal
metadata:
  name: getting-started-apimanagement-apiportal
  namespace: apps
spec:
  title: API Portal
  description: "Apps Developer Portal"
  trustedUrls:
    - https://api.getting-started.apimanagement.localhost
---
apiVersion: networking.k8s.io/v1
kind: Ingress
metadata:
  name: getting-started-apimanagement-apiportal
  namespace: traefik
  annotations:
    # This annotation link this Ingress to the API Portal using <name>@<namespace> format.
    hub.traefik.io/api-portal: getting-started-apimanagement-apiportal@apps
spec:
  rules:
  - host: api.getting-started.apimanagement.localhost
    http:
      paths:
        - path: /
          pathType: Prefix
          backend:
            service:
              name: apiportal
              port:
                number: 9903
EOF
This API Portal is routed using the internal ClusterIP service named apiportal provided with the Helm chart.
Ingress and not an IngressRoute?The API Portal is fronted by the built-in ClusterIP service apiportal that ships with the Helm chart.
Using a plain Ingress maintains straightforward routing and works across namespaces without additional configuration. An IngressRoute would
require cross-namespace RBAC permissions without providing additional benefits for this use case.
See the API Portal documentation for details.
After applying the resources, it creates APIPortal and Ingress resources:
apiportal.hub.traefik.io/getting-started-apimanagement-apiportal created
ingress.networking.k8s.io/getting-started-apimanagement-apiportal created
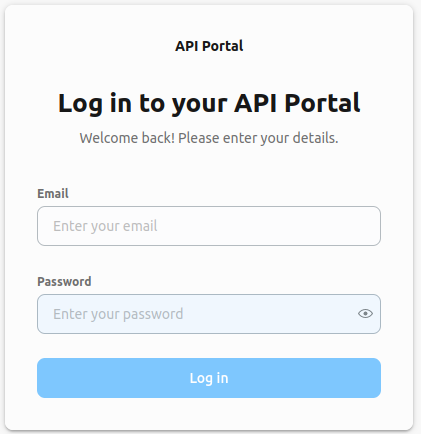
The API Portal is reachable at http://api.getting-started.apimanagement.localhost (its creation can take up to a minute).
Now, we can log in with the [email protected] as our username and the set password and create an application that can subscribe to the weather API plan and consume the API:
Step 6 : Create an Application in the API Portal
Next, we can create a new application by navigating to the Applications (at the top left of the portal) section and clicking on Create application:
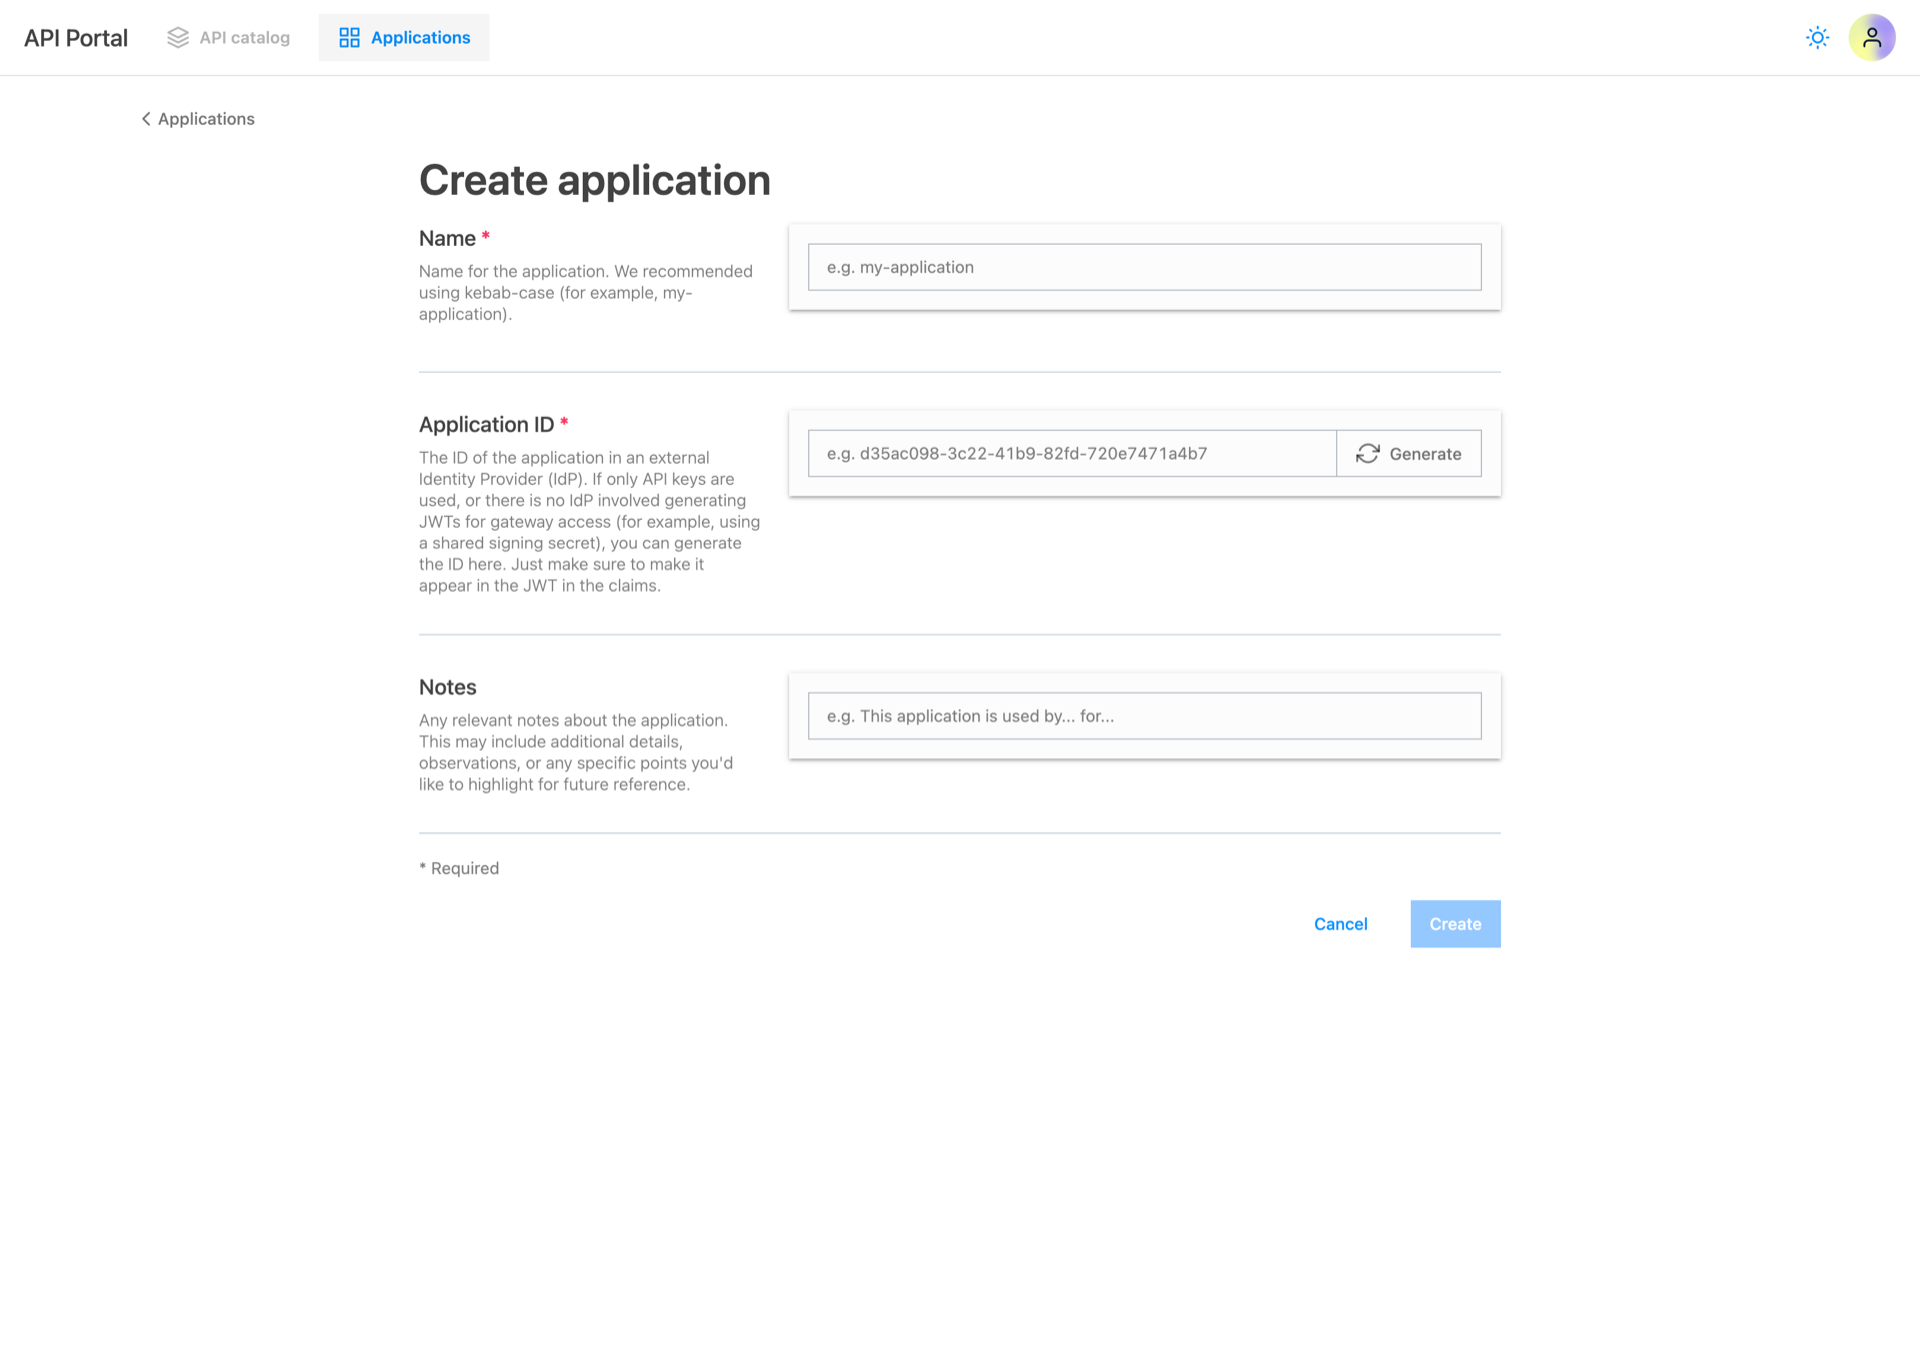
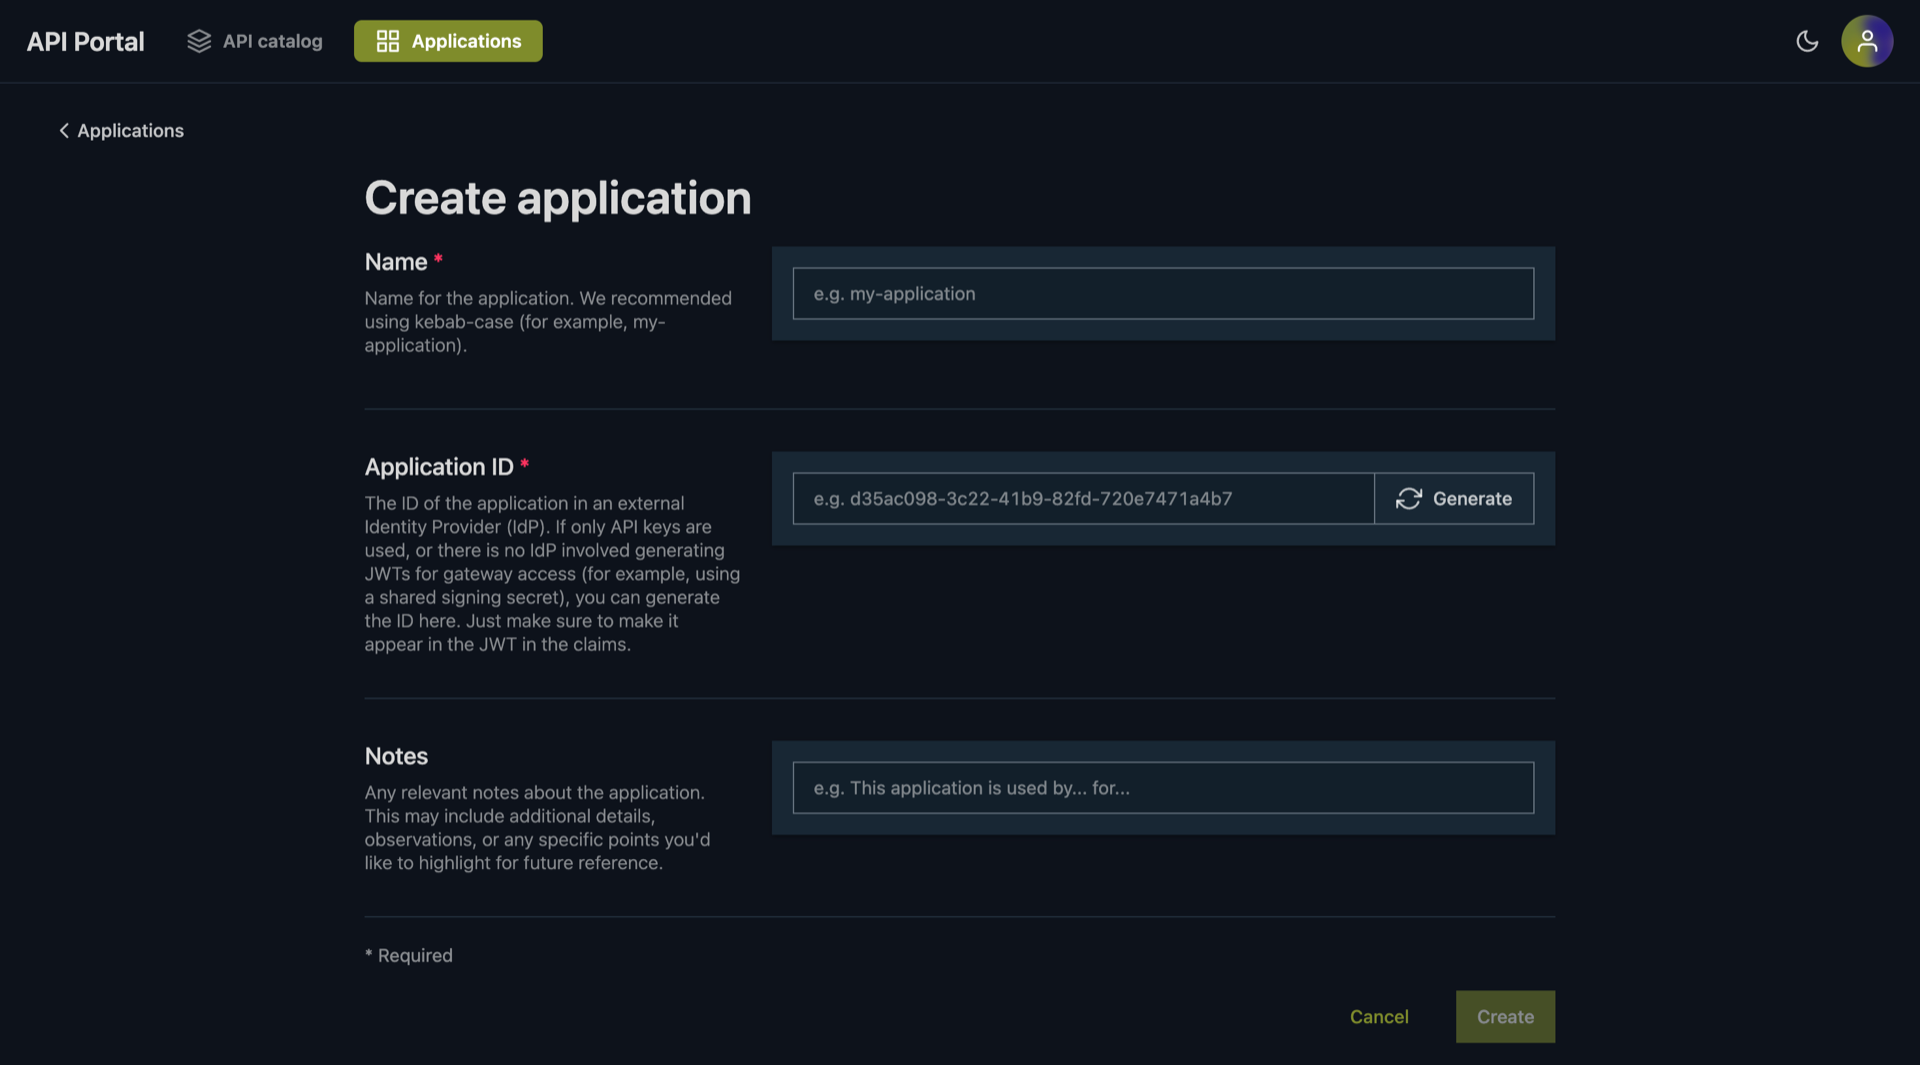
- You can choose any name for the application but we recommend using a meaningful name like
weather-appand in kebab case. - You can either generate the application ID manually or let the API Portal generate it for you by clicking icon beside the application ID input field.
After creating the application, we need to update our ManagedSubscription with the new application ID. We can do that by running the command below:
# Set this variable with the appId generated in the API portal
export APP_ID=<paste-app_id-here>
# Use the APP_IP exported variable to generate ManagedSubscription for this specific application
cat <<EOF | kubectl apply -f -
apiVersion: hub.traefik.io/v1alpha1
kind: ManagedSubscription
metadata:
    name: weather-api-subscription
    namespace: apps
spec:
  applications:
    - appId: $APP_ID
  apis:
    - name: getting-started-apimanagement-weather-api
  apiPlan:
    name: weather-api-basic-plan
EOF
managedsubscription.hub.traefik.io/weather-api-subscription configured
Step 7: Testing the API & Navigating the API Portal
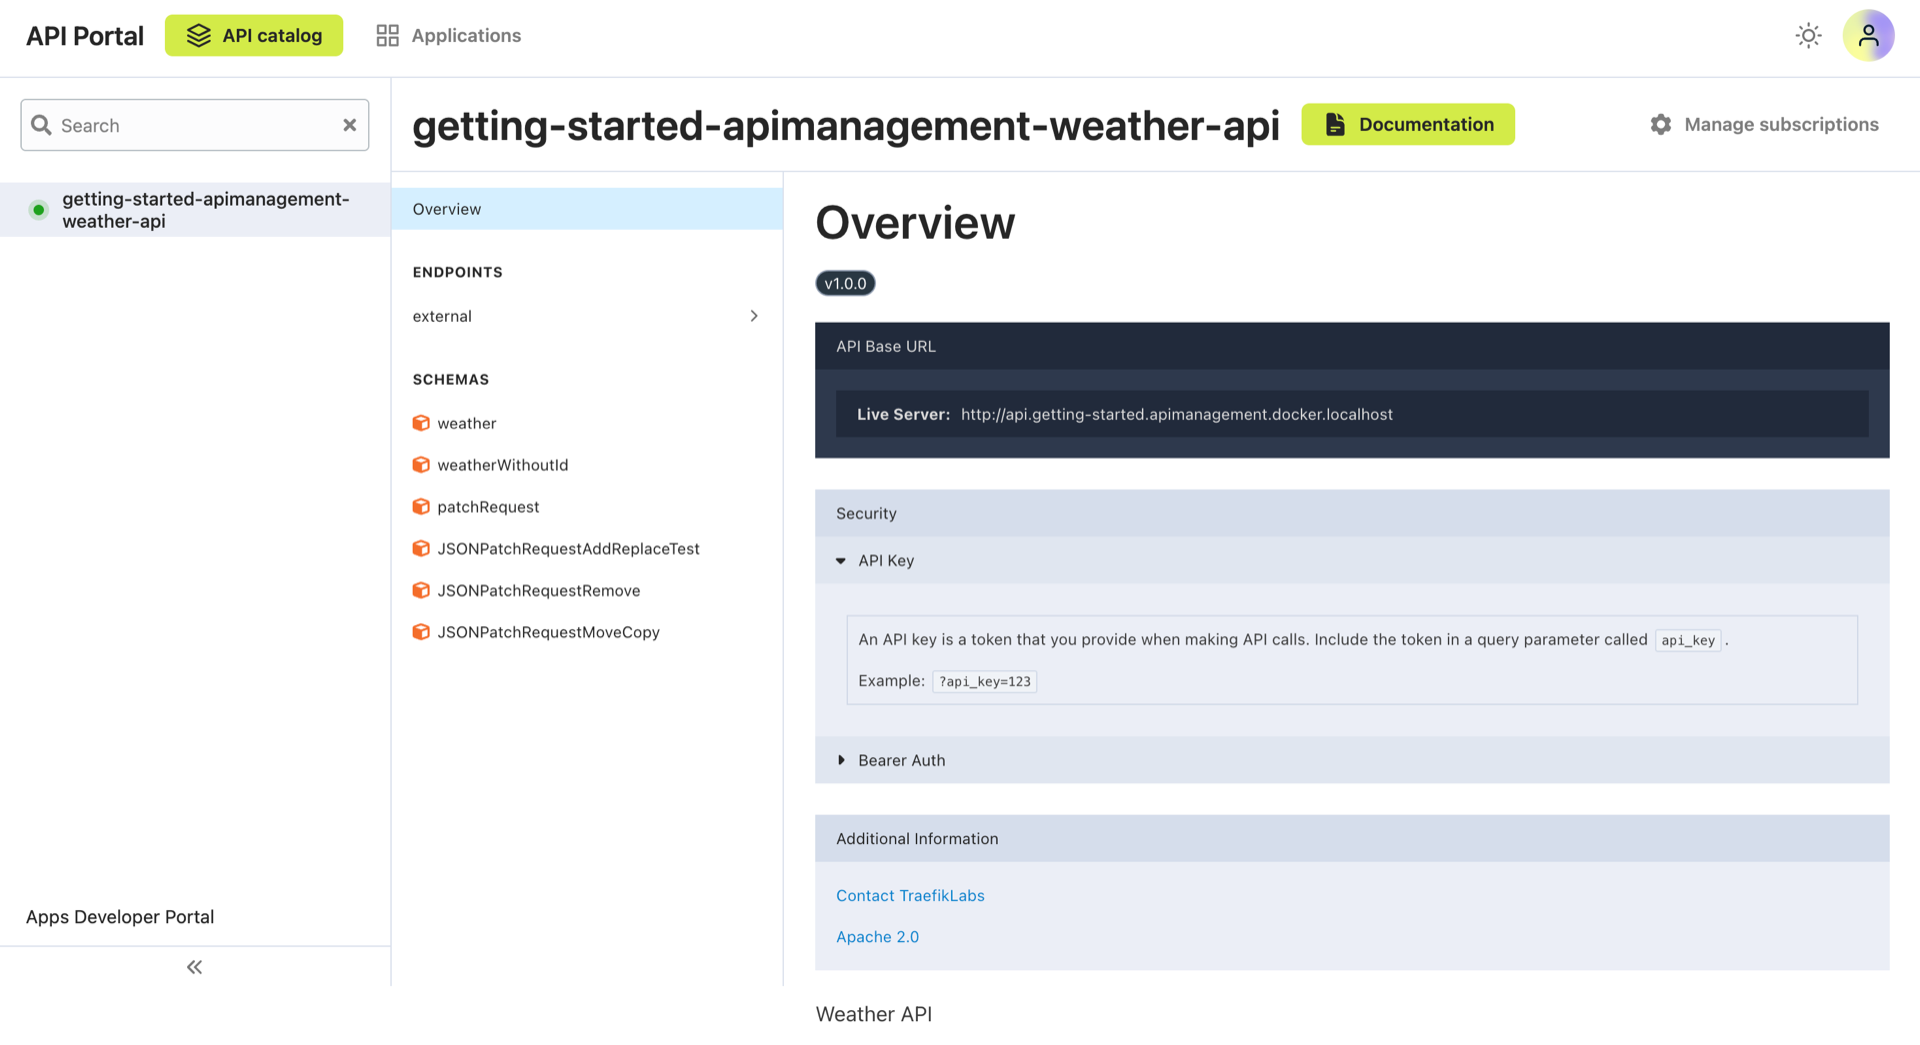
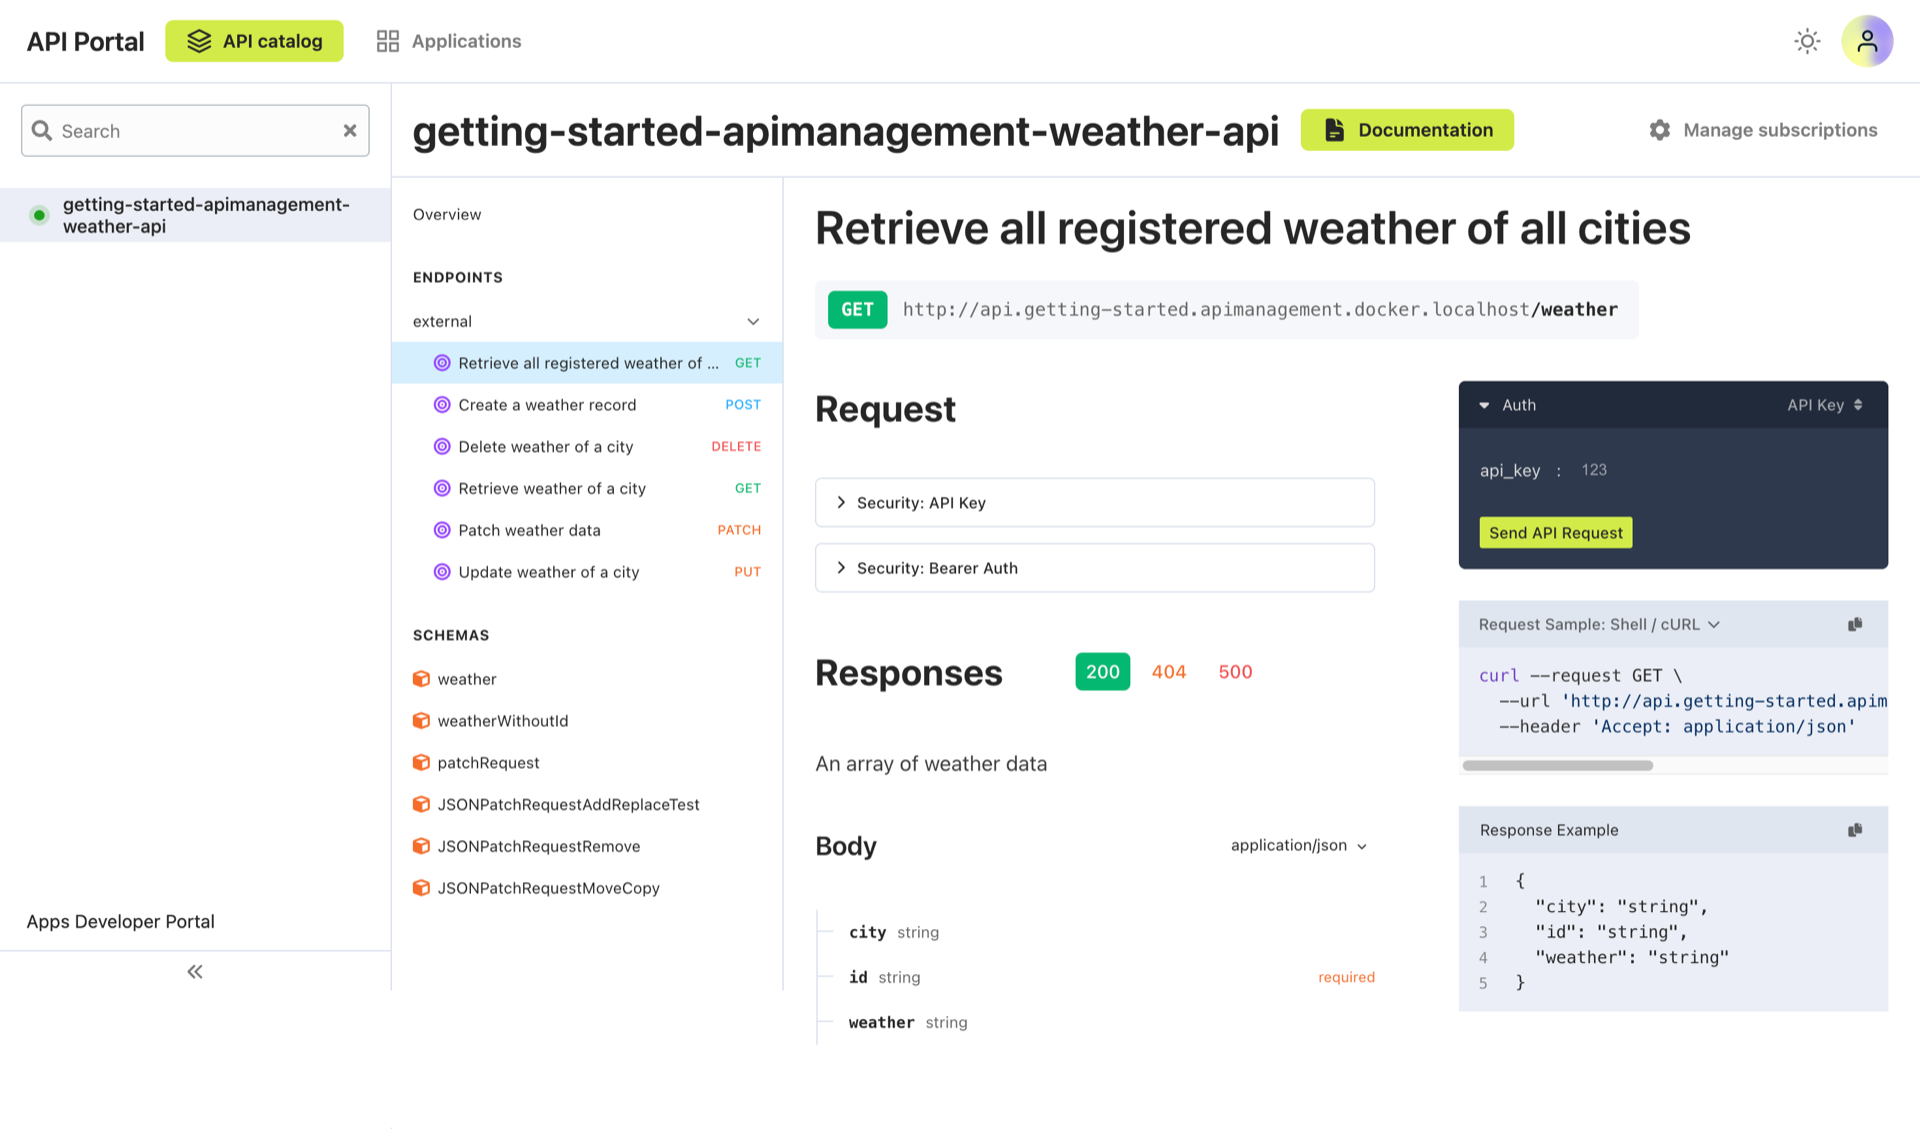
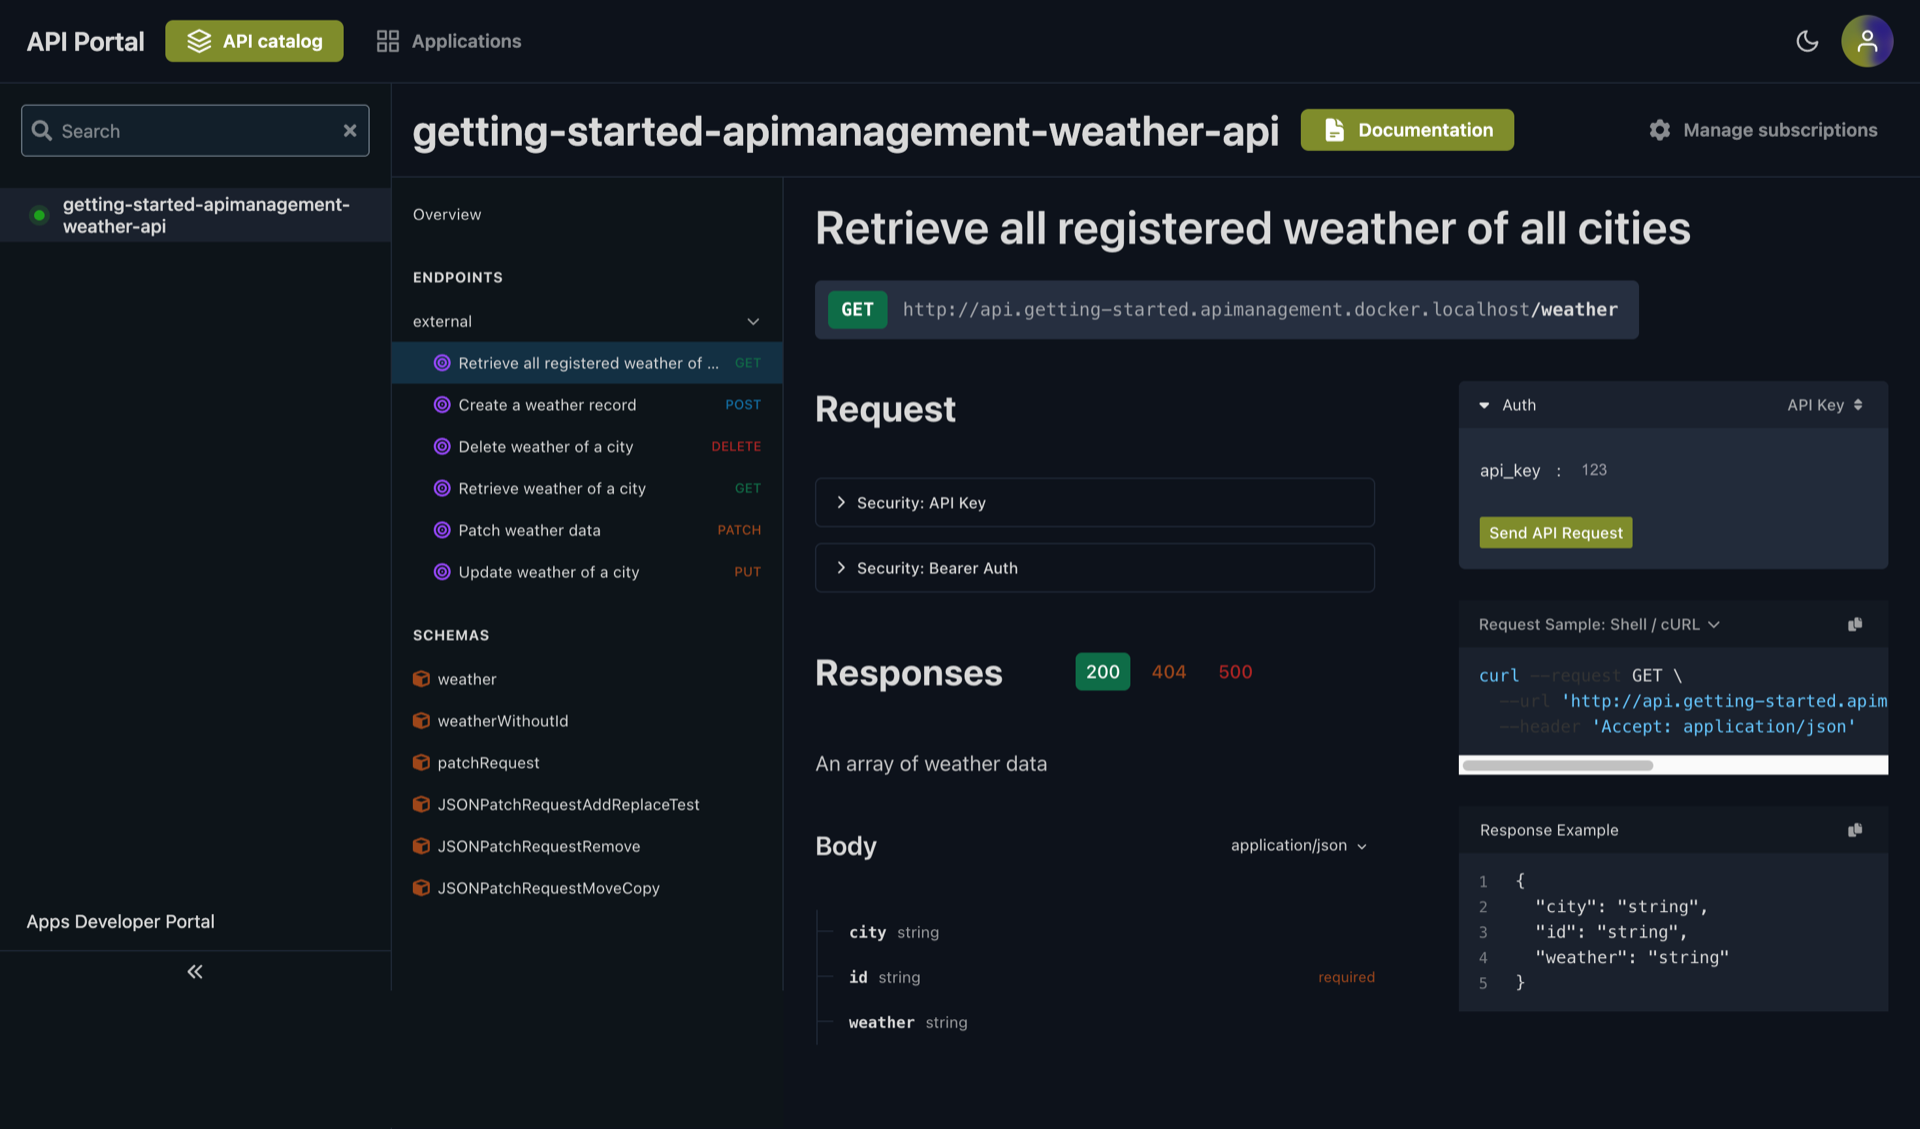
Now, if we navigate to the API Catalog section of the API portal, we can see the OpenAPI specification for the weather API:

Next, let's create an API key for our application and verify if we can now make requests to the weather API. We can do this by navigating to the Applications section of the portal, selecting the application just created, and clicking on Create API key.
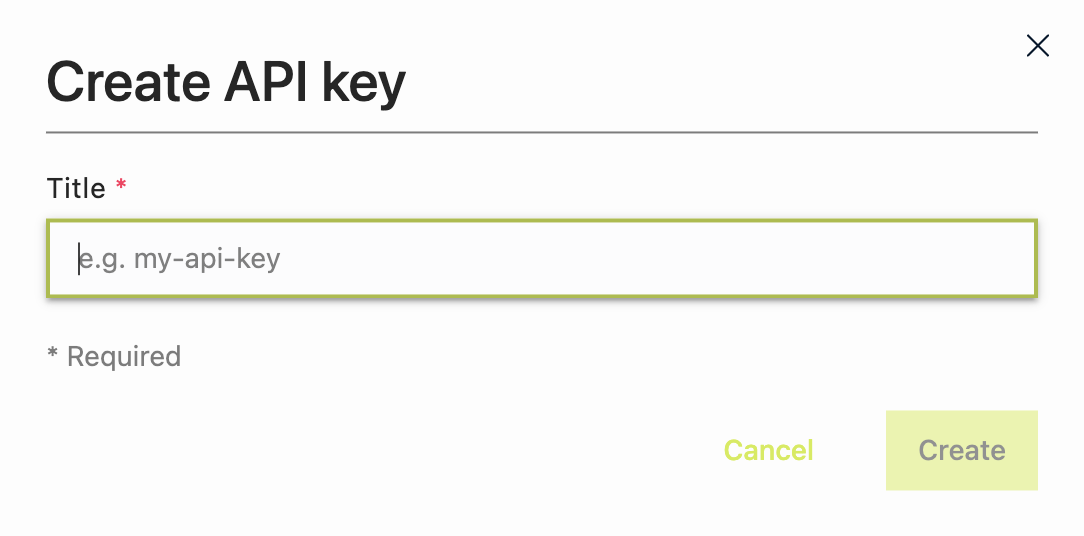
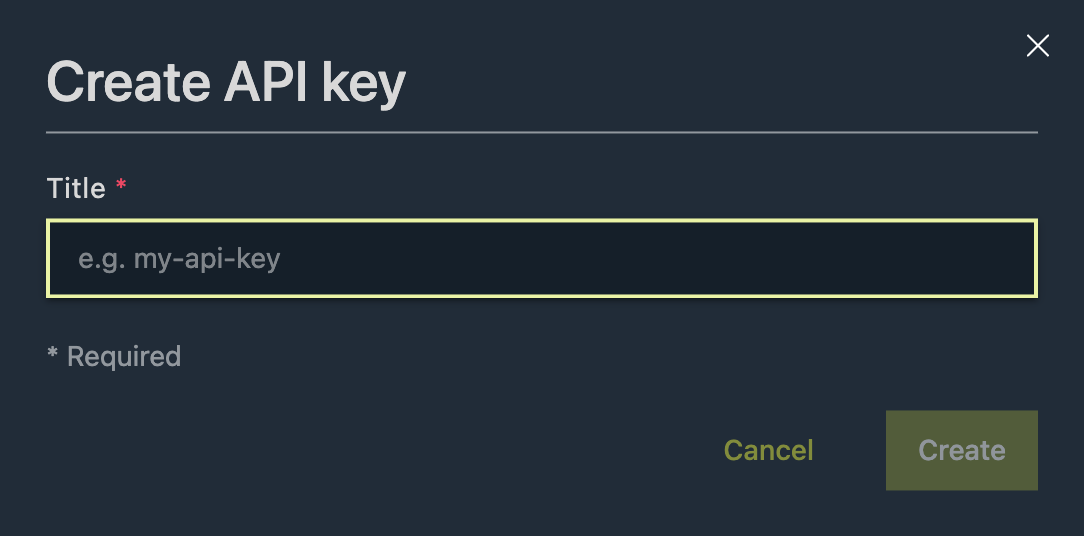
- You can choose any name for the API key but we recommend using a meaningful name and it should be in kebab case.
After creating the API key, export it:
export API_KEY=<paste-api_key-here>
Making a request to the weather API now allows access:
curl -s -H "Authorization: Bearer $API_KEY" http://api.getting-started.apimanagement.localhost/weather | jq
[
  {"city":"City of Gophers","id":"1","weather":"Sunny"},
  {"city":"GopherRocks","id":"2","weather":"Cloudy"},
  {"city":"GopherCity","id":"0","weather":"Moderate rain"}
]
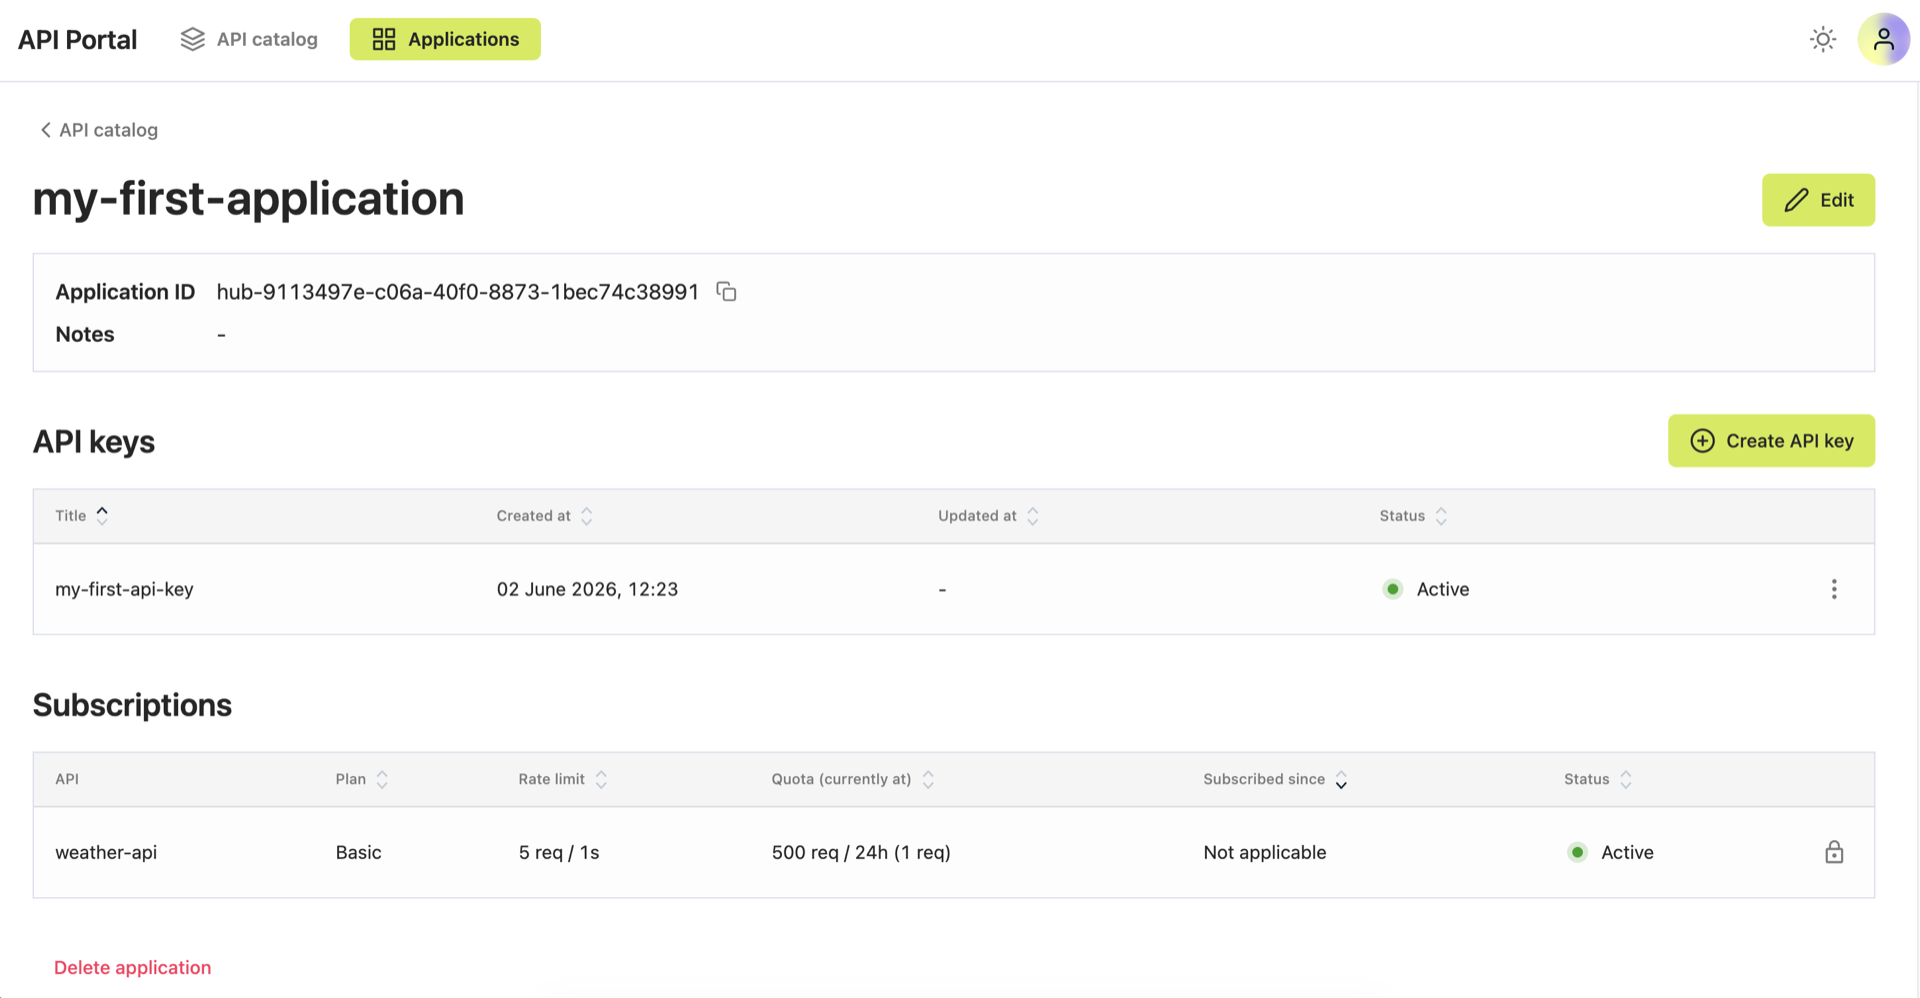
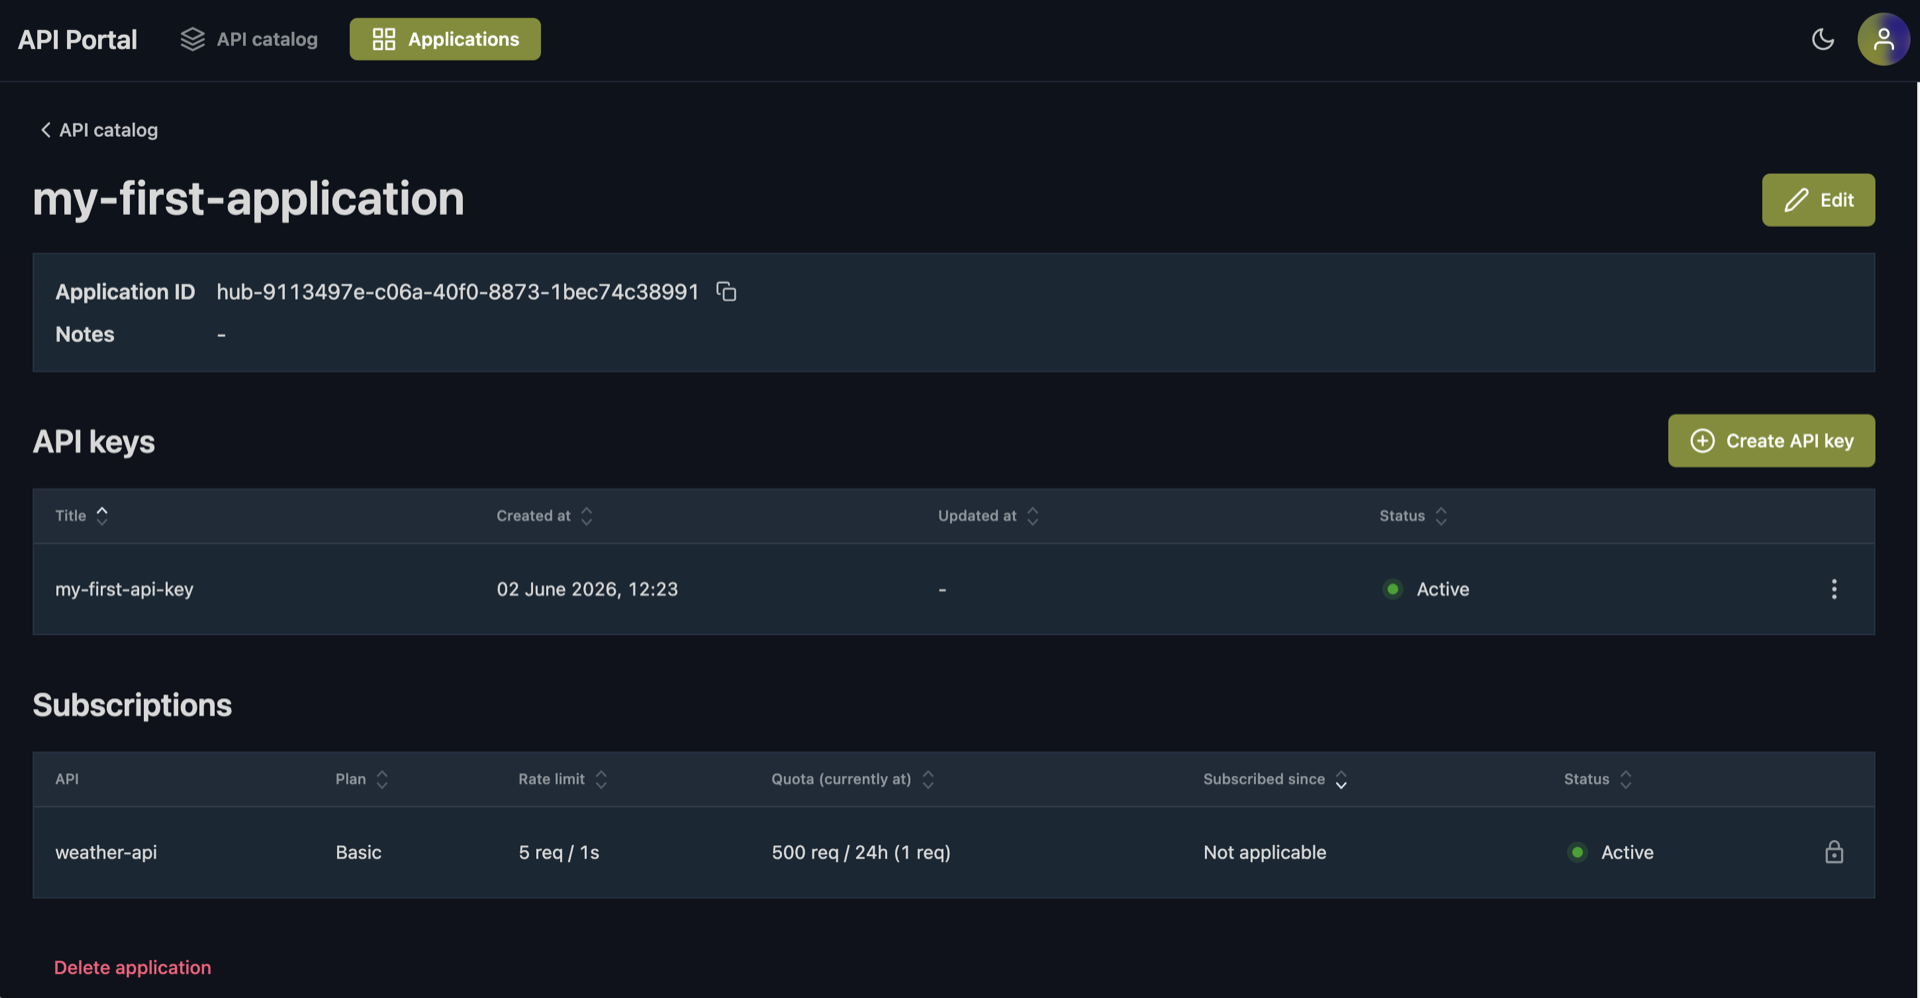
To view the subscription details, navigate back to the API Catalog section in the API portal and click Manage subscriptions:
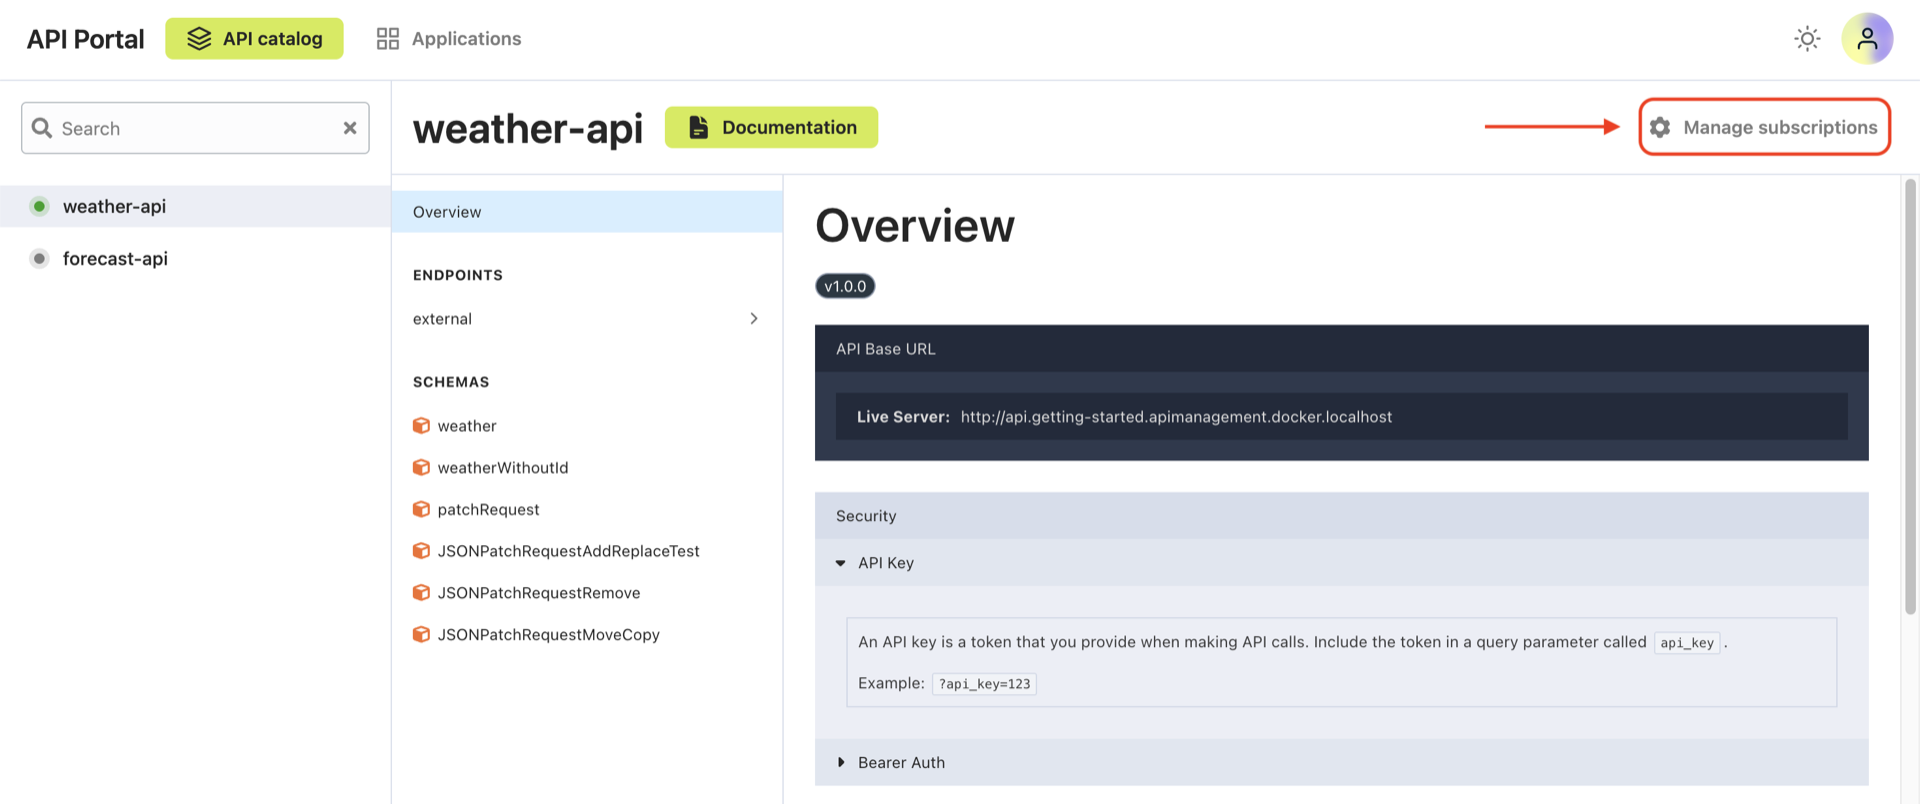
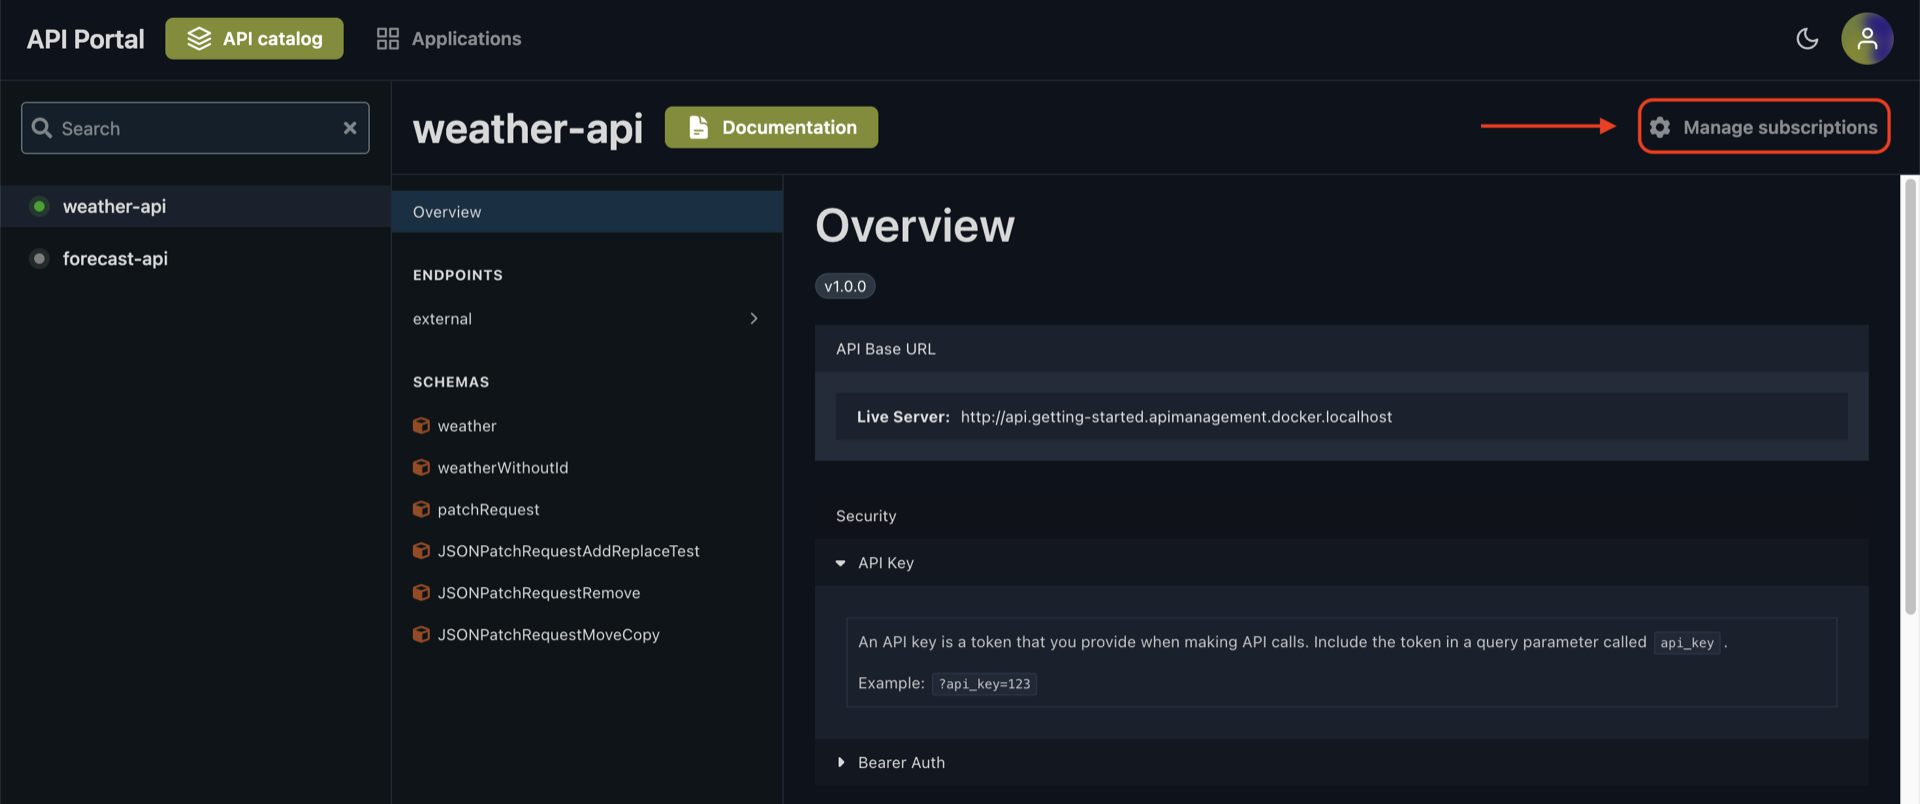
On the Subscriptions page, the list of applications is displayed. Click an application to view the subscription details. From here, you can edit the application name and ID, add API keys, and delete the application.
We can also see the API endpoints available in the apps namespace within the portal and make requests directly from the portal because of the OpenAPI specification attached to the API.
It is advisable that every API includes an OpenAPI specification (OAS):
However, it is still possible to use the API portal without setting an OAS, but this significantly hinders the process of getting started with API consumption.
Let's deploy a forecast app without an OpenAPI specification:
cat <<'EOF' | kubectl apply -f -
---
apiVersion: v1
kind: ConfigMap
metadata:
  name: weather-app-forecast-data
  namespace: apps
data:
  api.json: |
    {
      "weather": {
        "1":  { "city": "GopherCity", "weather": "Cloudy", "dt": "3128231402" },
        "2":  { "city": "City of Gopher", "weather": "Rainy", "dt": "3128231402" },
        "3":  { "code": "GopherCentral", "weather": "Shiny", "dt": "3128231402" }
      }
    }

---
apiVersion: apps/v1
kind: Deployment
metadata:
  name: weather-app-forecast
  namespace: apps
spec:
  replicas: 1
  selector:
    matchLabels:
      app: weather-app-forecast
  template:
    metadata:
      labels:
        app: weather-app-forecast
    spec:
      containers:
        - name: api
          image: ghcr.io/traefik/api-server:v1.2.0
          args: ["-data", "/api/api.json", "-errorrate", "2"]
          imagePullPolicy: IfNotPresent
          volumeMounts:
          - name: api-data
            mountPath: /api
      volumes:
        - name: api-data
          configMap:
            name: weather-app-forecast-data
---
apiVersion: v1
kind: Service
metadata:
  name: weather-app-forecast
  namespace: apps
  labels:
    app: weather-app-forecast
spec:
  type: ClusterIP
  ports:
    - port: 3000
      name: api
  selector:
    app: weather-app-forecast
EOF
This time, we will not specify how to retrieve the OpenAPI specification in the API CRD:
cat <<'EOF' | kubectl apply -f -
---
apiVersion: hub.traefik.io/v1alpha1
kind: API
metadata:
  name: getting-started-apimanagement-weather-api-forecast
  namespace: apps
spec: {}
EOF
The other resources are structured similarly. Let's apply it:
cat <<'EOF' | kubectl apply -f -
---
apiVersion: hub.traefik.io/v1alpha1
kind: APICatalogItem
metadata:
  name: getting-started-forecast-catalog
  namespace: apps
spec:
  apis:
    - name: getting-started-apimanagement-weather-api-forecast
  everyone: true

---
apiVersion: traefik.io/v1alpha1
kind: IngressRoute
metadata:
  name: getting-started-apimanagement-weather-api-forecast
  namespace: apps
  annotations:
    hub.traefik.io/api: getting-started-apimanagement-weather-api-forecast
spec:
  entryPoints:
  - web
  routes:
  - match: Host(`api.getting-started.apimanagement.localhost`) && Path(`/forecast`)
    kind: Rule
    services:
    - name: weather-app-forecast
      port: 3000
EOF
api.hub.traefik.io/getting-started-apimanagement-weather-api-forecast created
apicatalogitem.hub.traefik.io/getting-started-apimanagement-weather-api-forecast created
ingressroute.traefik.io/getting-started-apimanagement-weather-api-forecast created
If you navigate to the API portal, you should see the API displayed without an OpenAPI specification:
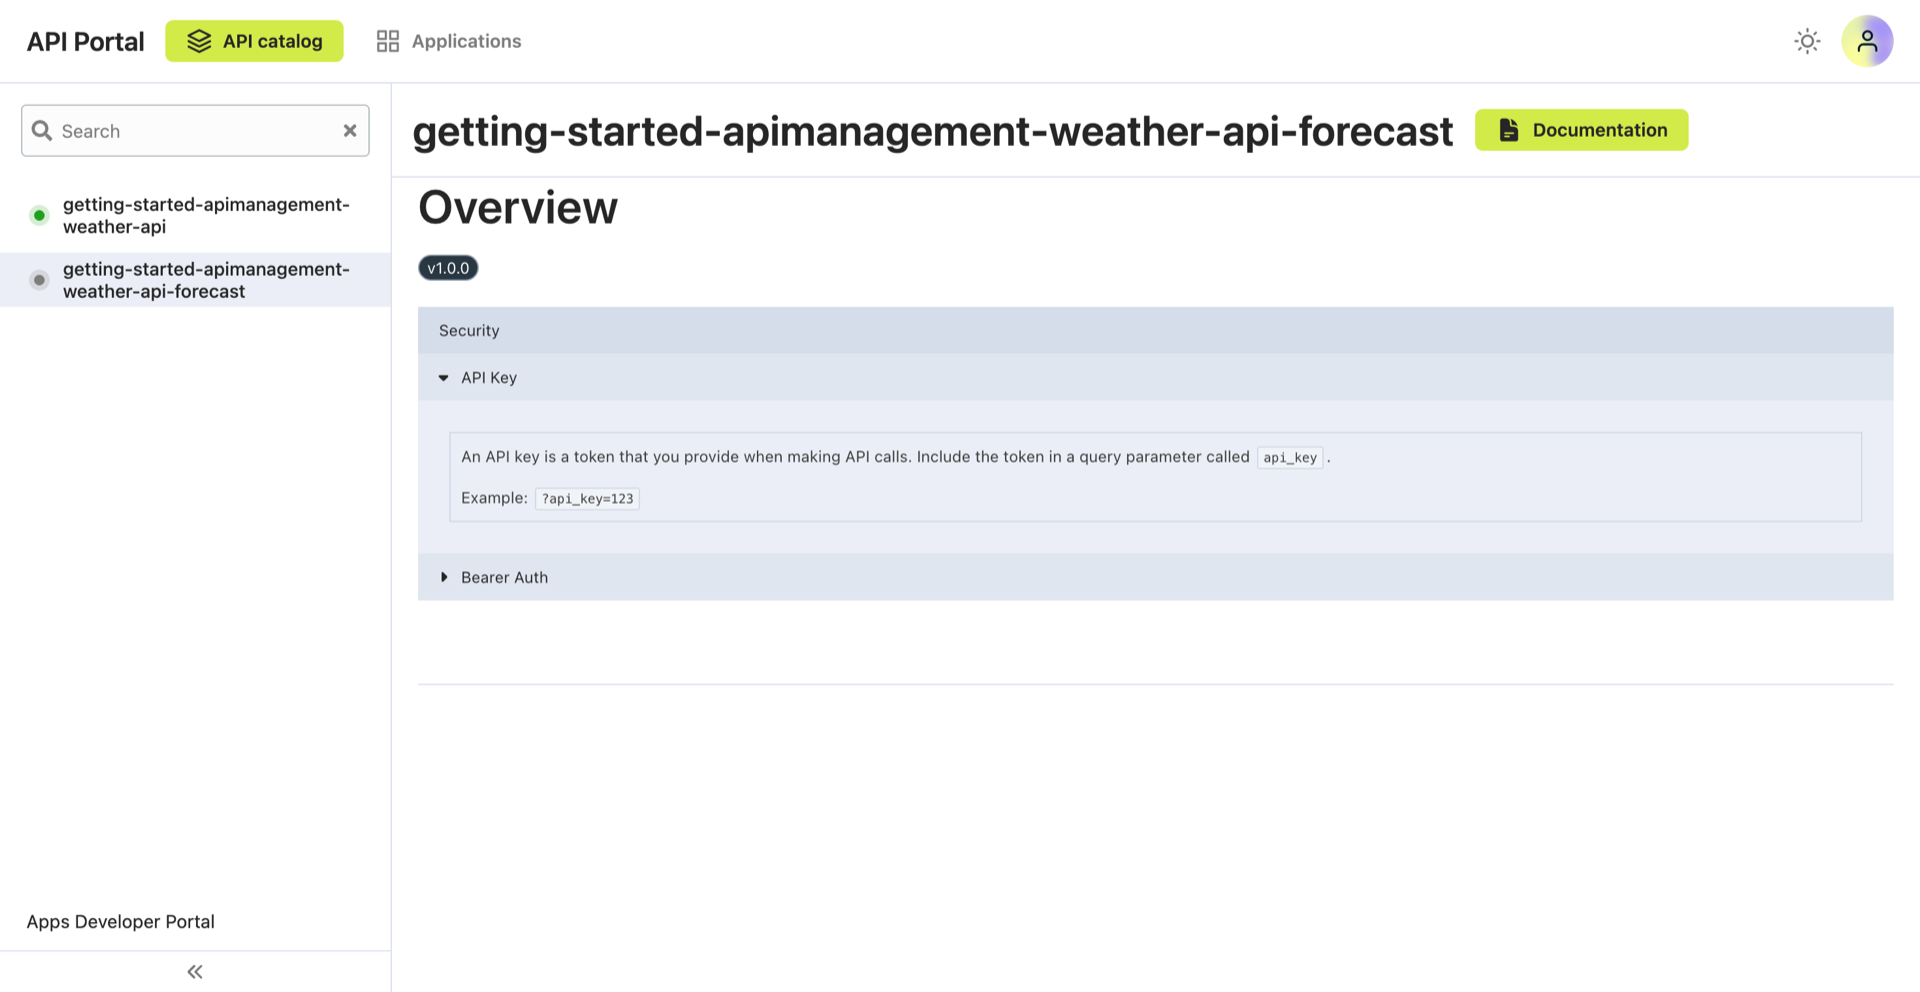
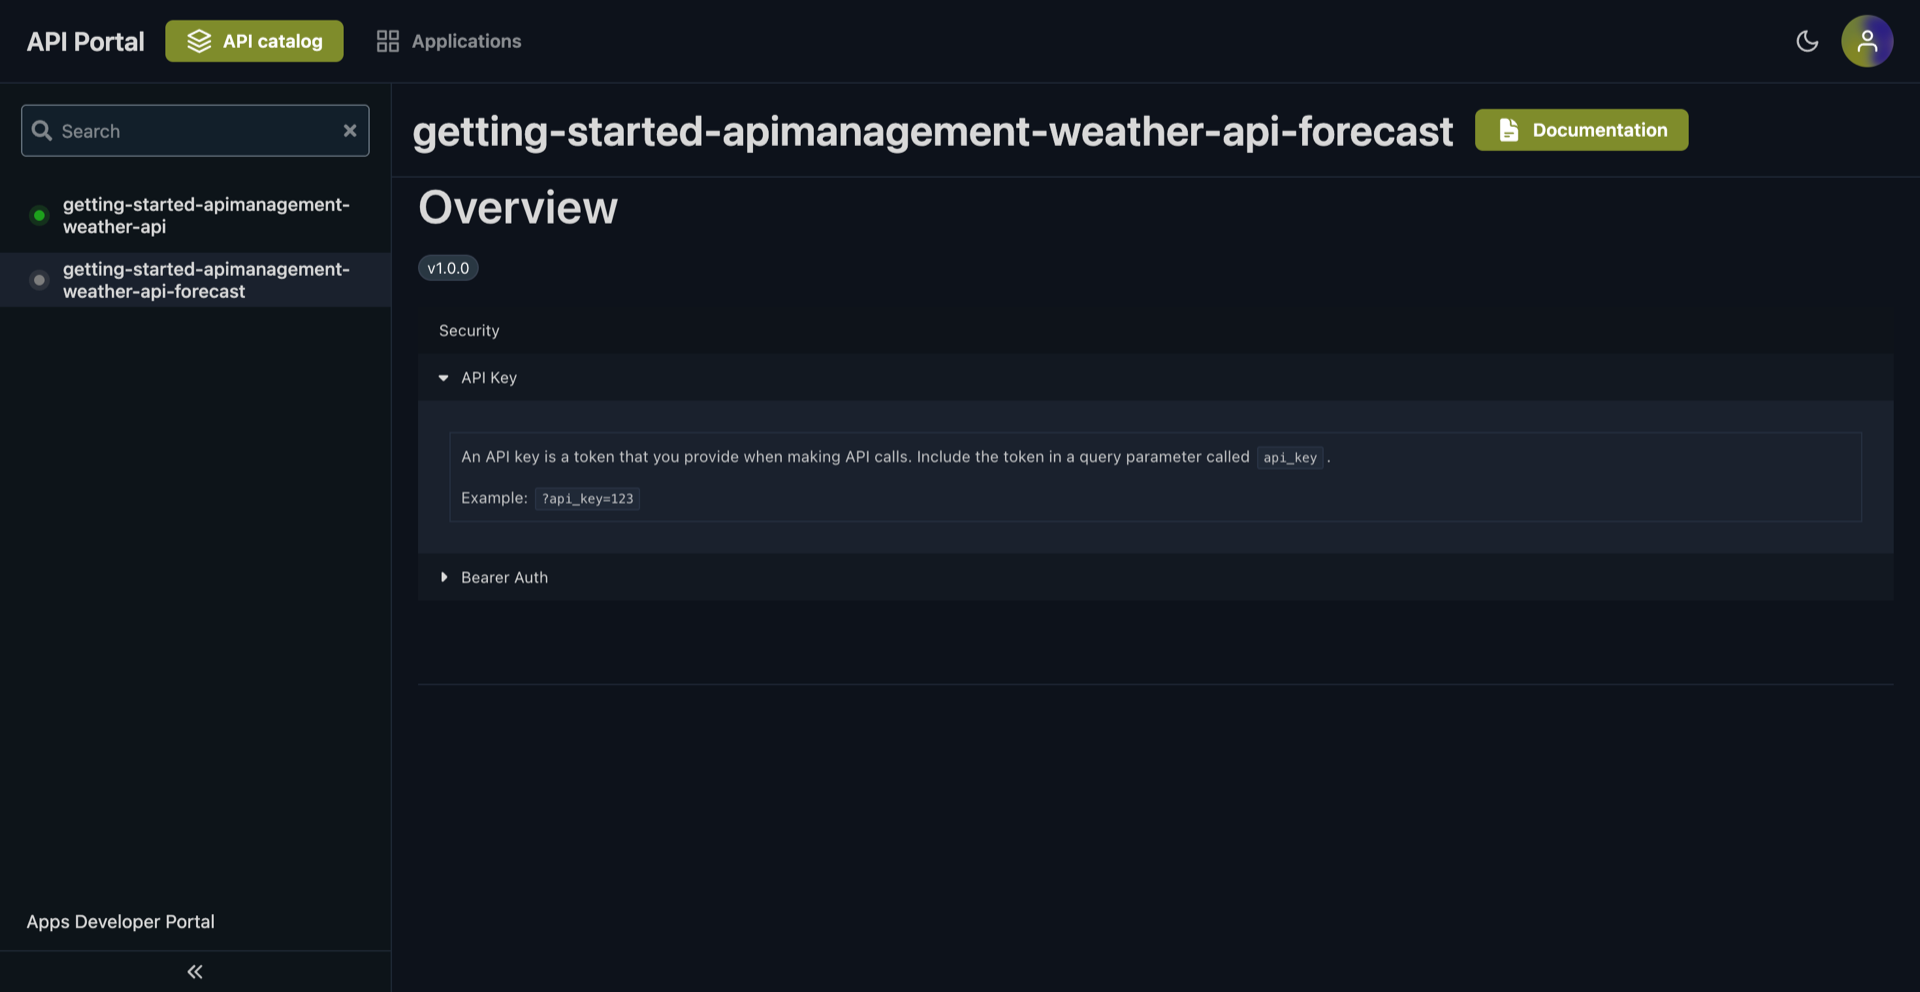
And that's it! You have successfully deployed and managed your first API with Traefik Hub API management.
Next Steps
To deepen your understanding of the concepts introduced in this guide, explore the documentation for the relevant resources:
- API: Learn more about defining and managing your APIs within Traefik Hub. Read the API documentation
- APICatalogItem: Understand how to control the visibility and metadata of your APIs in the API Portal. Read the APICatalogItem documentation
- APIPlan: Discover how to define different access tiers and rate limits for your APIs. Read the APIPlan documentation
- ManagedSubscription: See how applications subscribe to API Plans to consume APIs. Read the ManagedSubscription documentation
- ManagedApplication: Learn how to define and manage API-consuming applications through GitOps workflows. Read the ManagedApplication documentation
Familiarizing yourself with these resources will provide a solid foundation for leveraging Traefik Hub's API Management features.
