Custom Configuration
You can tailor the default installation configuration and apply custom settings with Helm (see the table below for the full list of available parameters).
Configuration Parameters
| Name | Description | Default Value |
|---|---|---|
replicas | Stable set of replicated Pods running within a cluster at any given time. | 1 |
maxSurge | The maximum number of Pods that can be created over the desired number of Pods. | 1 |
resources.requests.memory | Kubernetes resource management for Pods and containers. | 64Mi |
resources.requests.cpu | Kubernetes resource management for Pods and containers. | 50m |
resources.limits.memory | Kubernetes resource management for Pods and containers. | 128Mi |
resources.limits.cpu | Kubernetes resource management for Pods and containers. | 80m |
hubTokenSecretName | Name of the Secret containing the Traefik Hub agent token. | hub-agent-token |
service.type | Kubernetes Service types allow you to specify what kind of Service you want. | ClusterIP |
service.annotations | For defining external DNS annotations. | None |
sendlogs | Error and fatal logs are transmitted to the Traefik Hub platform. You can disable sending these logs with - "--hub.sendlogs=false" in the additionalArguments. Please note that it could result in increased support issue resolution times. | true |
Configure a Custom Configuration
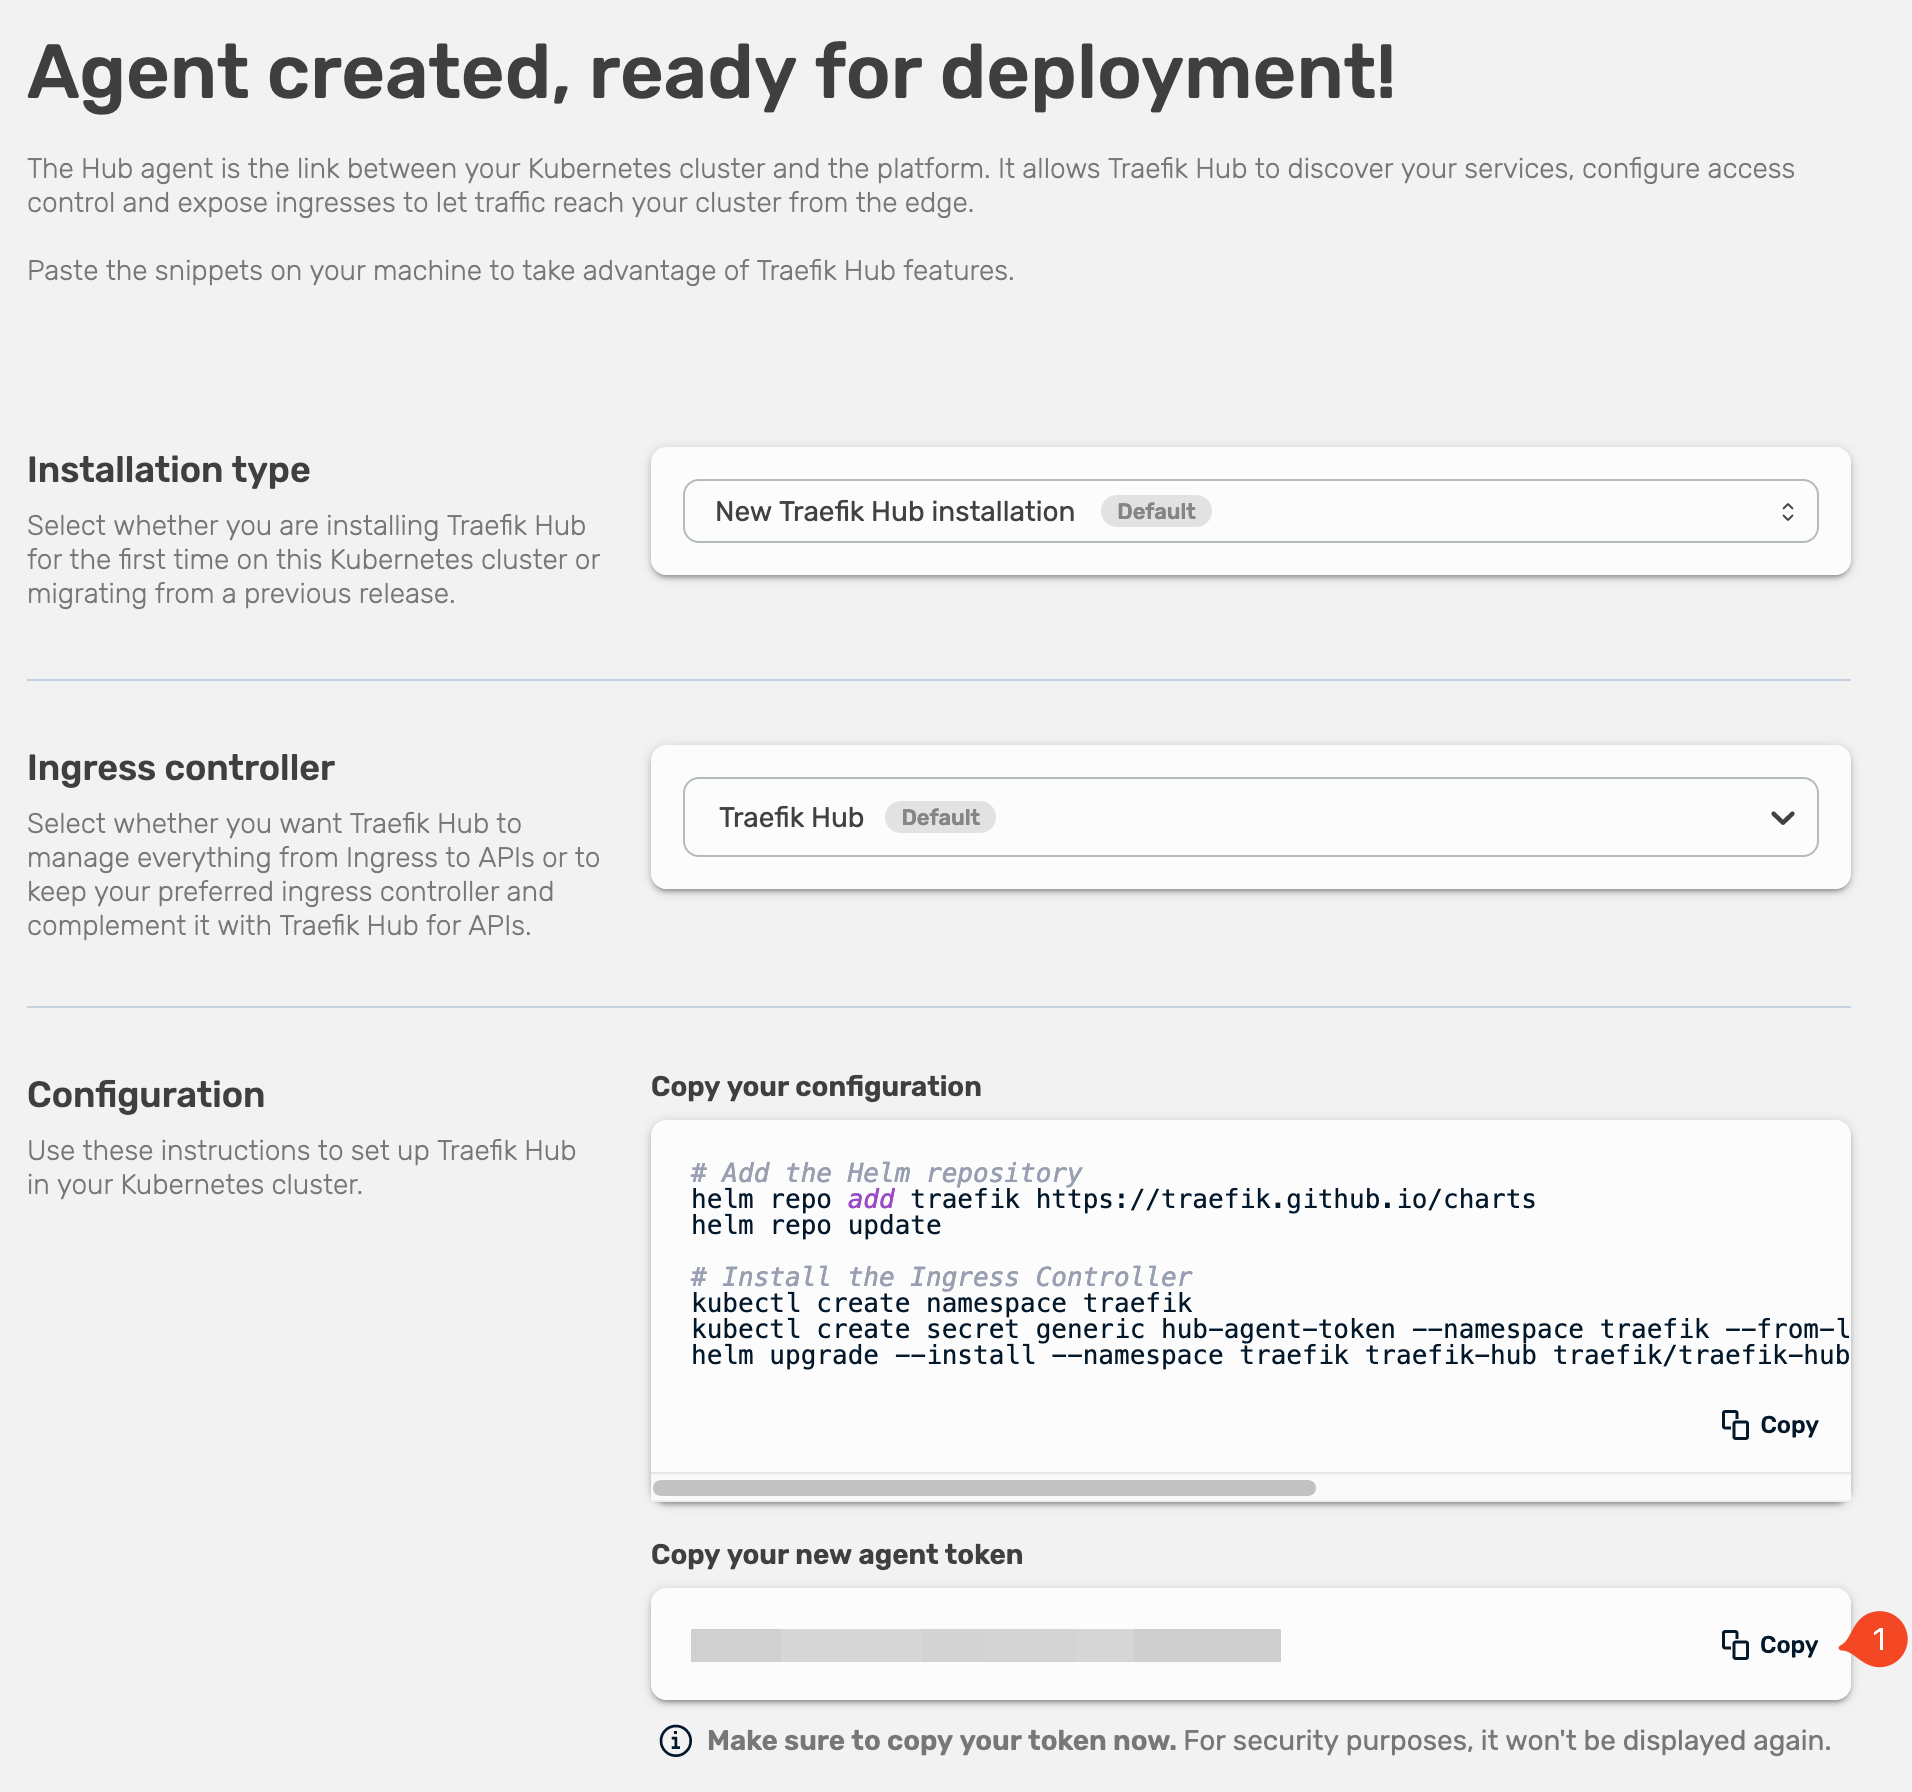
From the Dashboard, you will need to generate an agent token.
Login to the Dashboard and create a new agent.

You only need the token shown at the bottom (1).
Once you have your token copied and saved, continue with the steps to deploy the Traefik Hub agent.
Add the Helm Repository
helm repo add traefik https://traefik.github.io/charts
helm repo update
Create the Kubernetes Namespace for Traefik Hub
kubectl create namespace traefik-hub
Create the Secret with the Agent Token
kubectl create secret generic hub-agent-token --namespace traefik-hub --from-literal=token=$YOUR-AGENT-TOKEN
$YOUR-AGENT-TOKEN: Your token displayed in the dashboard
You can adjust the default configuration by adjusting the values.
Adjust the Default Values
First, save the default configuration.
The following command will save it to a file with the name values.yaml in your working directory.
helm show values traefik/traefik-hub > values.yaml
Second, adjust the file.
The following example shows a configuration where the log level of the Traefik Hub agent is set to DEBUG and the access log format to JSON.
additionalArguments:
  - --log.level=debug
  - --accessLog.format=json
Install the Agent with Your Custom Settings
Once you have the configuration adjusted to your needs, use Helm to deploy the Traefik Hub agent with the new values:
helm upgrade --install --namespace traefik-hub traefik-hub traefik/traefik-hub --values values.yaml
That the Traefik Hub Helm Chart is open source and that contributors are welcome?