OIDC Identity Provider (IdP)
This guide explains how to connect an OpenID Connect‑compliant third‑party identity provider (IdP) to Traefik Hub API Management (APIM). Once configured, the external IdP becomes the single source of truth for developer identities in the Hub Portal, while the Gateway validates requests with JWT tokens issued by that IdP.
Traefik Hub supports any provider that implements the OIDC specification. The examples below reference Azure Entra ID, Oracle Cloud IAM, Auth0, and Curity, but the steps are identical for other OIDC platforms (Keycloak, Okta etc.).
Prerequisites
-
You are an workspace admin in Traefik Hub (required to change identity provider).
-
An OIDC application is registered in your chosen IdP with:
-
Authorization Code flow enabled.
-
Redirect URI pointing to
https://<YOUR_API_PORTAL_URL>/callback. -
The following scopes permitted:
openid email profile(additional scopes optional).
-
Switching from the built‑in Internal IdP to OIDC deletes all users, groups, and API credentials currently stored in Traefik Hub. Make sure you re‑create them (or map them from your IdP) before going live.
Enable OIDC in the Hub UI
-
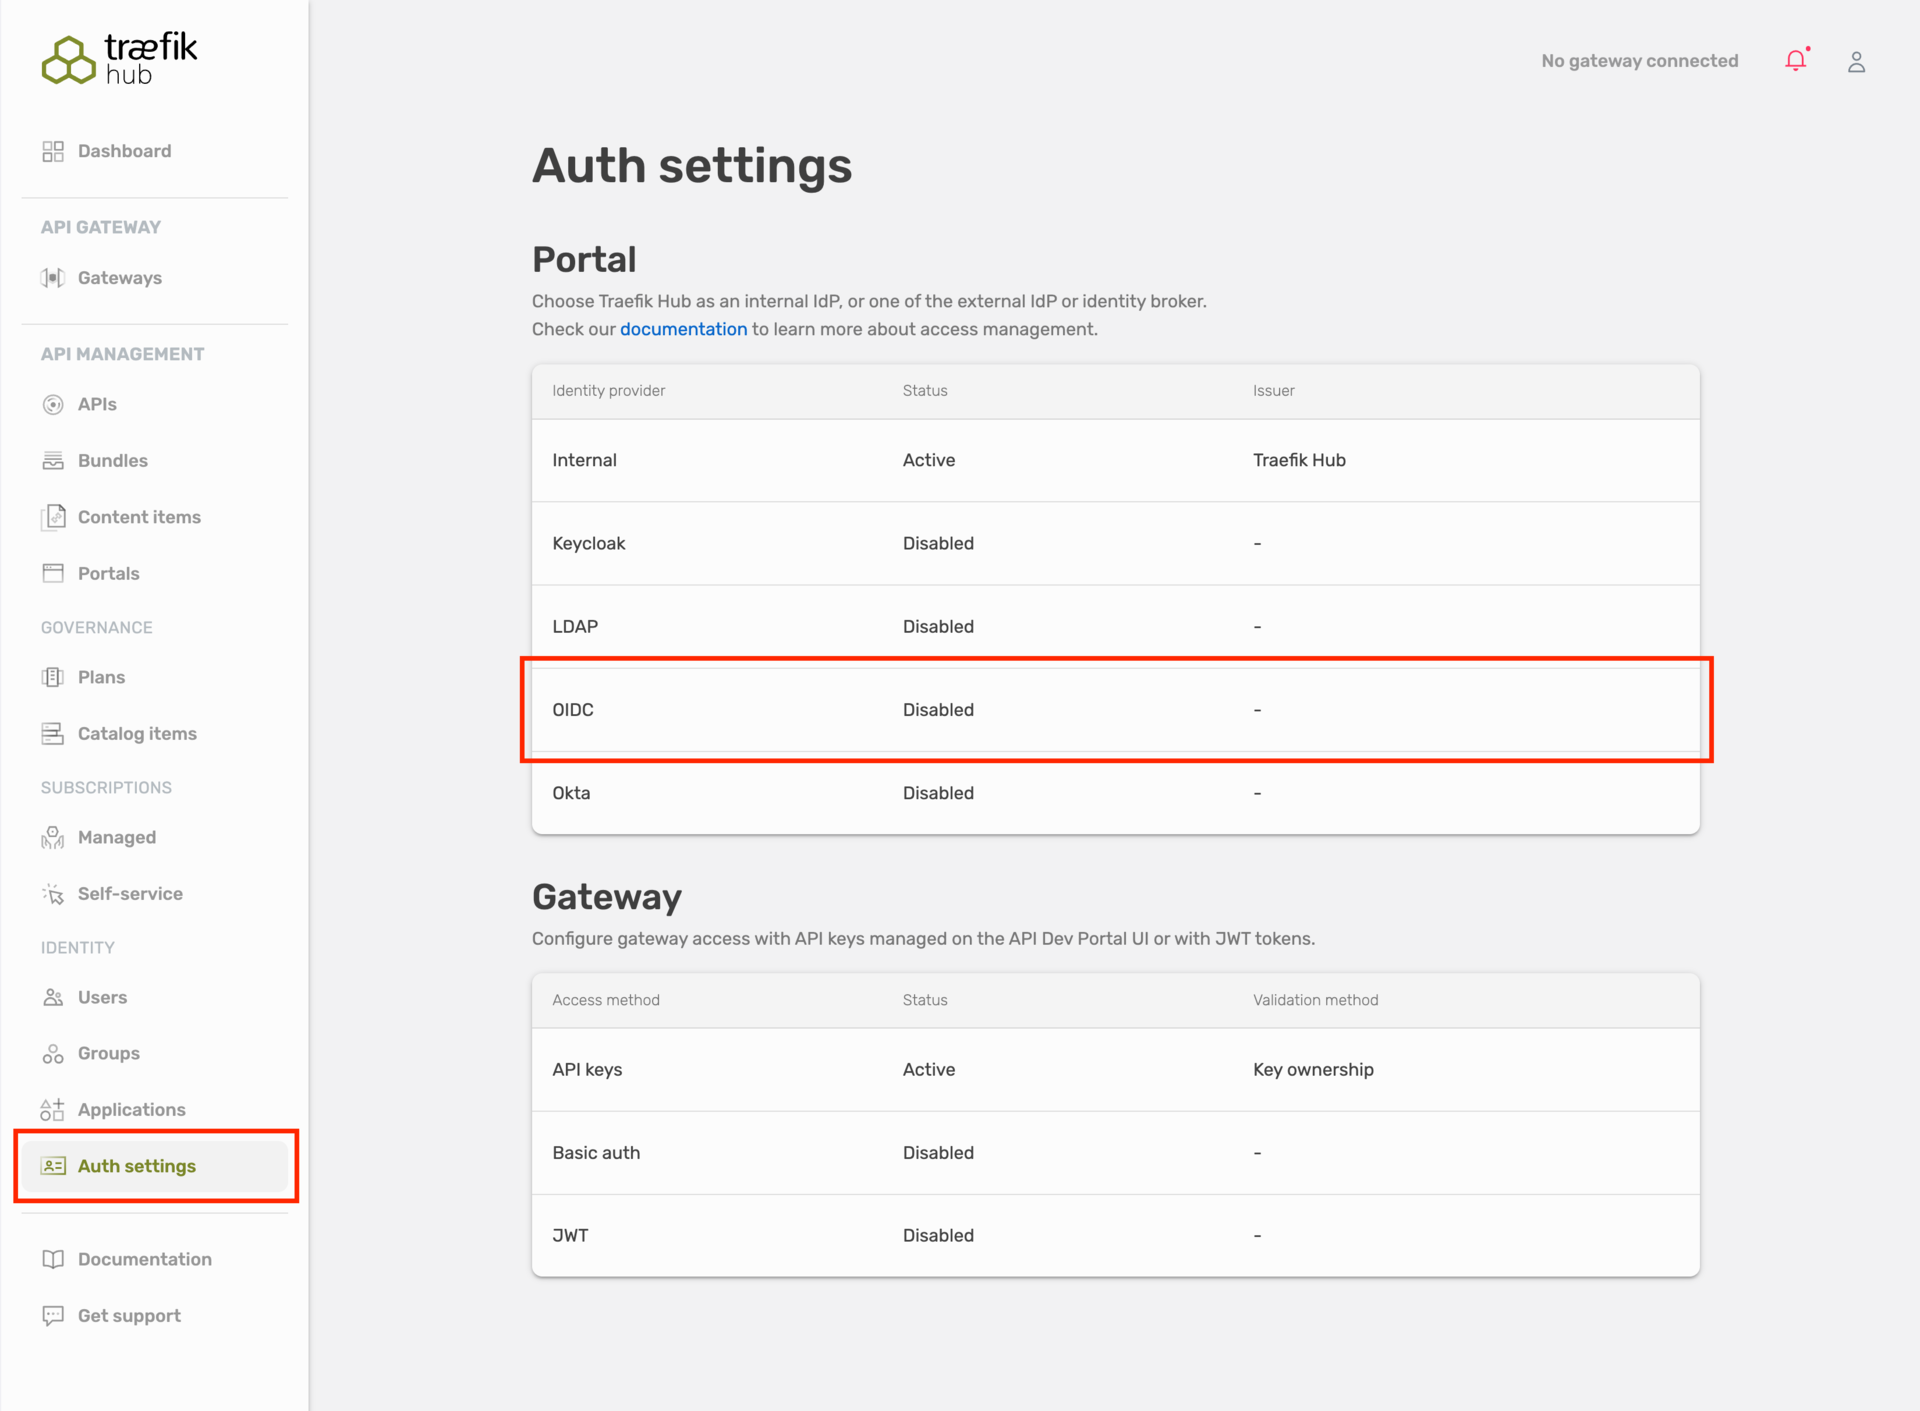
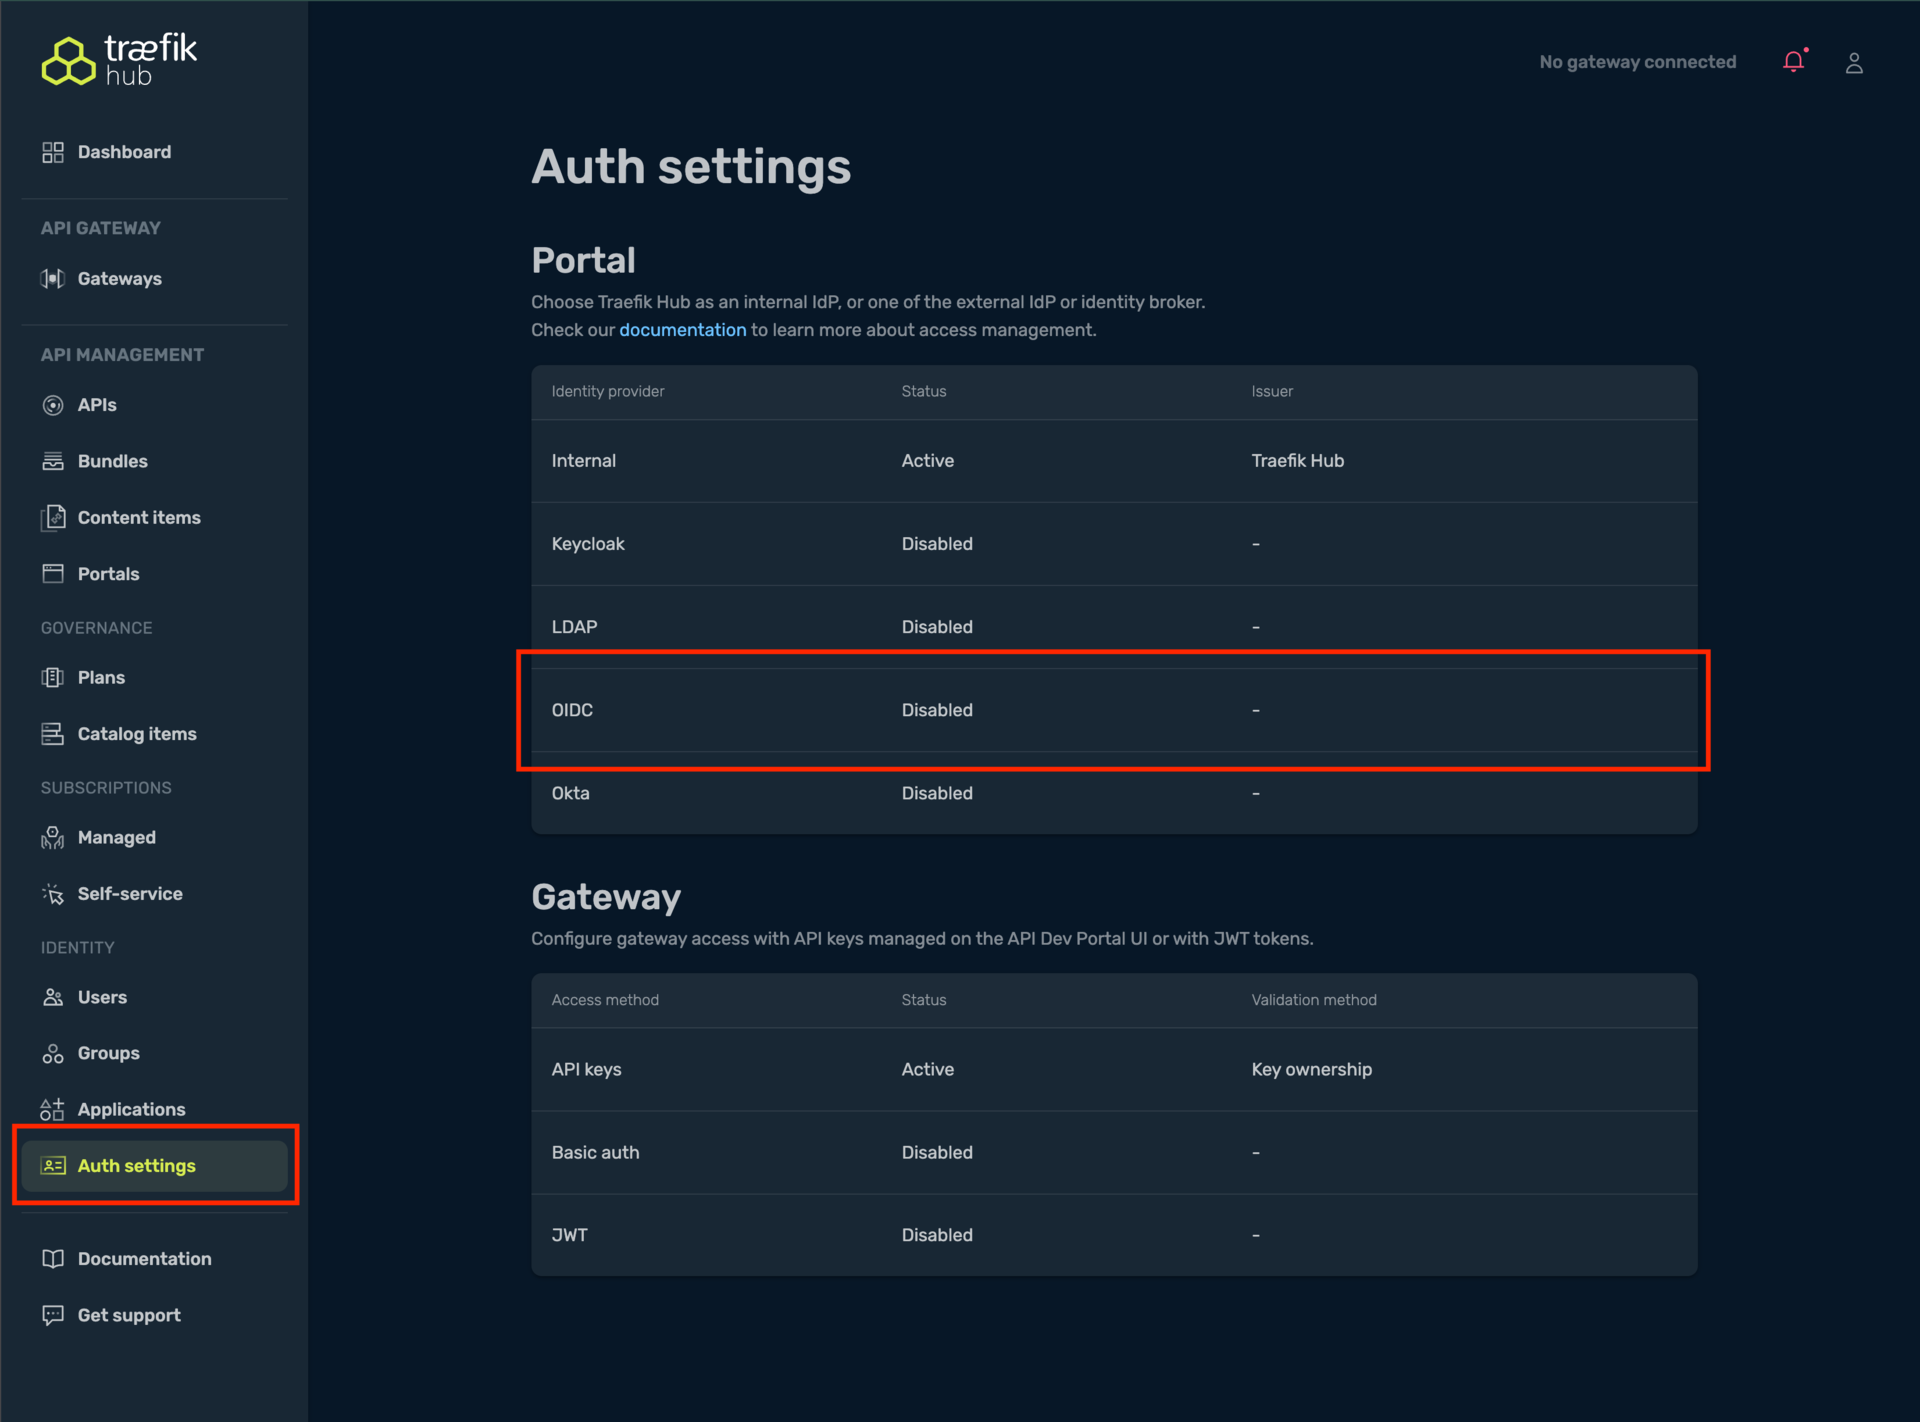
Sign in to https://hub.traefik.io, navigate to Auth settings.
-
In the Portal table, select OIDC.
- Fill the form as follows:
| Field | Description |
|---|---|
| Issuer URL | The OIDC discovery URL (usually ends with /oauth2/v2.0 or /.well-known/openid-configuration). |
| Client ID | The identifier of the application you created in your IdP. |
| Client Secret | Secret generated for that client. |
| Scopes | Space‑separated list of scopes. Required: openid. Recommended: email profile. |
| Portal claims mapping | Map IdP claims to Traefik Hub user fields. Groups is required for access control; the other claims are optional. Enable Store in Hub when you want the mapped values recorded in each user’s profile. This lets the information (e-mail, names, company, etc.) appear in the Hub UI and in audit/metrics views, making it easier to identify and track who is consuming your APIs. |
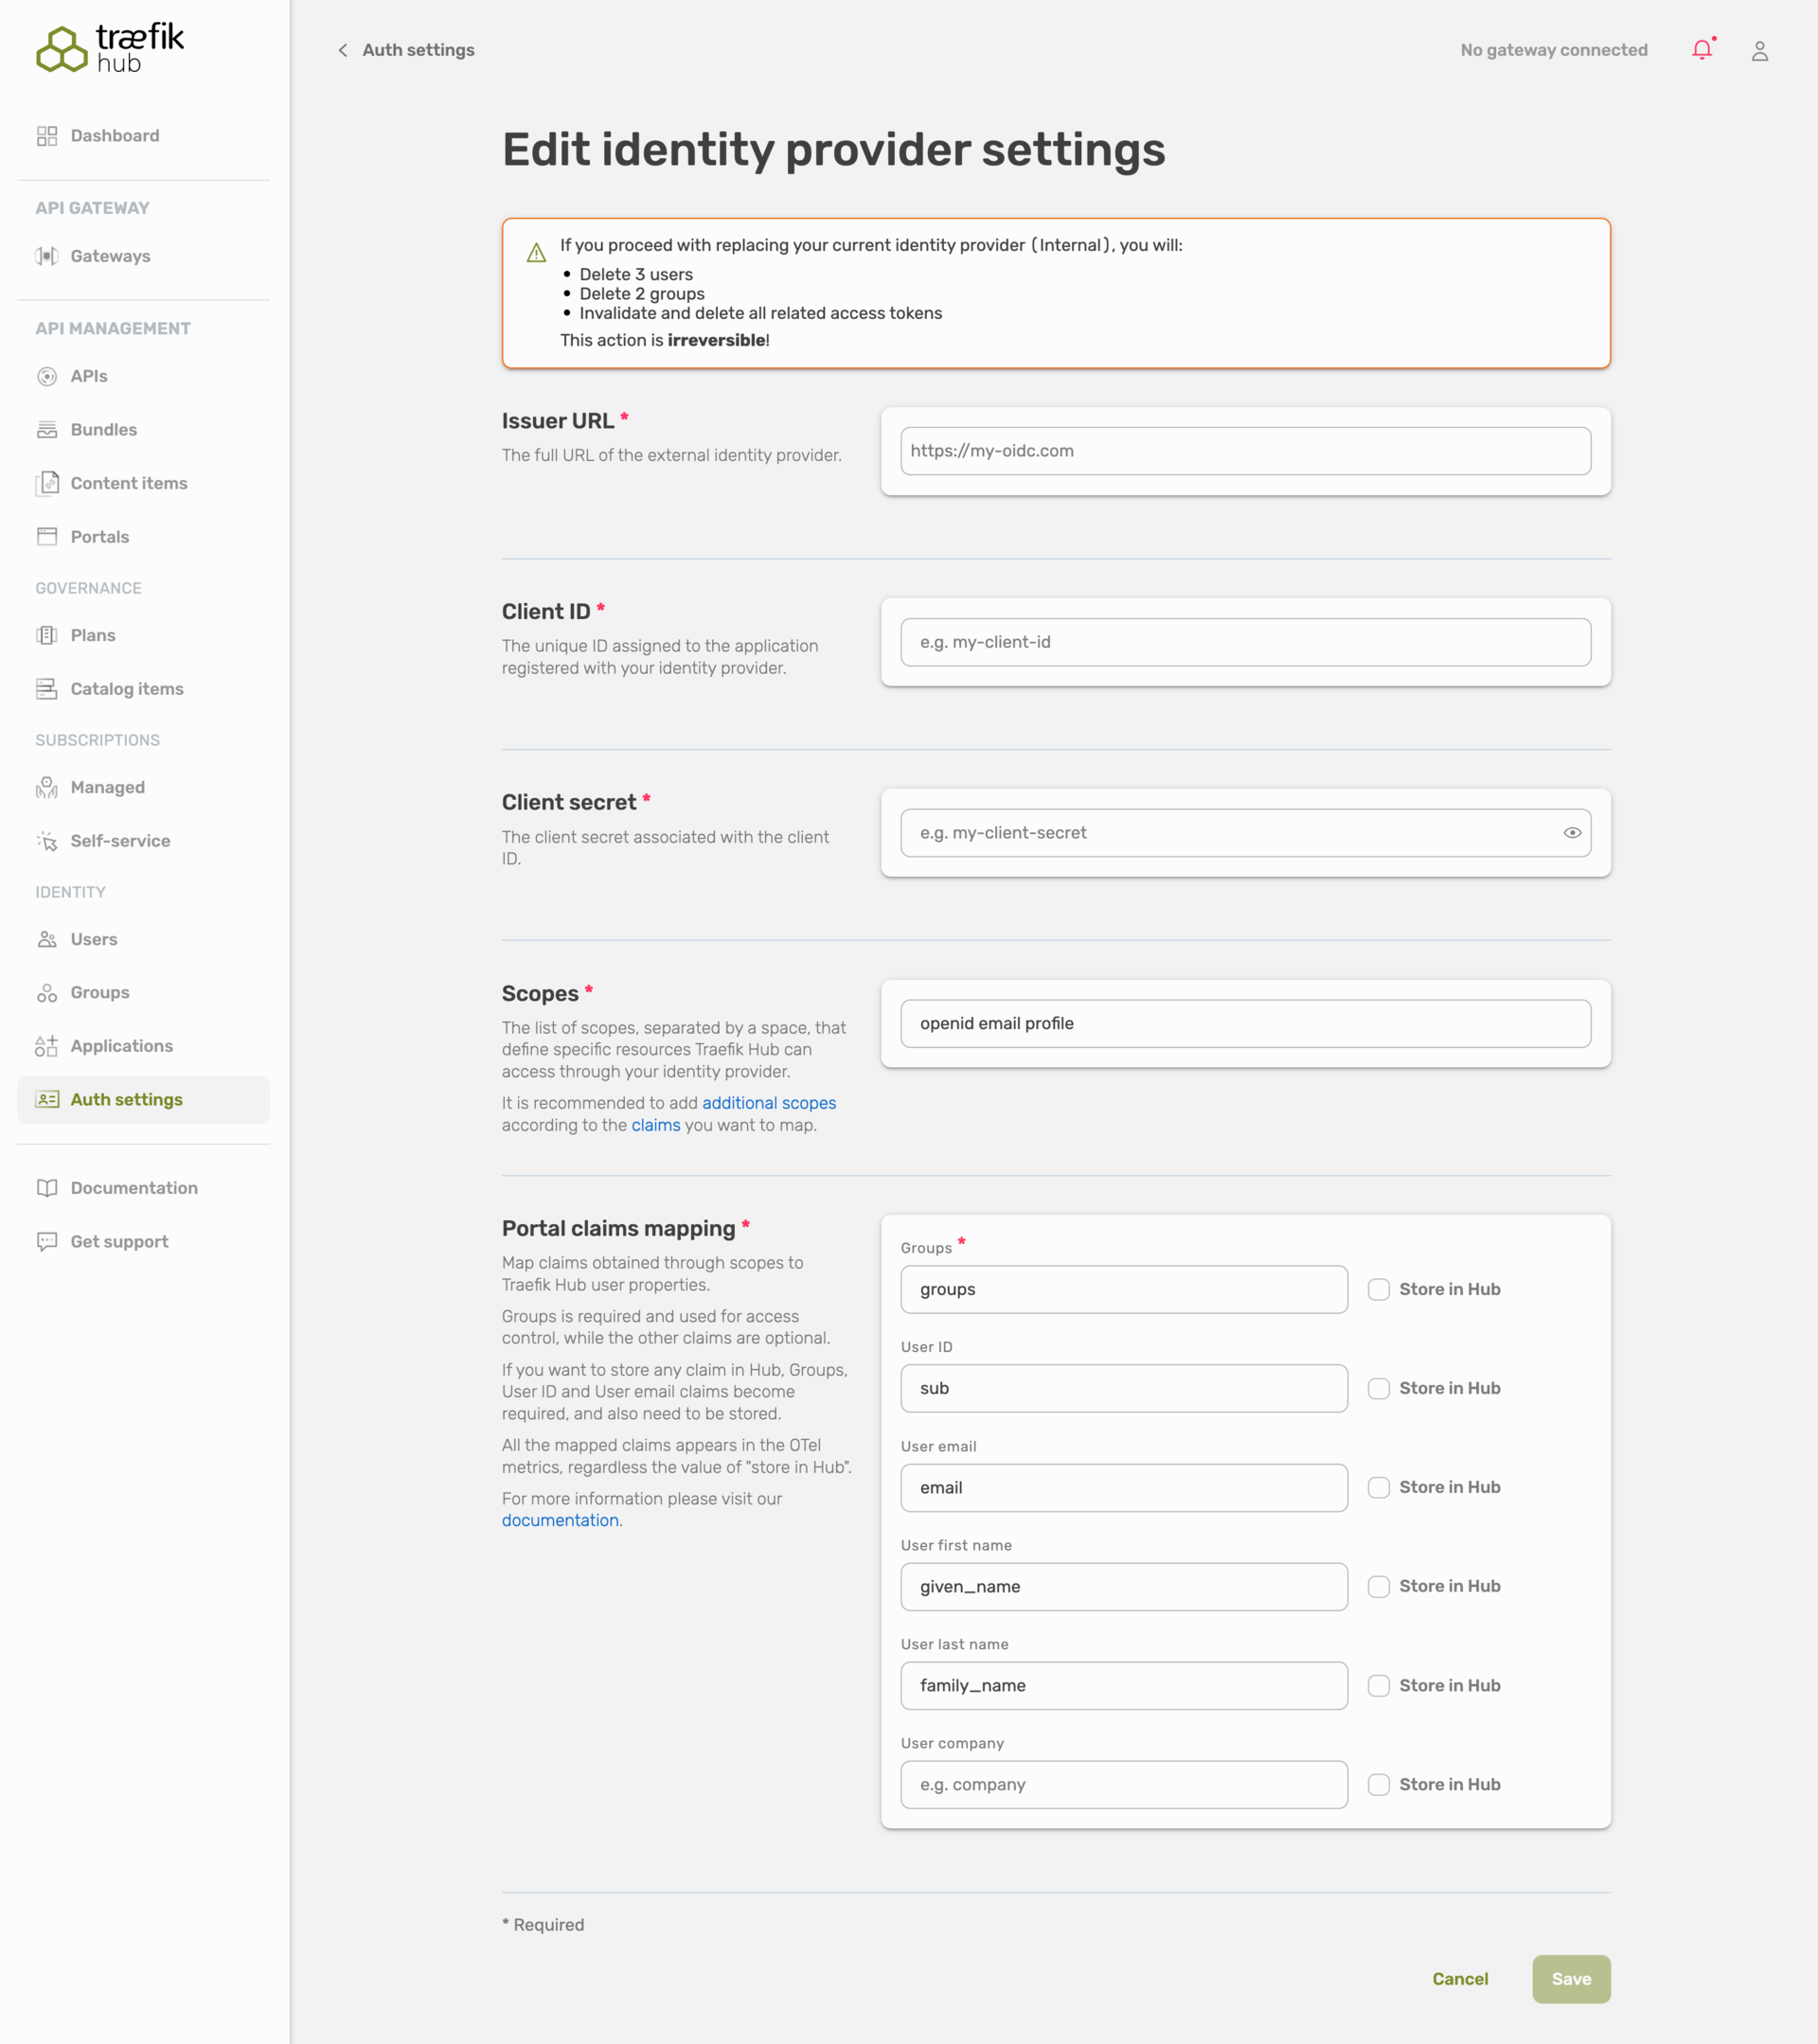
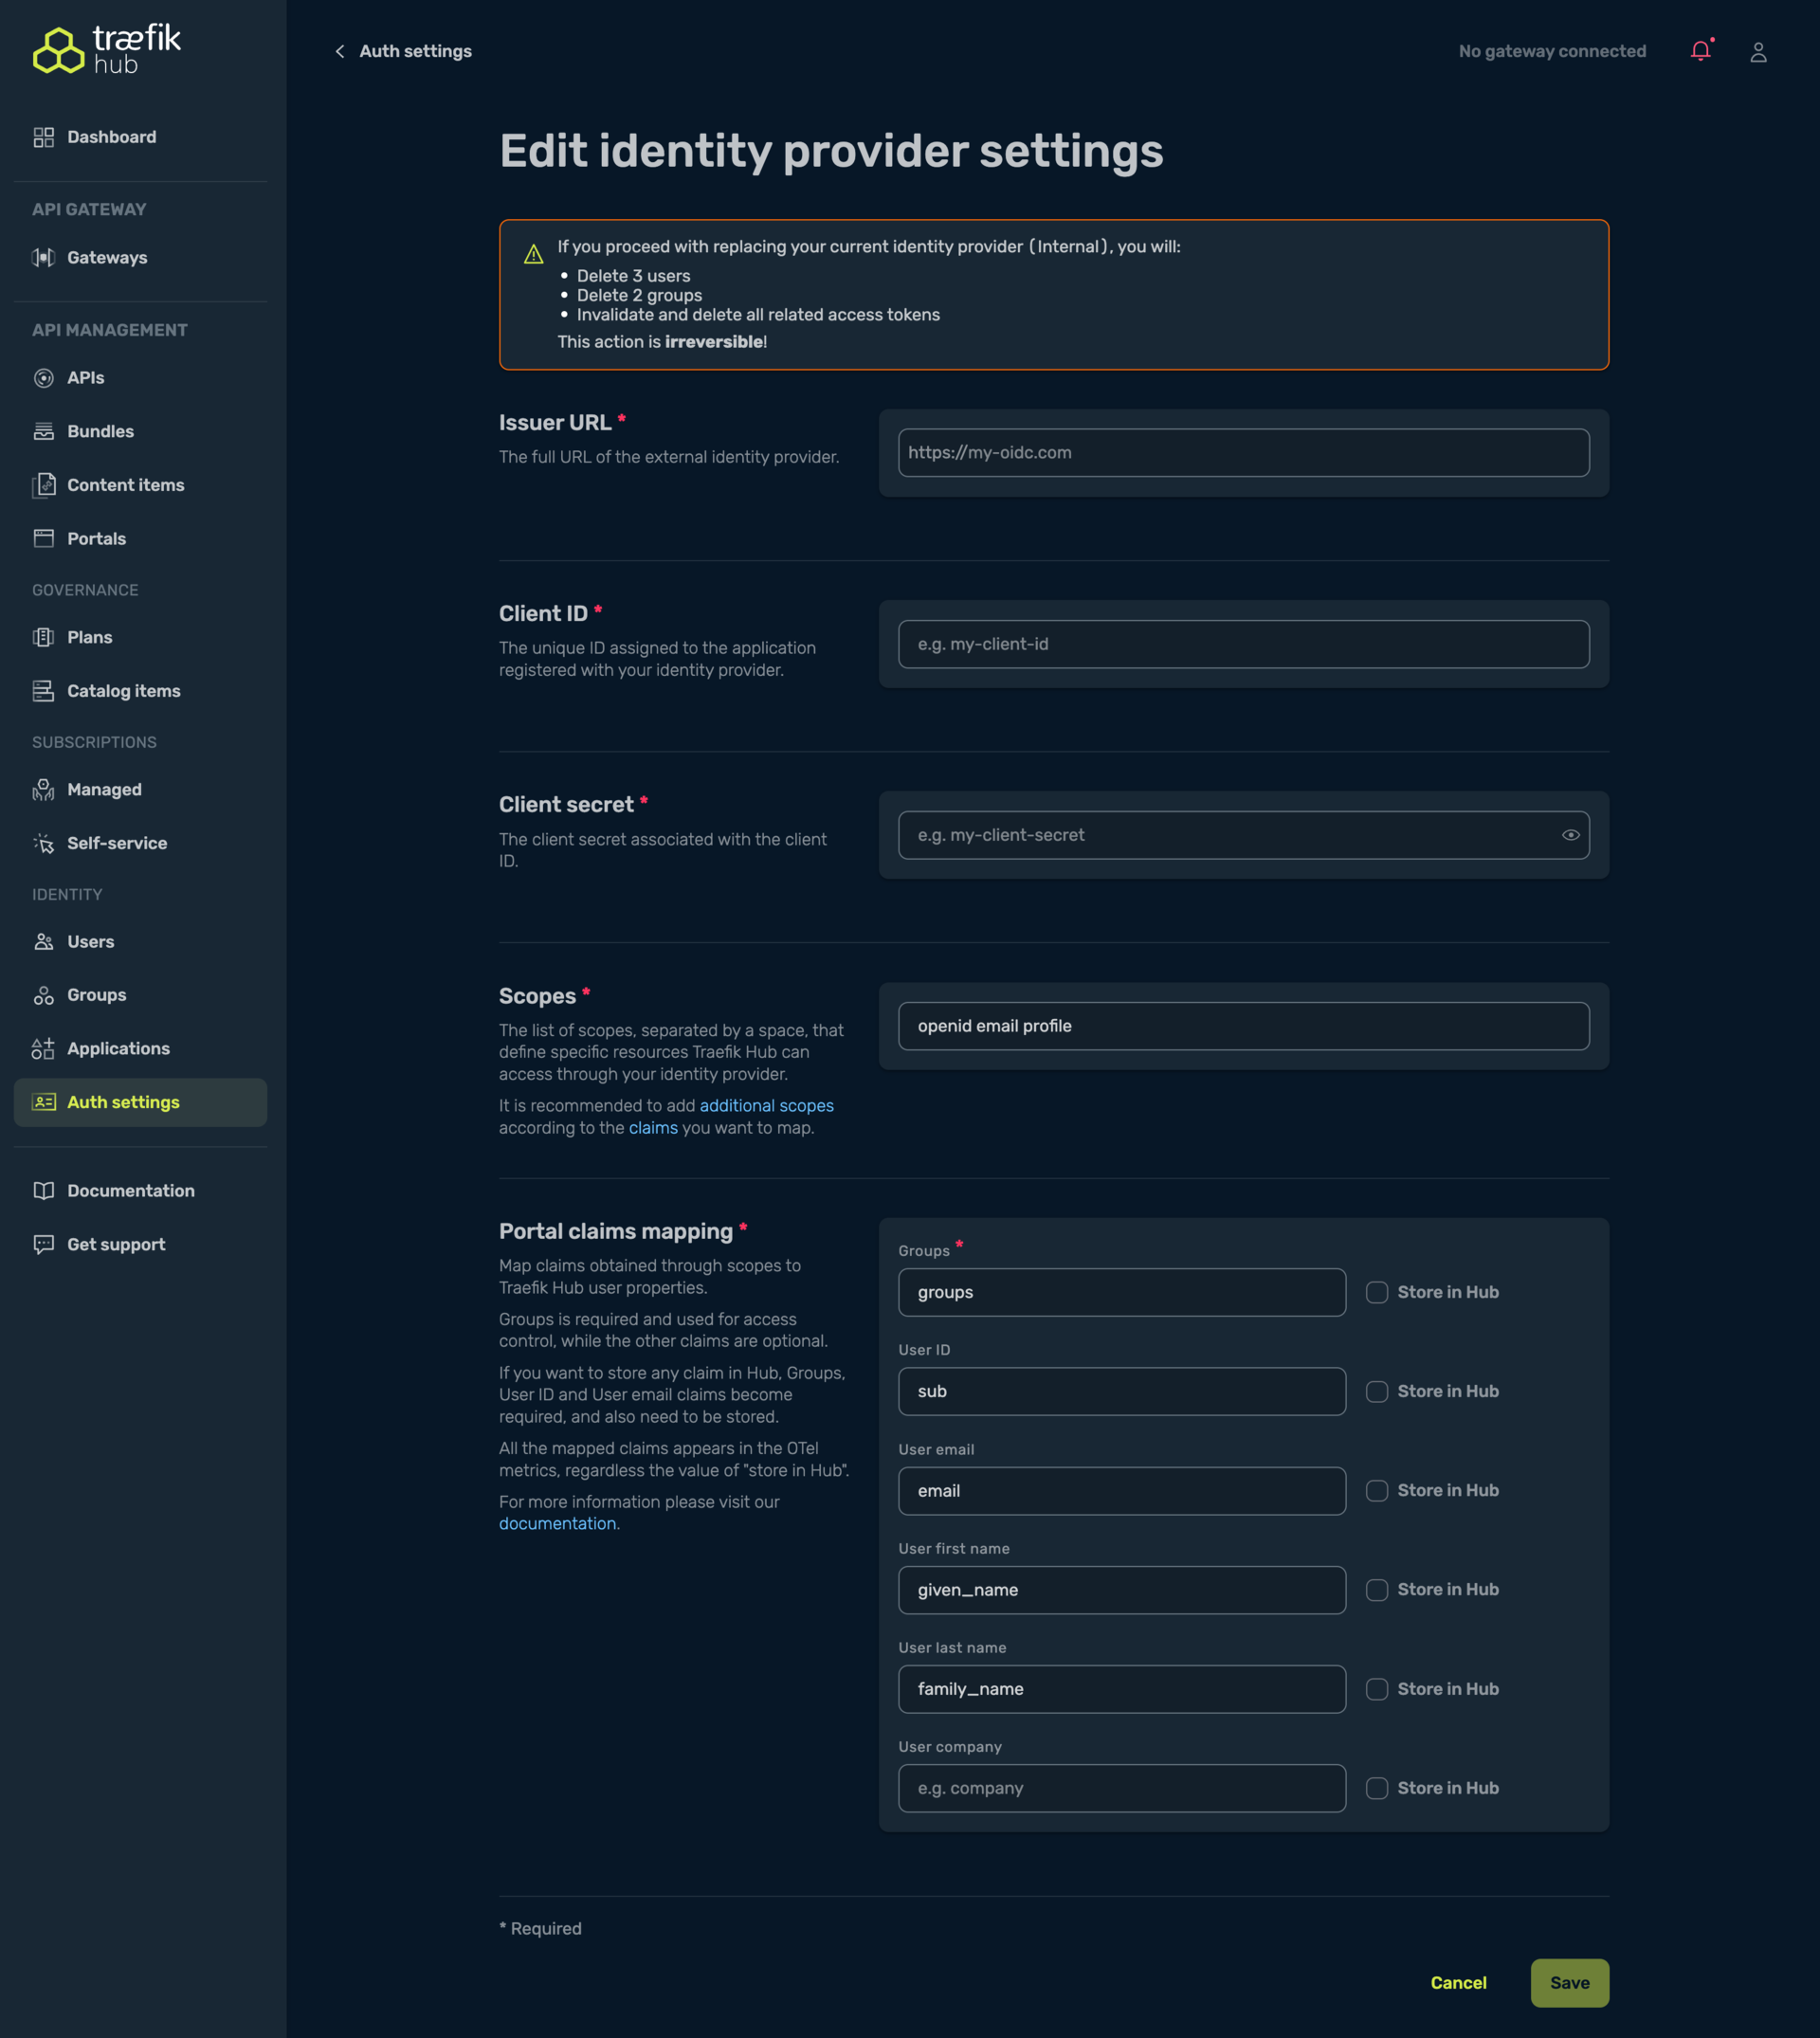
- Click Save. Traefik Hub immediately switches to OIDC: the login screen of the API Portal will now redirect to your IdP.
Claim‑Mapping Tips
| Hub property | Typical OIDC claim |
|---|---|
| Groups | groups or roles |
| User ID | sub |
email | |
| First name | given_name |
| Last name | family_name |
| Company | Custom claim such as company |
Groups are required for API Catalog Items to decide which API can be seen on API Portals by authenticated users..
Configure the Gateway for JWT
When a Portal is backed by an external OIDC Identity Provider, Traefik Hub automatically disables API key authentication and requires JWT tokens issued by that same IdP.
-
Open Auth settings, navigate to the Gateway section, and select JWT.
-
Select a token-validation method
- JWK URL is the most common choice for OIDC providers.
- Paste the
jwks_urivalue from your IdP’s discovery document.
- Map required JWT claims
- client ID: claim that identifies the application (often
cid,azp, orclient_id). - token: claim that you want Traefik Hub to use as the application name in metrics. API Keys always have a user-defined name, but JWTs do not; mapping a claim here (for example cid, client_id, or any custom claim) lets Hub label traffic and usage reports with a meaningful identifier. Leave blank if you don’t need a name in the metrics.
- (Optional) Adjust advanced options
- Strip authorization header: remove the original Authorization header once the token is validated.
- Token query key: allow passing the JWT in a query-string parameter instead of a header.
- Forward headers: copy specific claims into upstream headers.
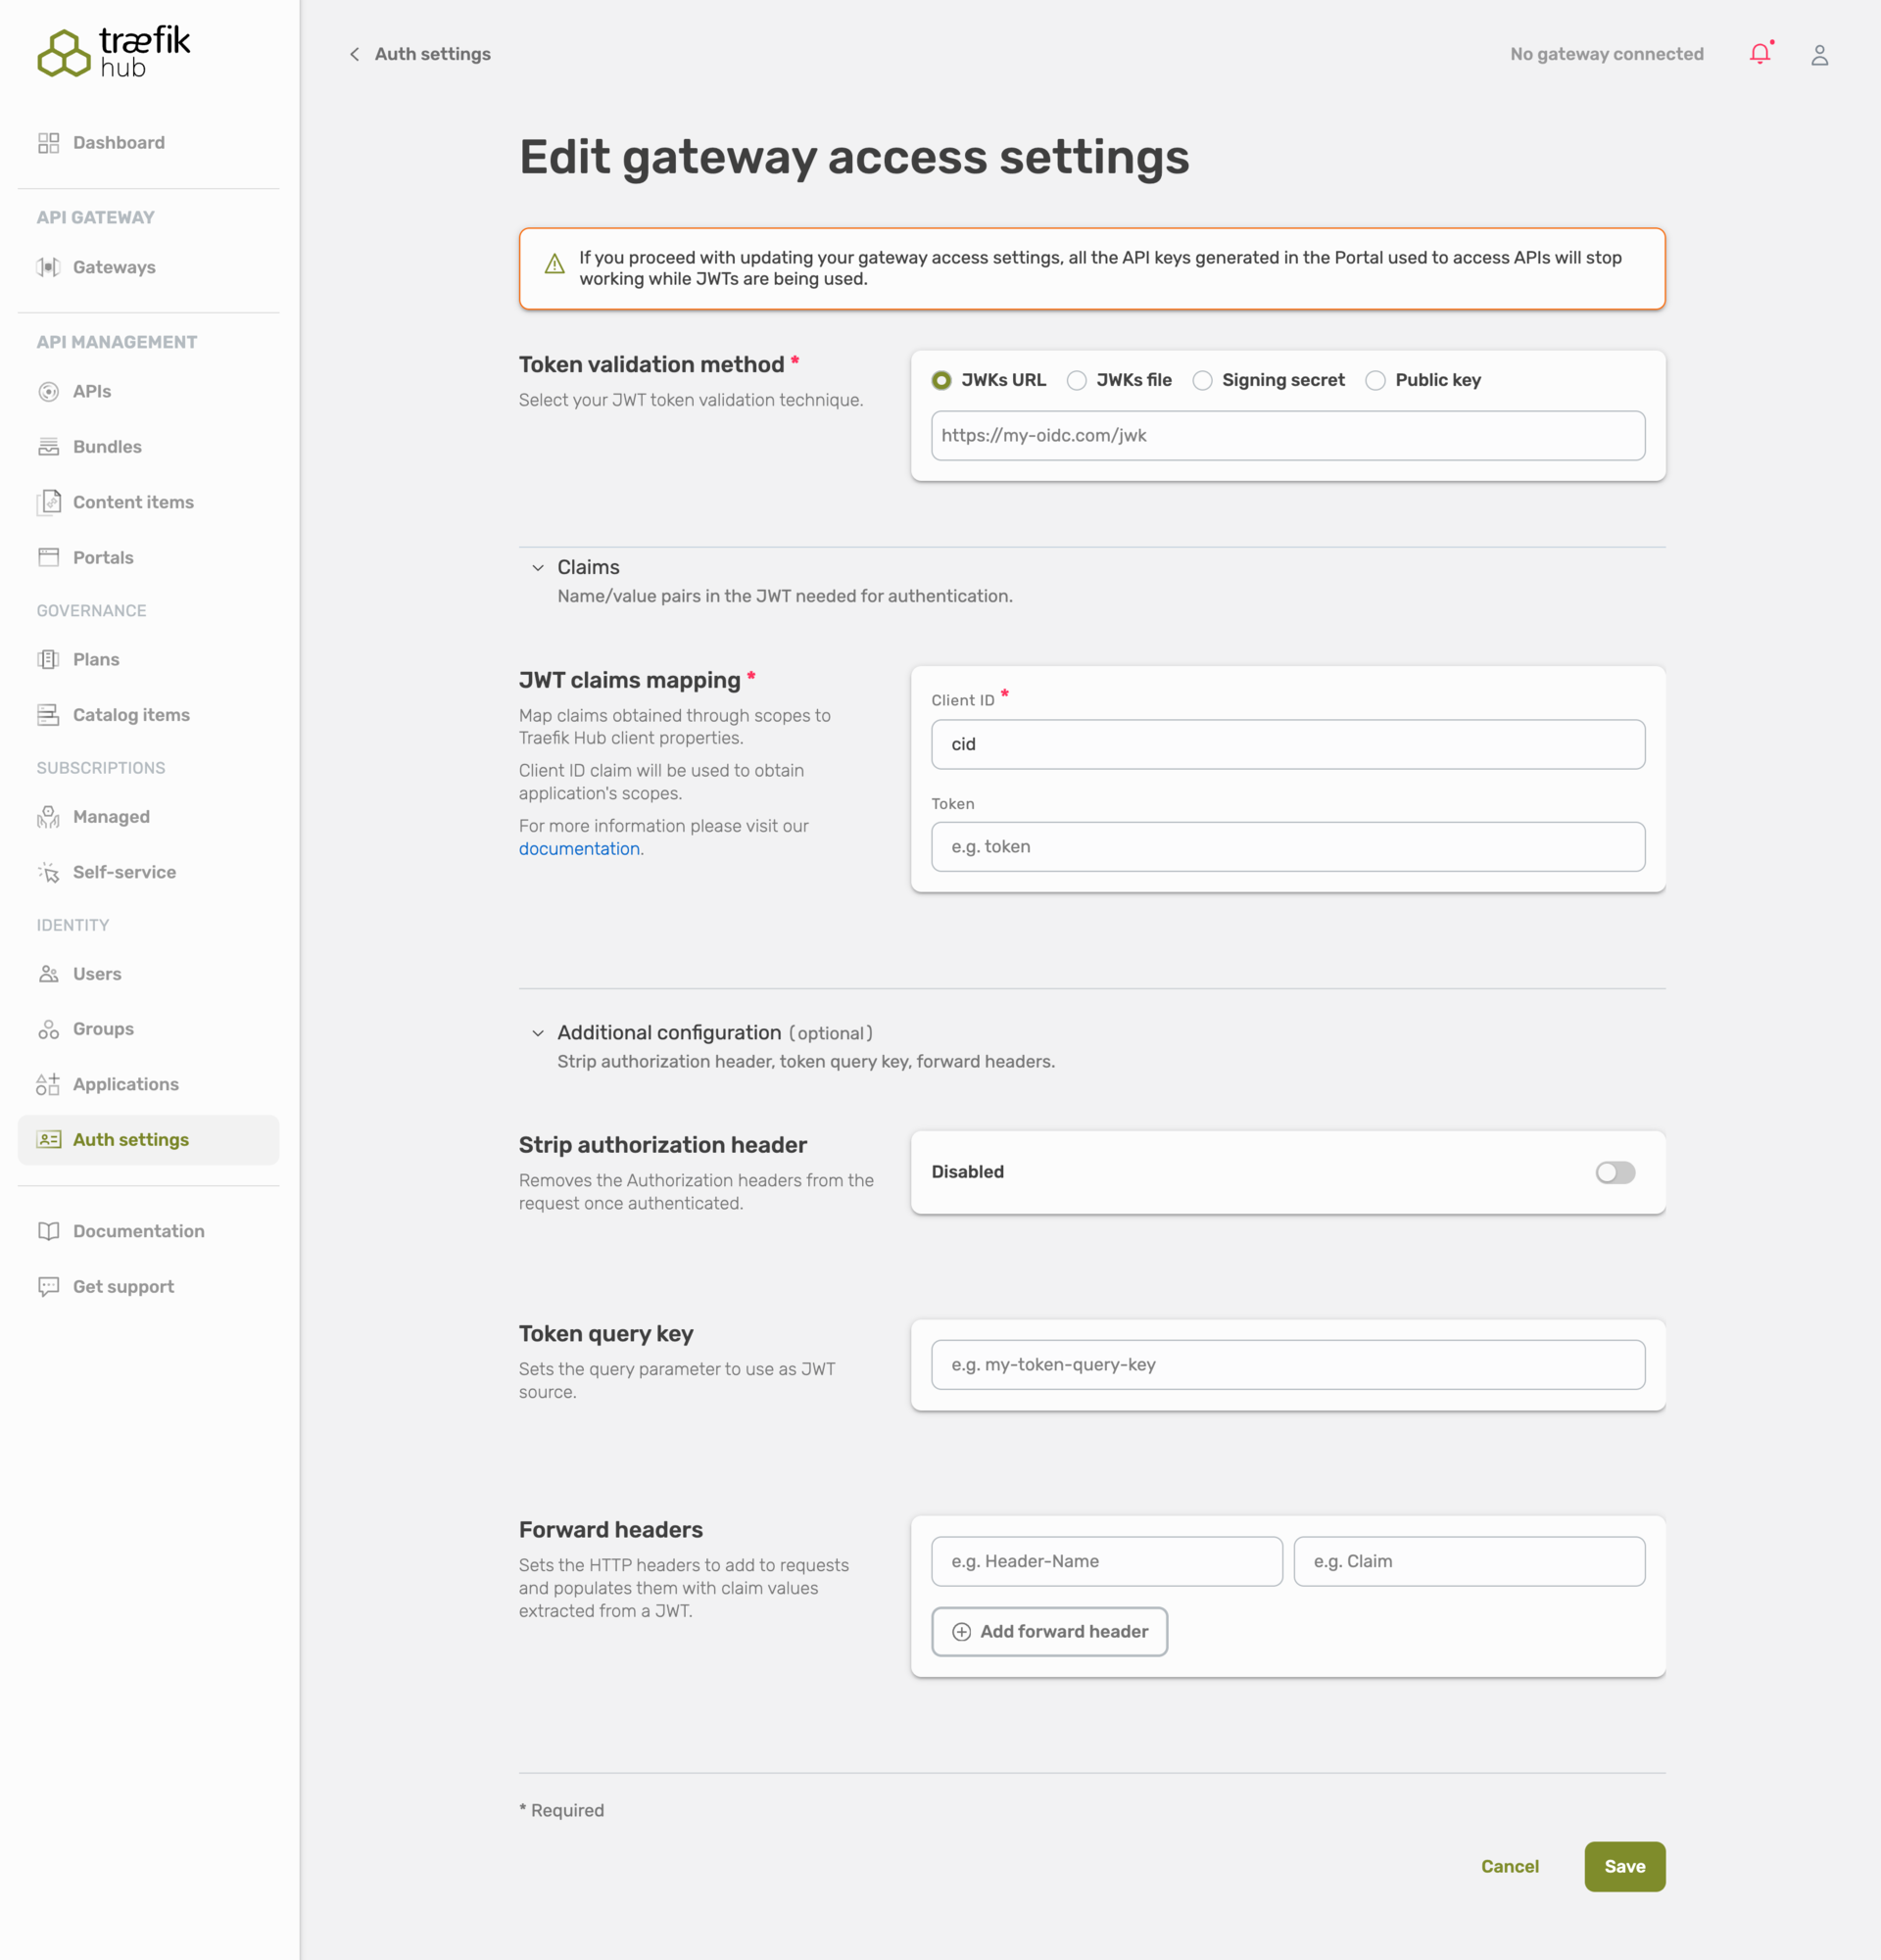
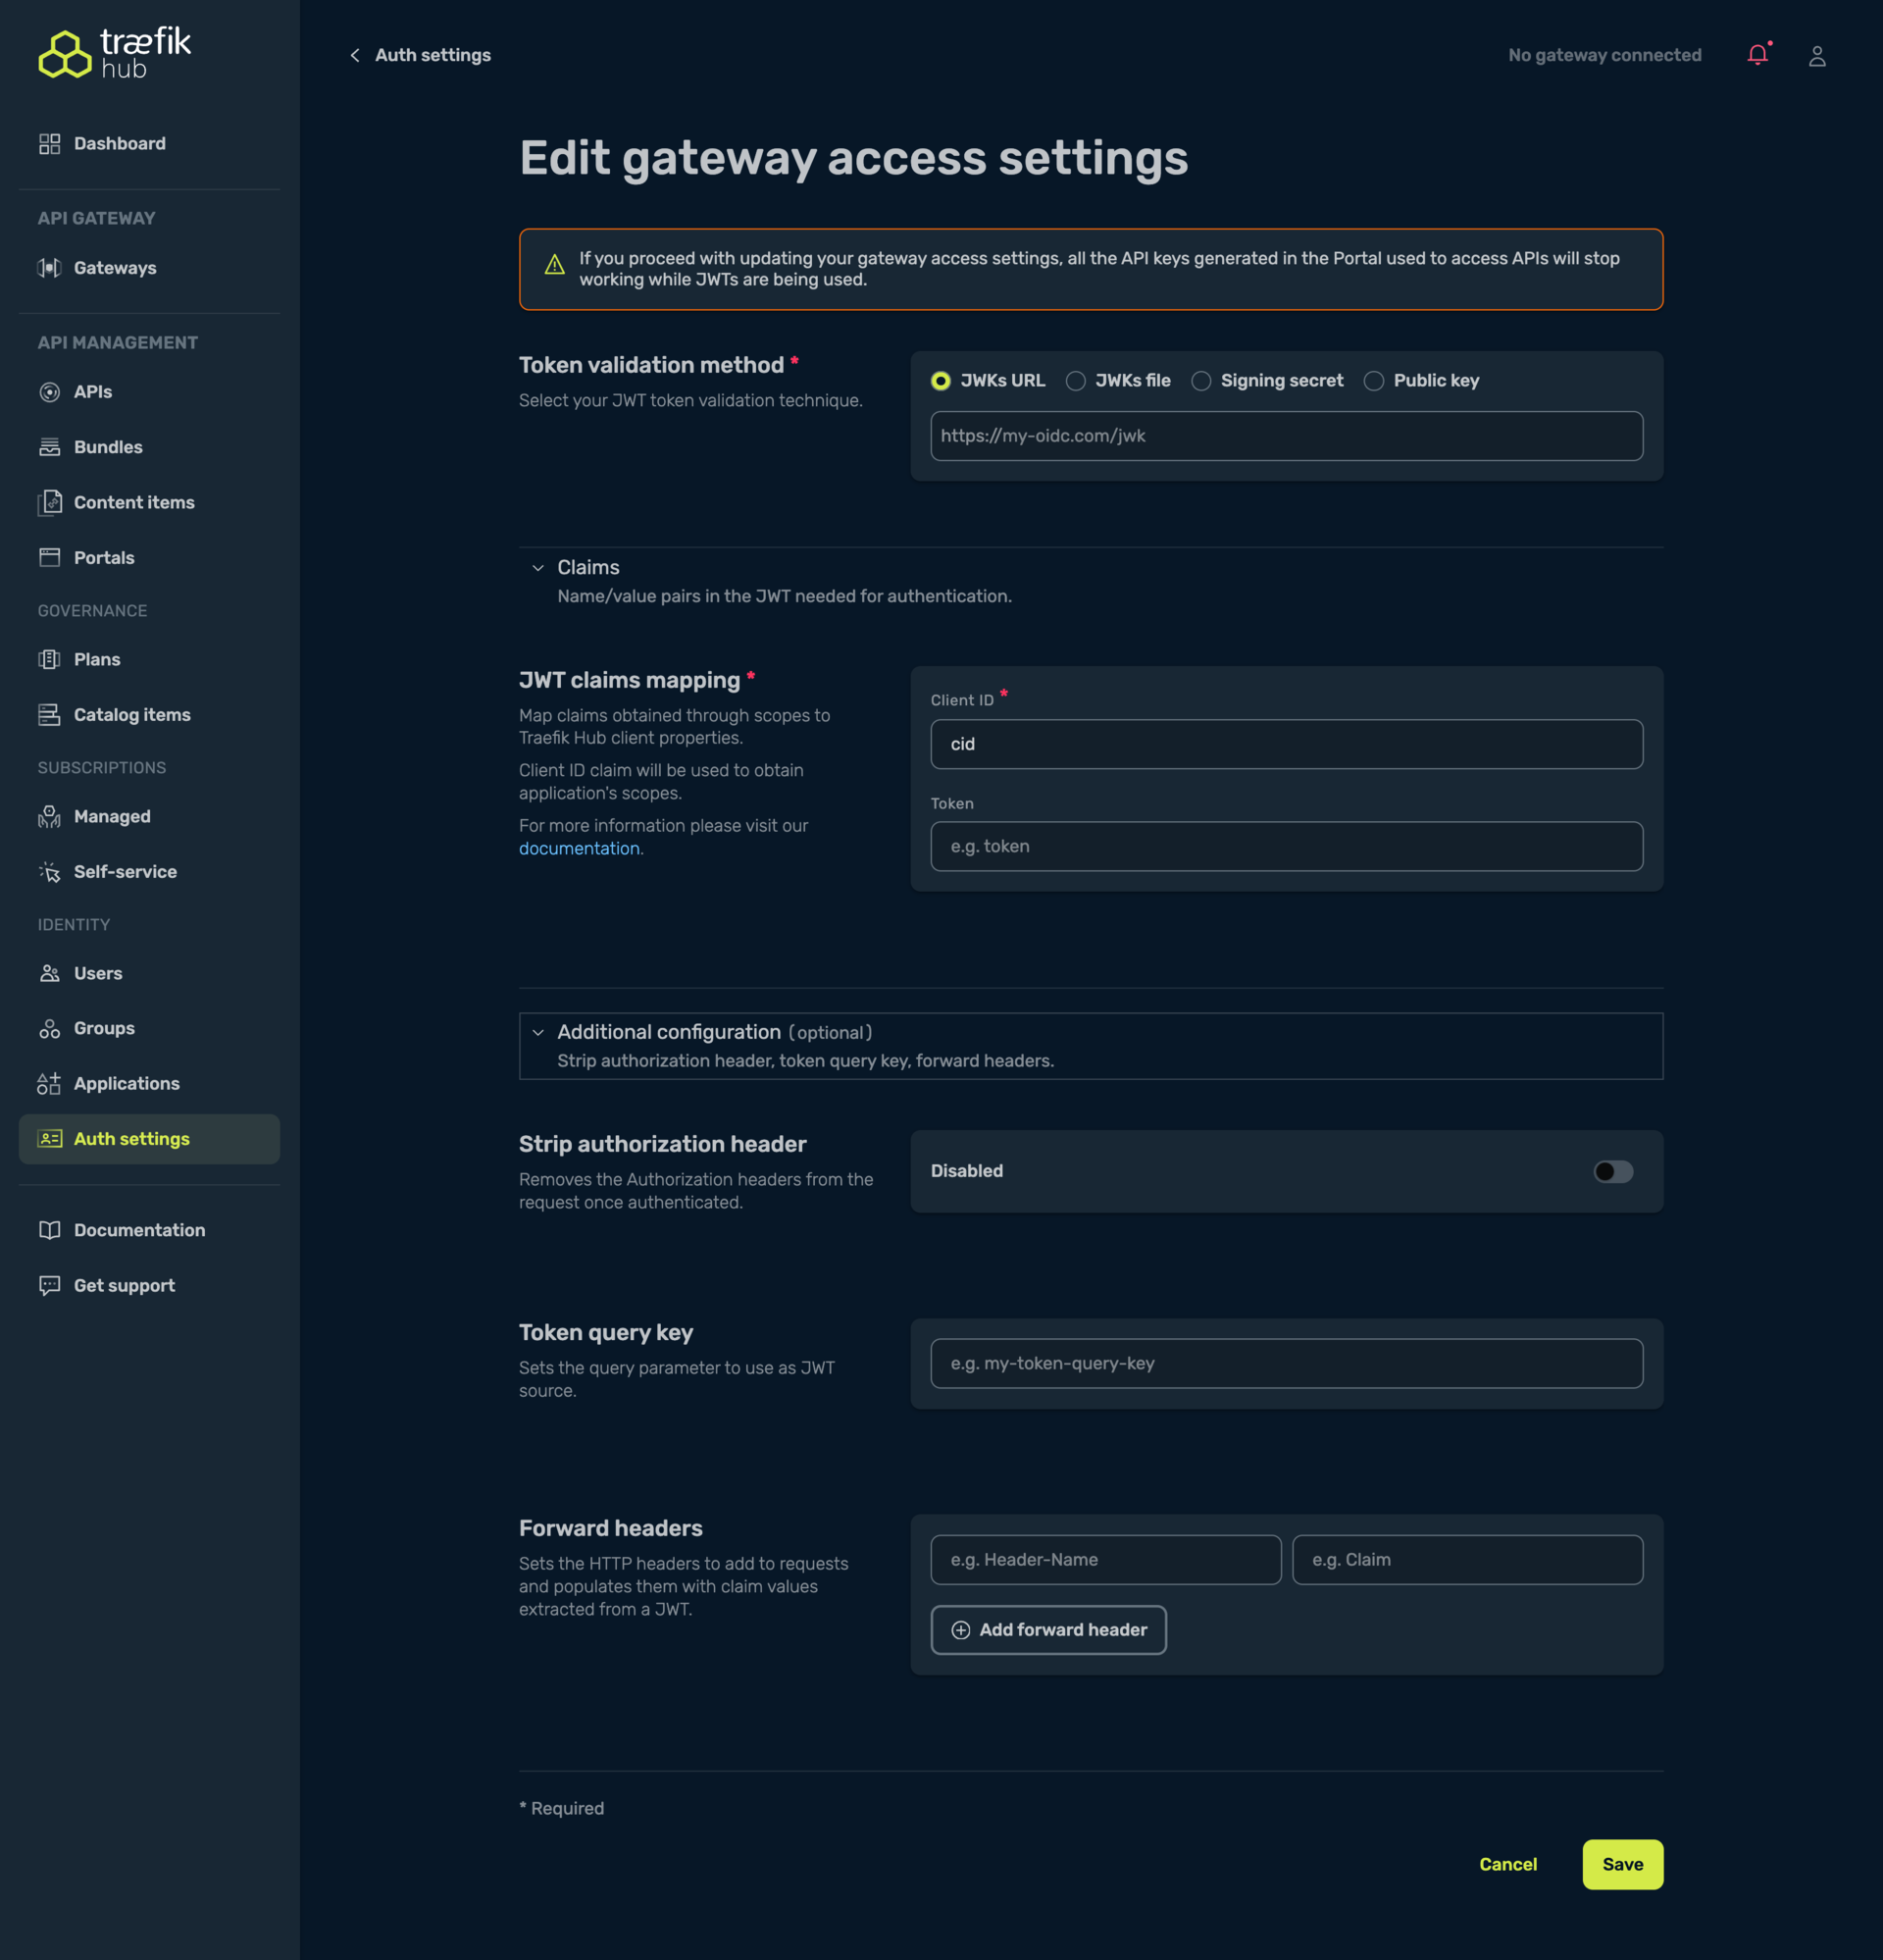
- Save your changes.
- On saving your changes, any existing Portal-generated API keys stop working immediately; API clients must now send
Authorization: Bearer <jwt>with a token signed by your IdP.
If you revert to the internal IdP later, remember to switch Gateway access back to API keys or set up using a signing secret to generate new JWTs for your clients.
Next steps
-
Enable Let’s Encrypt TLS so your Portal and Gateway use valid certificates.
-
Configure Redis for production rate‑limiting.
