Keycloak JWT Configuration
How to configure a Keycloak realm for JWT.
If you switch from the default configuration to JSON Web Tokens, all API keys generated in the API Portal will be turned off.
Requirements
Please ensure you have the following:
- A Keycloak instance with all the required permissions
- A Keycloak realm
- Admin permissions for the Traefik Hub workspace
curl
Client Configuration
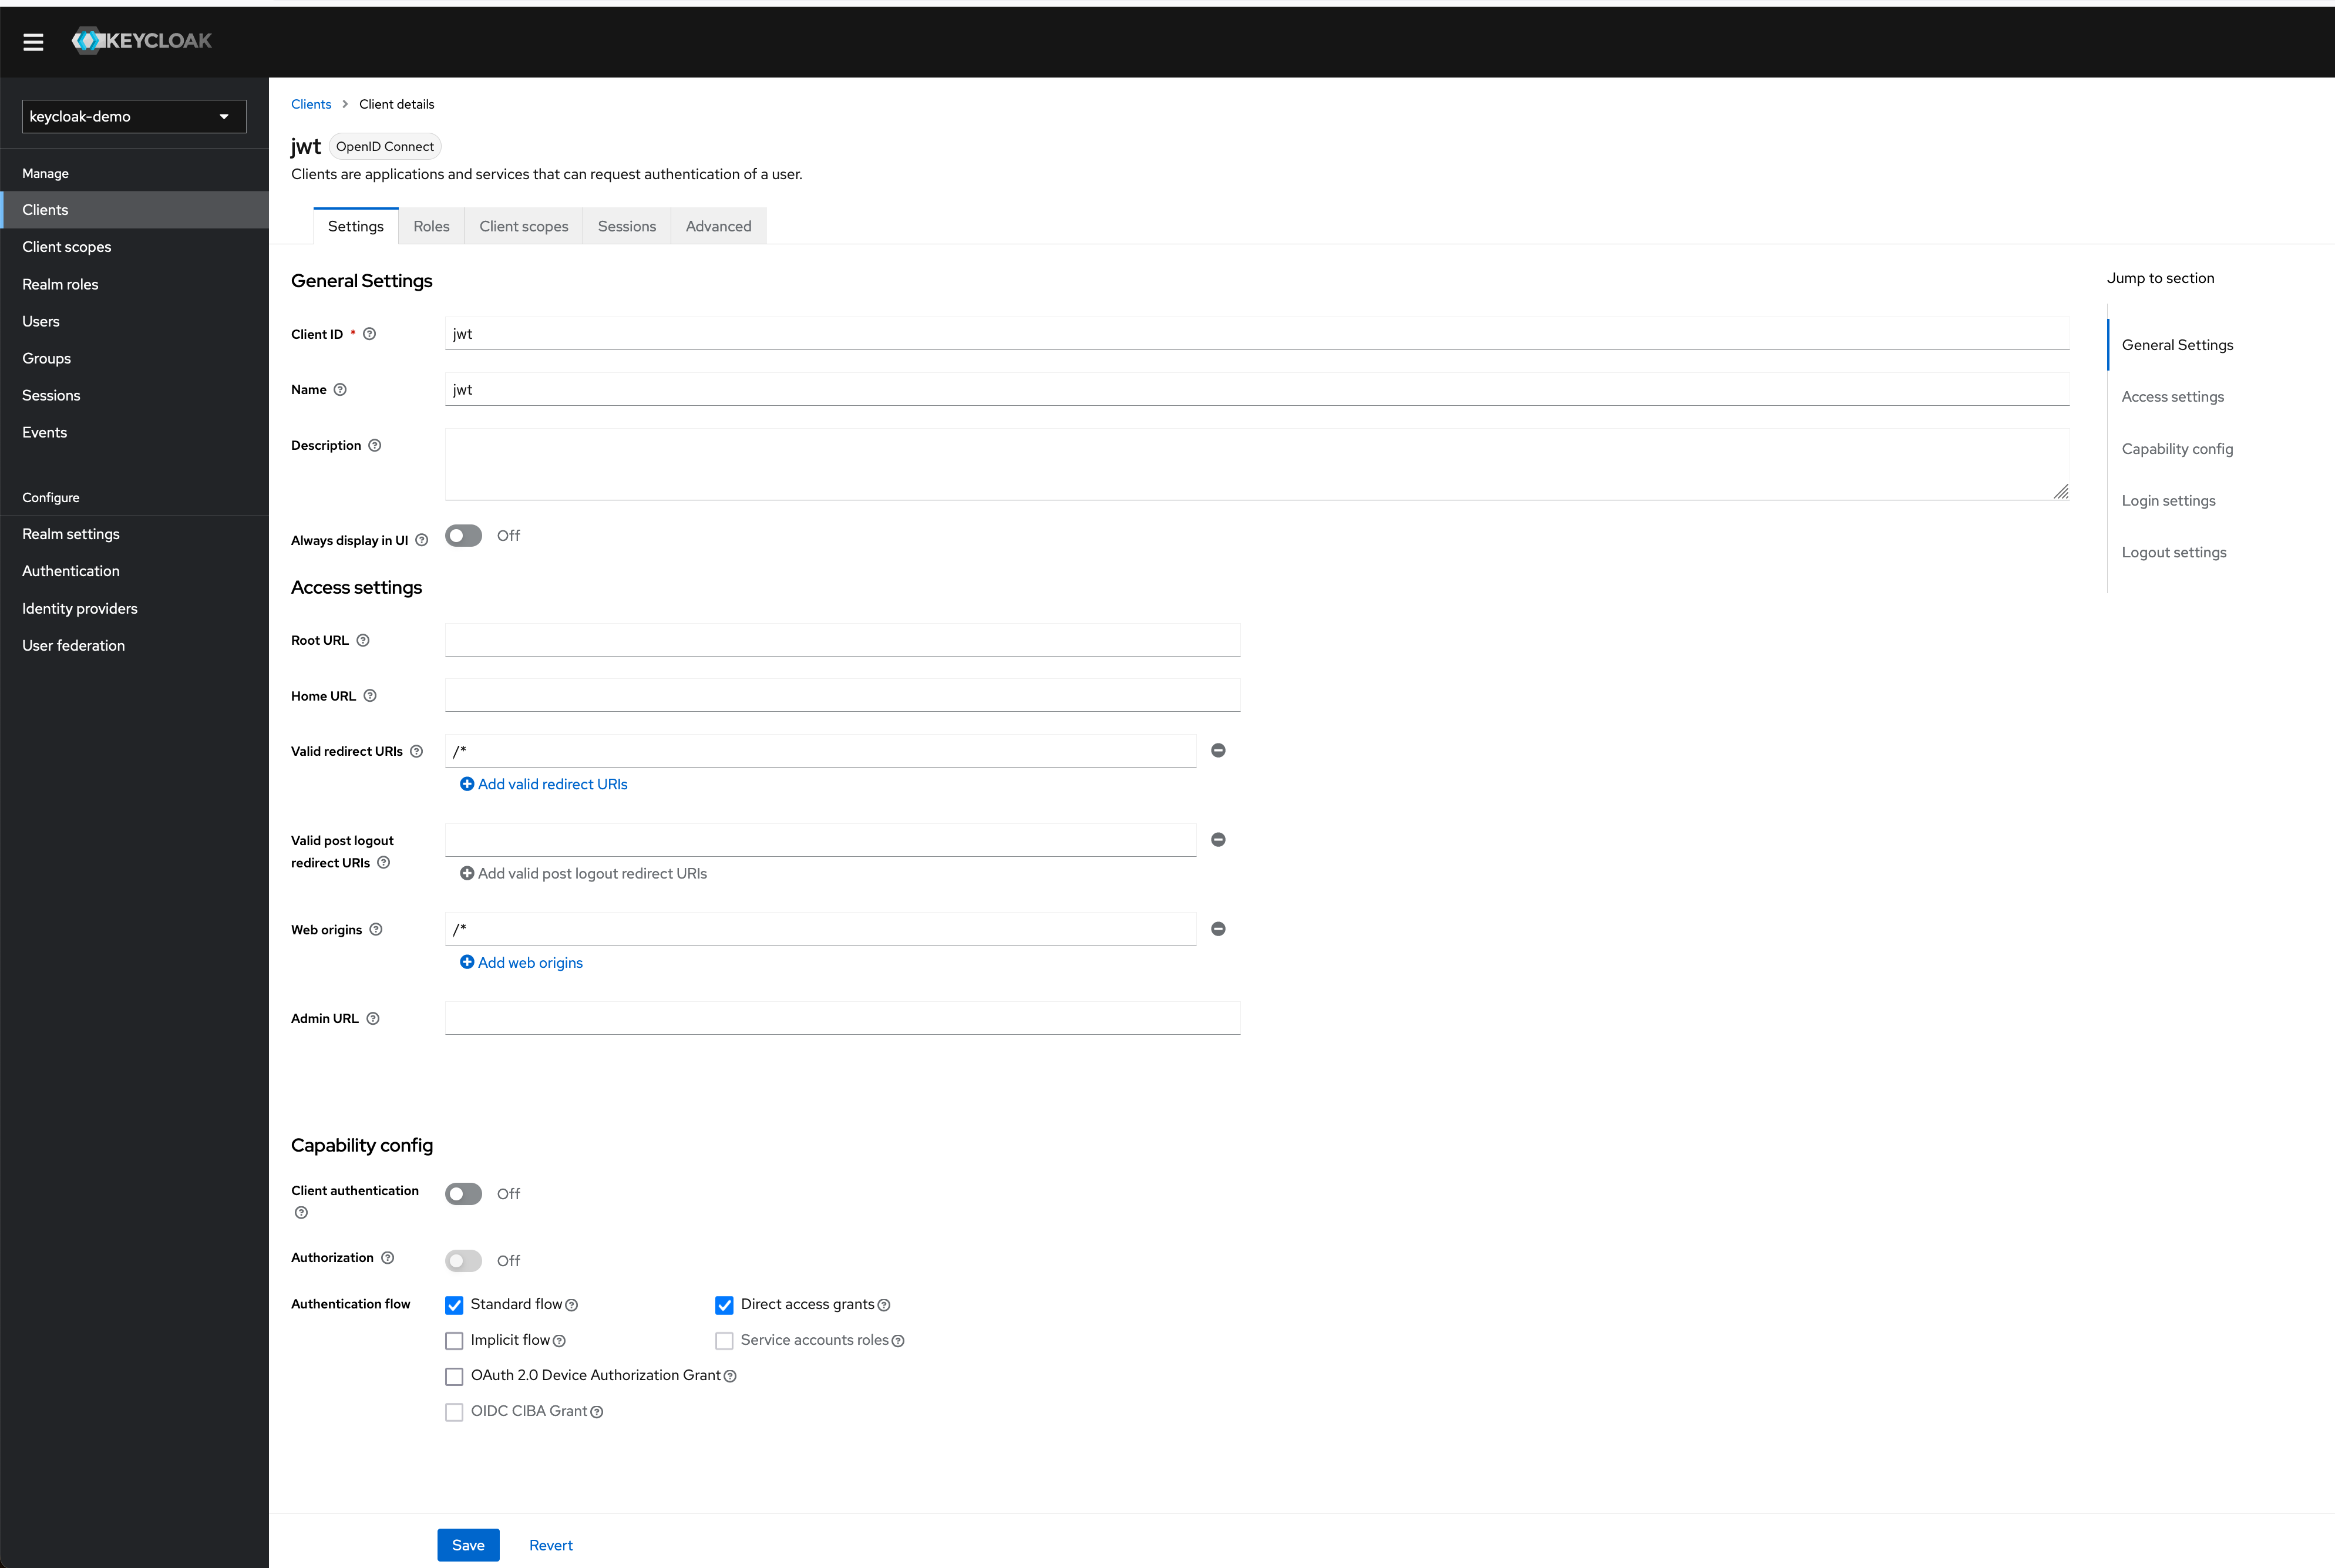
In the first step, select the realm and select Create client to create a new Keycloak client.
The example uses the realm keycloak-demo and the name of the new client will be new-client.


Create a Client Scope
A client scope is a way to limit the roles that get declared inside an access token. When a client requests that a user be authenticated, the access token they receive back will only contain the role mappings you’ve explicitly specified for the client’s scope.
This allows you to limit the permissions each individual access token has, rather than giving the client access to all the user’s permissions.
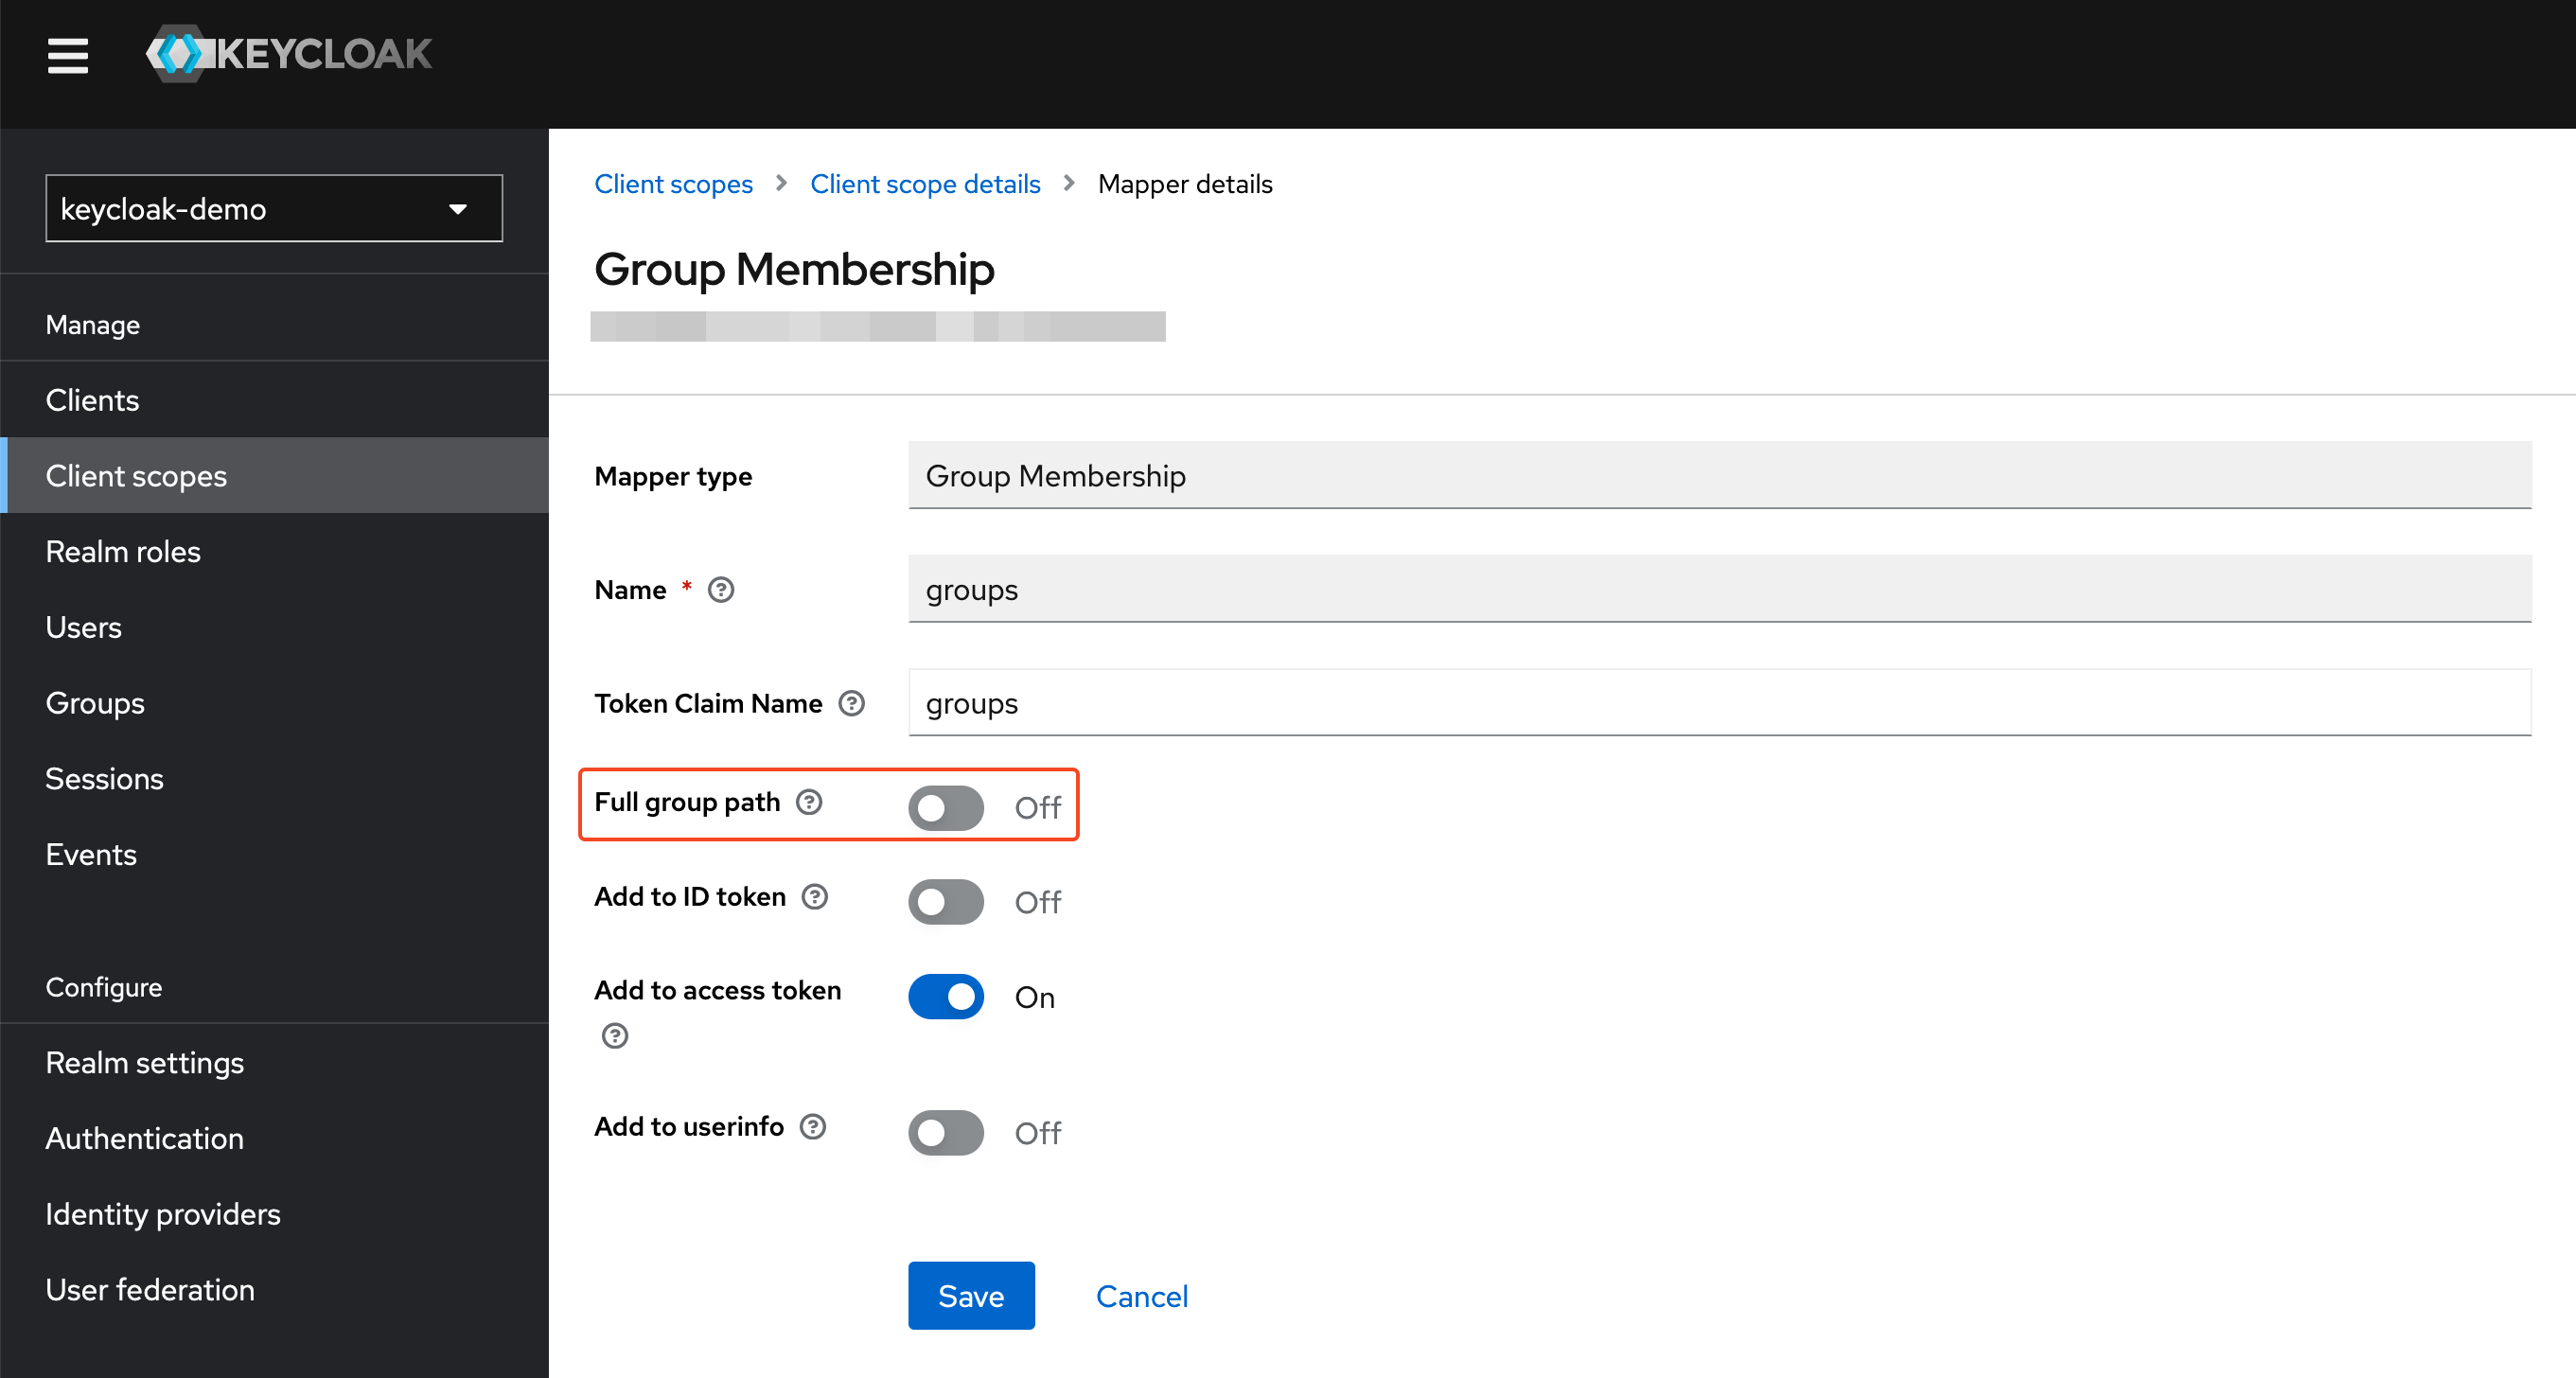
Make sure to disable the full group path setting.

Test the Configuration
Use curl to generate a JWT and validate it against your Keycloak instance.
The following example uses the password grant type as a validation method.
curl -s \
--data-urlencode 'username=jane.doe' \
--data-urlencode 'password=&MY-SECURE-PASSWORD' \
--data-urlencode 'grant_type=password' \
--data-urlencode 'client_id=jwt-demo' \
https://$KEYCLOAK-URL/realms/keycloak-demo/protocol/openid-connect/token
{"access_token":"eyJhbGciOiJIUzI1NiIsInR5cCI6IkpXVCJ9.eyJleHAiOjE2OTk1MTg5NDYsImlhdCI6MTY5OTUxODY0NiwianRpIjoiN2U5ZTUxYjQtN2M5Ny00MjdiLWIyZWMtYzA1NGIyMGFiMDMwIiwiaXNzIjoiaHR0cHM6Ly9rZXljbG9hay5leGFtcGxlLmlvL3JlYWxtcy9rZXljbG9hay1kZW1vIiwiYXVkIjoiYWNjb3VudCIsInN1YiI6IjM0MTYwNWIyLWU0NGItNGNkMC1hNDZjLWEwNjMzNWFhYTVkYiIsInR5cCI6IkJlYXJlciIsImF6cCI6Imp3dC1kZW1vIiwic2Vzc2lvbl9zdGF0ZSI6IjU2MDQwZmE3LTJiZjQtNGRhZi05YjhhLWEzZjRmZjhhZWM3MSIsImFjciI6IjEiLCJhbGxvd2VkLW9yaWdpbnMiOlsiLyoiXSwicmVhbG1fYWNjZXNzIjp7InJvbGVzIjpbImRlZmF1bHQtcm9sZXMta2V5Y2xvYWstZGVtbyIsIm9mZmxpbmVfYWNjZXNzIiwidW1hX2F1dGhvcml6YXRpb24iXX0sInJlc291cmNlX2FjY2VzcyI6eyJhY2NvdW50Ijp7InJvbGVzIjpbIm1hbmFnZS1hY2NvdW50IiwibWFuYWdlLWFjY291bnQtbGlua3MiLCJ2aWV3LXByb2ZpbGUiXX19LCJzY29wZSI6Imdyb3VwcyBlbWFpbCBwcm9maWxlIHVzZXJfaWQiLCJzaWQiOiI1NjA0MGZhNy0yYmY0LTRkYWYtOWI4YS1hM2Y0ZmY4YWVjNzEiLCJlbWFpbF92ZXJpZmllZCI6dHJ1ZSwibmFtZSI6IkphbmUgRG9lIiwiZ3JvdXBzIjpbInN1cHBvcnQiXSwicHJlZmVycmVkX3VzZXJuYW1lIjoiamFuZS5kb2UiLCJnaXZlbl9uYW1lIjoiSmFuZSIsImZhbWlseV9uYW1lIjoiRG9lIiwiZW1haWwiOiJqYW5lLmRvZUB0cmFlZmlrLWFpcmxpbmVzLmlvIn0.3NcJ3sbItZmPLe6ZAome17yT-50MM6mjumeh9ROvNfE"}
Related Content
- Learn how to enable JWT authentication in the dashboard.
